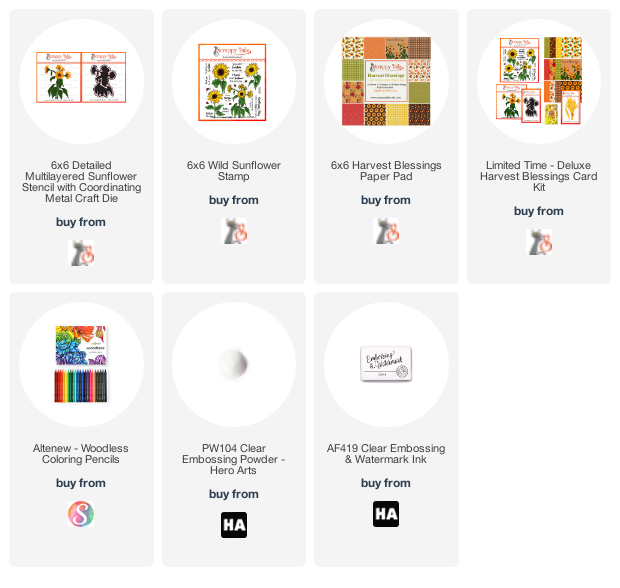
Hi everyone! I have another Scrappy Tails inspiration for you today! I will be using the 6X6 Detailed Multi-layered Sunflower stencil with coordinating dies for my card. The set comes with three stencils with 4 layers to color in and each stencil is marked accordingly so you know which one use first.

I took the layering stencil #1 which was the stencil that colors in the stems and leaves and used a combination of two shades of green ink, a light one and a medium tone. I blended in the lighter shade green ink on the edges of the leaves and the medium ink on the inner parts of the leaves and the stems. I used a light brown ink for the middle of the main flower. I make sure to mask of the areas surrounding so that the ink colors would not contaminate each other.

Then I took layering stencil #2, used yellows and oranges to blend in the petals of all the sunflowers. I used the darker shades of orange towards the middle and the lighter shades for the tips of the sunflowers. For the last layering stencil # 3, I used a dark shade of green. This stencil has all the details for the stems and the veins of the leaves. And for the middle of the sunflower, I used a dark orange.
After I finished with all the layers of the stencil, I took out my colored pencils and added even more details on the flowers, leaves and stems. The good thing about coloring stenciled images like this, is that you will have a “guide” on how to color in the details. You will just need to follow the details that are already there and enhance it. I made sure I used colored pencils that had a slightly darker shade than the ink color. I colored the inner parts of the petals and leaves with the darkest shades. This is a wonderful technique to add that extra OOMPH to stenciled image!

After coloring the image, I die cut it out using the coordinating die. I also cut out two more layers and added it to the back of the die cut image for extra dimension.
I wanted to make the background very subtle, so I stamped one of the sunflowers from the Wild Sunflower stamp set. But before that, I ink blended the sides of a 4.5”X6.5” piece of red cardstock with a darker shade of red. Then I mounted the stamp onto an acrylic block and applied embossing ink only on the flower (and not the stem and leaves) and stamped it free hand all over a panel. I sprinkled clear embossing powder onto the stamped images and heat embossed it.

I added the heat embossed panel onto a 5”X7” side folding card base. Then I added a 1.5” strip of green polka dot pattern paper from the Harvest Blessings Paper Pad onto the lower part of the panel after ink blending it on the sides with a dark green ink. I adhered the sunflower image onto the panel. I added the sentiment “Sending you Sunshine” also from the Wild Sunflower stamp set. I finished off the card with the yellow gems that came in the Deluxe Harvest Blessings Card Kit.
I hope you were inspired to give this technique a try!
Have a wonderful and crafty day!
‘Til next time!
❤️
Anna
Thank you for visiting my blog. You can also find me on Instagram, YouTube, Pinterest and Facebook.
Product List: