


Today’s experimentation.. ah..er..inspiration for this month’s Happy Little Stampers challenge is coloring with watercolor pencils. At a recent trip to Japan, I visited the biggest craft store in Japan–maybe even in Asia. It’s called Itoya. The store comprised of two buildings, 11 floors total. There I picked up a few copics to add to my collection and some Faber Castell Albrecht Durer watercolors pencils. I treated myself to a tin of 24 pencils. It took extreme willpower not to buy up the whole store!
It’s my very first time to use watercolor pencils. I didn’t find many tutorials on YouTube for crafters. I am by no means a good watercolorist. I have to admit, the first time I tried watercolor pencils, I was very underwhelmed with the results. But I decided not to give up on them so I started to experiment.
Since this HLS Challenge is optional Flowers, I will be using a flower image to demonstrate the techniques. I hope you find it helpful.
Technique # 1: Layers of color
You can layer one color on top of each other before applying water to the paper. Just make sure you follow basic color theory and use colors that are next to each other on the color wheel so as to not make muddy colors.
You can also scribble on more color after its dried to add more depth to the image.
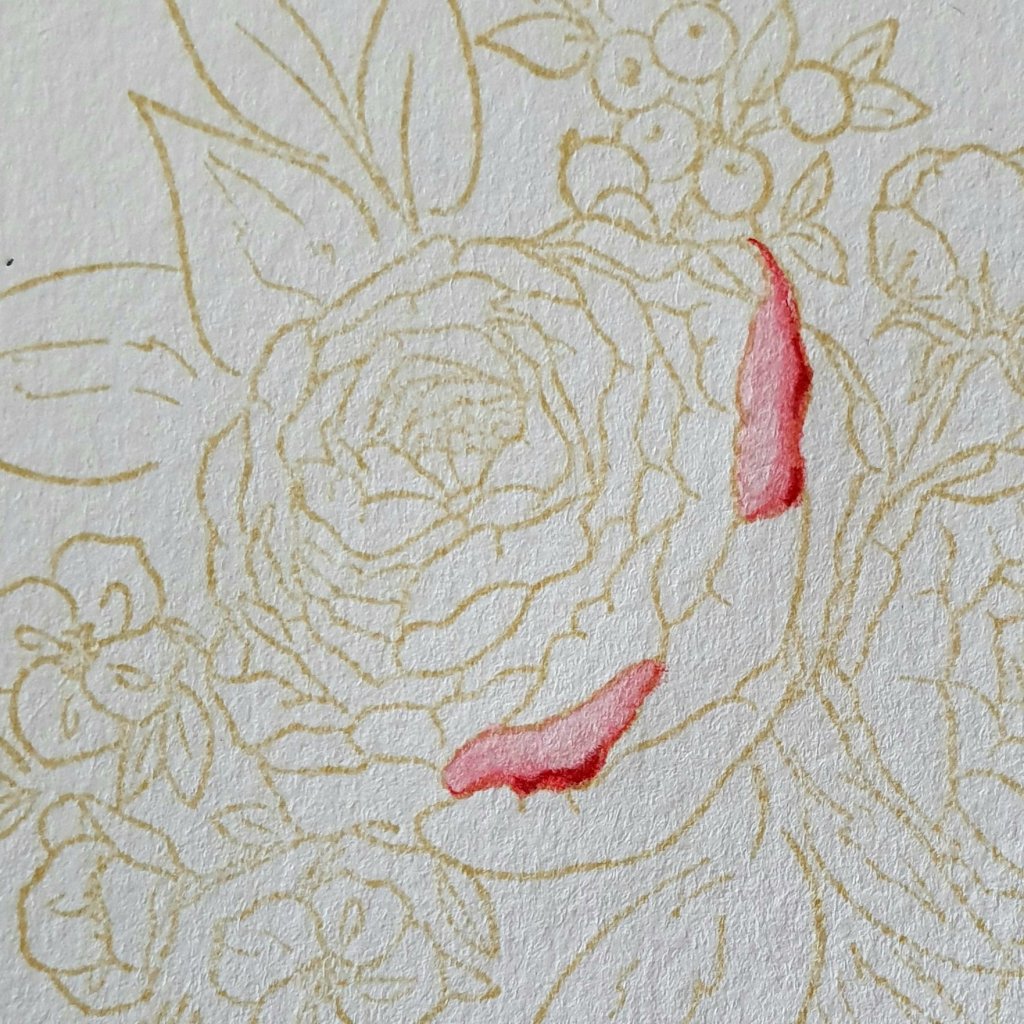
Technique # 2: Wet Brush to Tip coloring
Sometimes you want to just add a little color to certain sections of your stamped image or sketch. You can use a damp brush and swipe it gently on the tip of the pencil to pick up the color then apply it to sections of your image.

Technique # 3: Pencil shavings
Another way to get color from your pencils without applying the pencil directly to the paper is to use a fine tea strainer. Yes, a tea strainer! Rub your pencil tip gently over the tea strainer, similar to how you would cheese to a grater. Tap a wet brush to the shavings and pick up the pigment. Apply to your project.

Also you sharpen your watercolor pencils, do not throw the shavings out! The little pencil shavings still have a lot of pigment to it. Just remove the wood shavings and add some water to the pigment by applying a wet brush or dropping a little water.
Technique # 4: Drawing on wet paper
This technique is great for adding details to your watercolor project. Details like veins to the leaves and little dot details to flowers. Scribble on the wet watercolor with the watercolor pencil. Make sure the paper is wet before scribbling the details, this will make it look more natural.

Technique #5: Experiment and Have fun!
This is really not a technique but a sure way to improve your technique! There is more than one way to learn how to use a new medium. But the best way, I find, is to experiment. Sometimes it works and sometimes it doesnt. Of course, try to have fun and not get frustrated. Believe me, when I first used watercolor pencils, I almost gave up on them.. they just didnt have the same effect as regular watercolors. But i soon found out, there are many ways to use them.
Here is my watercolor inspiration applying the techniques above.
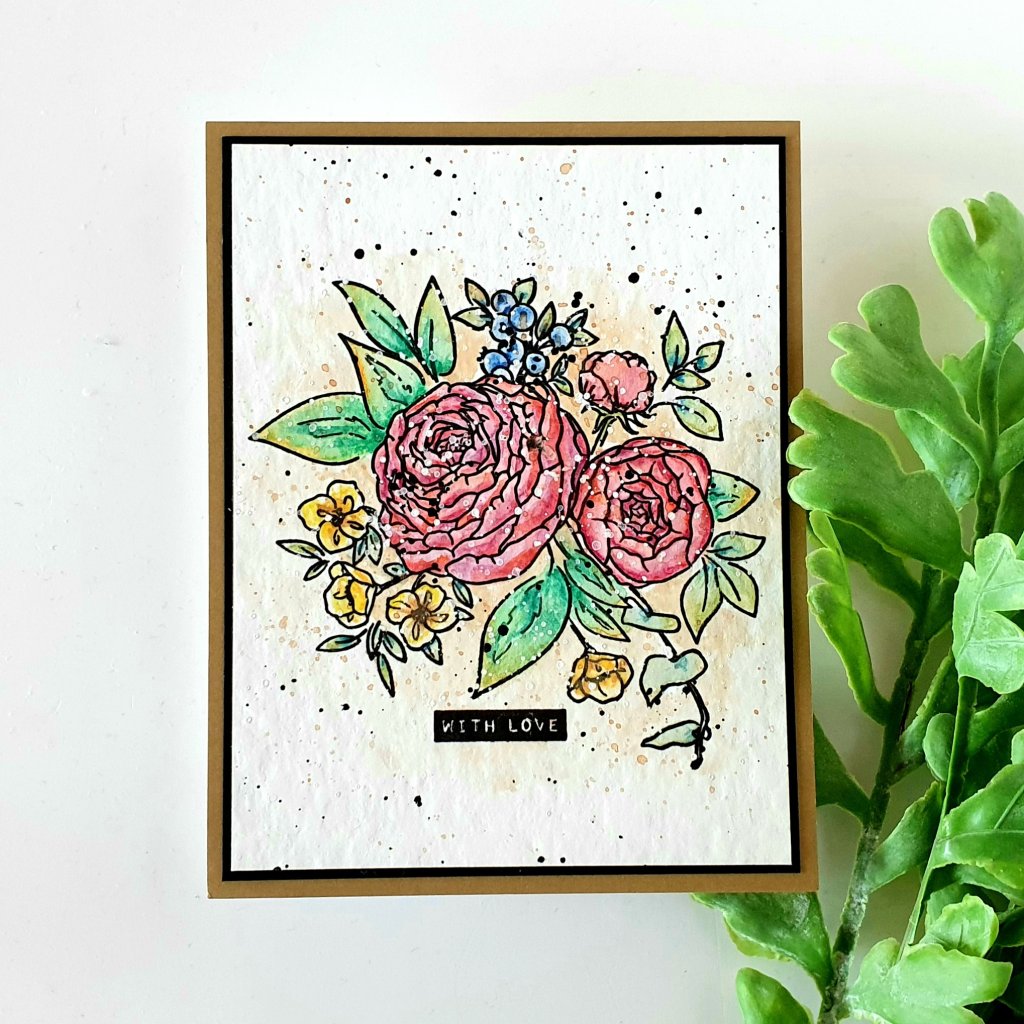
For the flowers, I scribbled on the base color using the lightest shade of red. Then using wet brush to tip technique, I took a darker red and applied it to the corners of the petals of the flower. Then I did the same for a the purple pencil and an orange pencil, dabbing it here and there on the petals to created color variations.
For the leaves, I scribbled on a light green and yellow on the tips, then use a wet brush to spread the pigment. Then while wet, I scribbled the veins using a darker green. I did the same technique for the rest of the leaves as well as the tiny flowers and berries.
As for the background, I used a tea strainer and grated some pigment from the pencil, added water with a brush and painted it on . Then I flicked whatever color was left on my brush all over the panel. Then I did the same with white and black gouache.

Hope you were inspired to give watercolor pencils a try, if you havent already. See you at the Happy Little Stampers Watercolor Challenge. I can hardly wait to see what you create!
‘Til next time!
❤️
Anna
Materials used:
Faber-Castell Albrecht Durer Watercolor Pencils: For the flower: Deep Scarlet (base), Dark Red, Magenta & Dark Cadmium Orange; For the big leaves: Burnt Ochre & Light Green (base), Emerald Green & Dark Pthalo Green; Small Leaves: Earth Green & Pthalo blue; For the small flowers: Burnt Ochre & Cadmium Yellow; Berries:Ultramarine & Helioblue; Background:Burnt Ochre
Flower stamp: Beautiful Ranunculus by WPlus9

Thanks for sharing these techniques! I have not had good luck with them either, but am going to give some of these techniques a try. 🙂
LikeLike
Thank you so much! Have fun experimenting! 💕
LikeLiked by 1 person
I would love to visit that craft store in Japan. You showed such great restraint. Your flower is colored beautifully. Wonderful card. thanks for all the hints.
LikeLike
Thank you so much! 💕
LikeLike
Beautiful card, love how you coloured the image.
LikeLike
Thank you! 💕
LikeLike
WOW Anna your card is so beautiful, I love your watercolouring.
Hugs
Anke
LikeLike
Thank you so much! So happy you like it 💕
LikeLike
Your card is just lovely with wonderful coloring, and thanks for sharing your techniques for using pencils. I’m trying to visualize a craft store as big as the one you described. I’d probably come out needing to re-mortgage my home LOL
LikeLike
Thank you! So glad you like it 💕 I was at the store for three hours and didn’t even get see all of it. They had one whole floor just for paper. It was like a dream 😁
LikeLike
Thanks so much for sharing those techniques Anna. Haven’t used my wc pencils in a long time. What a beautiful card you have created here. Beautiful blending and love the leftovers for splatters.
LikeLike
Thank you so much Ina 💕
LikeLike
I’m not sure I would have had as much restraint as you in a craft shop that size. All the different techniques you’ve used have made a gorgeous ca4d.
LikeLike
Thank you so much 💕
LikeLike
Wow, Anna! You were very lucky to get the chance for such wonderful shopping!!! Not sure my credit card would love it as much as I would!!! LOL!!! Thanks so much for sharing all your wonderful tips for using w/c pencils. I must drag mine out more often! Your card is beautiful! Wonderful colouring! I hope you are safe and well. Take care! 🙂
LikeLike
It took a lot of self control that’s for sure! 😂 Thank you for dropping by my blog and stay safe too! 💕
LikeLike