

I had just recently finished taking the Simply Watercolor Christmas card classes over at onlinecardclasses.com given by the uber talented Kristina Werner. This is a wonderful class for both beginners and seasoned watercolorists. I was so glad I took the class because aside from all the wonderful cards I was able to create, I was also able to get a headstart in creating holiday cards for the upcoming Christmas season.
I am writing about this because I wanted to document my creations. I hope you find inspiration. If you are interested in the classes, I will link it here.
Here are the cards I made for the class and a brief description of each.
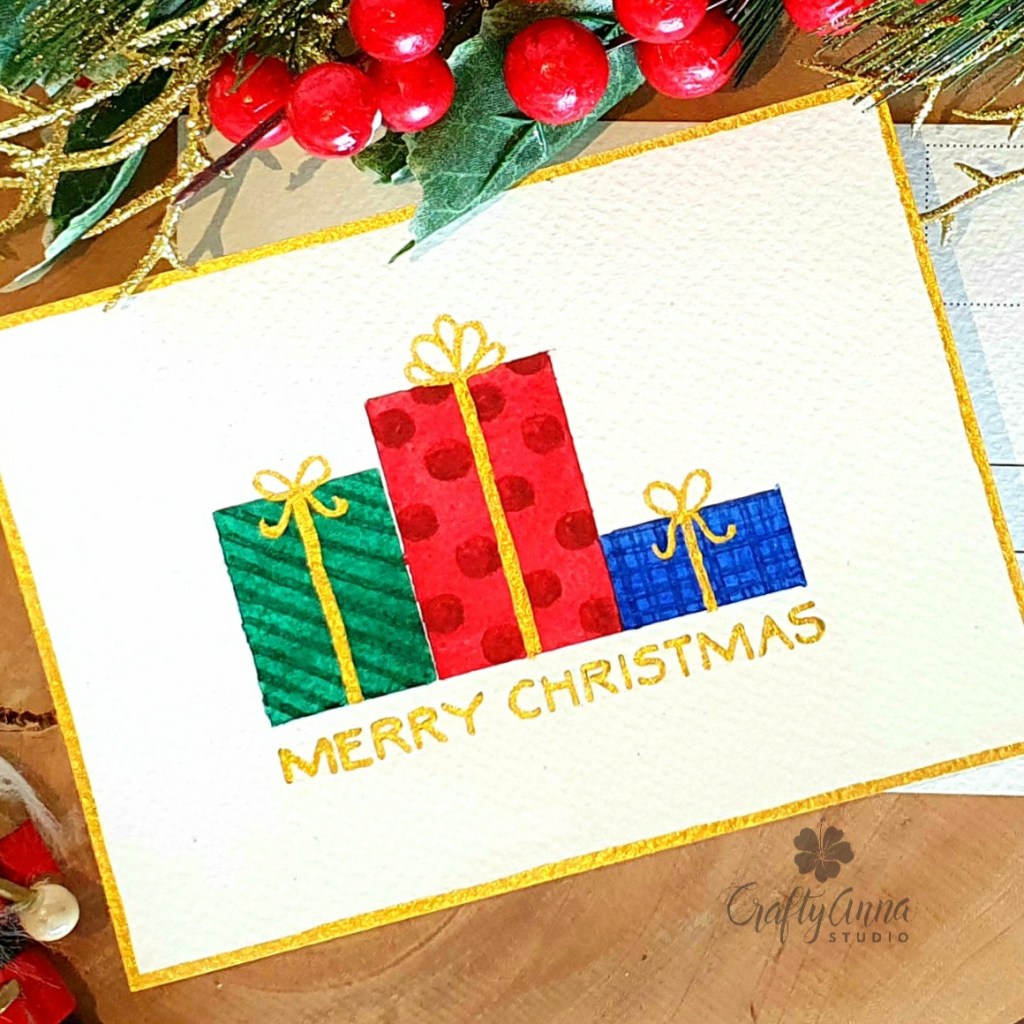
DAY 1: Simple Masked Shaped Cards
For the cards in Day 1, I broke out my Cotman’s Watercolor pan set and mixed some vibrant holiday colors. The gold metallic paint is from the Gansai Tambi Starry colors paint set – in Red Gold.
CARD #1:
For this is card, I used a freehand style which means, I didn’t use any painters tape to mask the gift images. I freehanded the sentiment and the borders as well.

CARD #2:
For this card, I decided to mask off each gift with painters tape. Though I freehanded the sentiment, I did use a ruler and pencil to sketch out the lines and the letters.
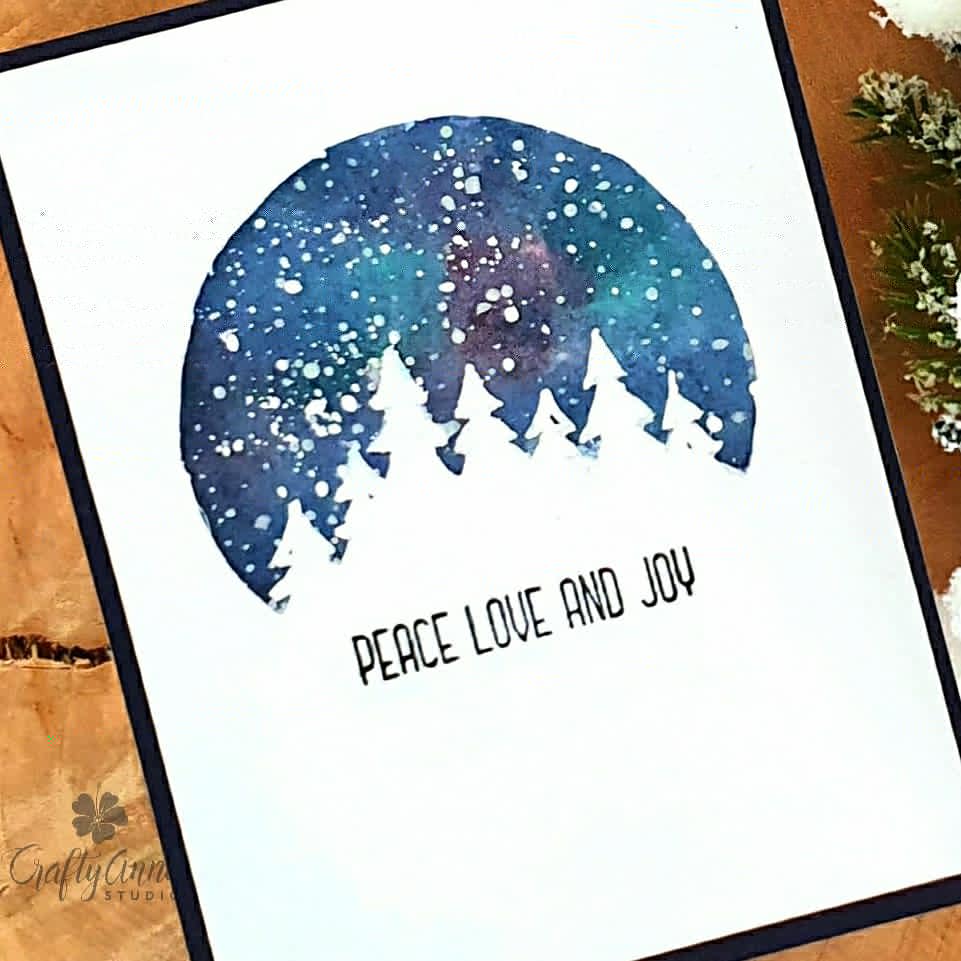
DAY 2: Using Masking Fluid
This is my take on the card examples demonstrated in class. I sketched out the row of trees inside a circle and used masking fluid on the areas I did not want to paint in. Then I created the galaxy sky by using the left over paint from my palette and dabbing it on the card. Then I applied some diluted black paint on top. I finished it off by flicking white acrylic paint on top with my brush. After the paint was dry, I rubbed off the masking fluid with my fingers. The sentiment “Peace Love And Joy” is from the Altenew Holiday Flowers stamp set stamped with Hero Arts Intensi-fied Ink.
Card #2:
I did the same for this card except I did not use left over paint. I used colored metallic paints instead from the Altenew Metallic paint set. Then used the same procedure as above to finish it off. But instead of white acrylic paint, I used silver metallic paint for the stars.
The “Peace Love and Joy” sentiment is from the Altenew Holiday Flower stamp set stamped with two kinds of ink, top half is Memento Paris Dusk and bottom is Hero Arts Intens-ified Black ink.

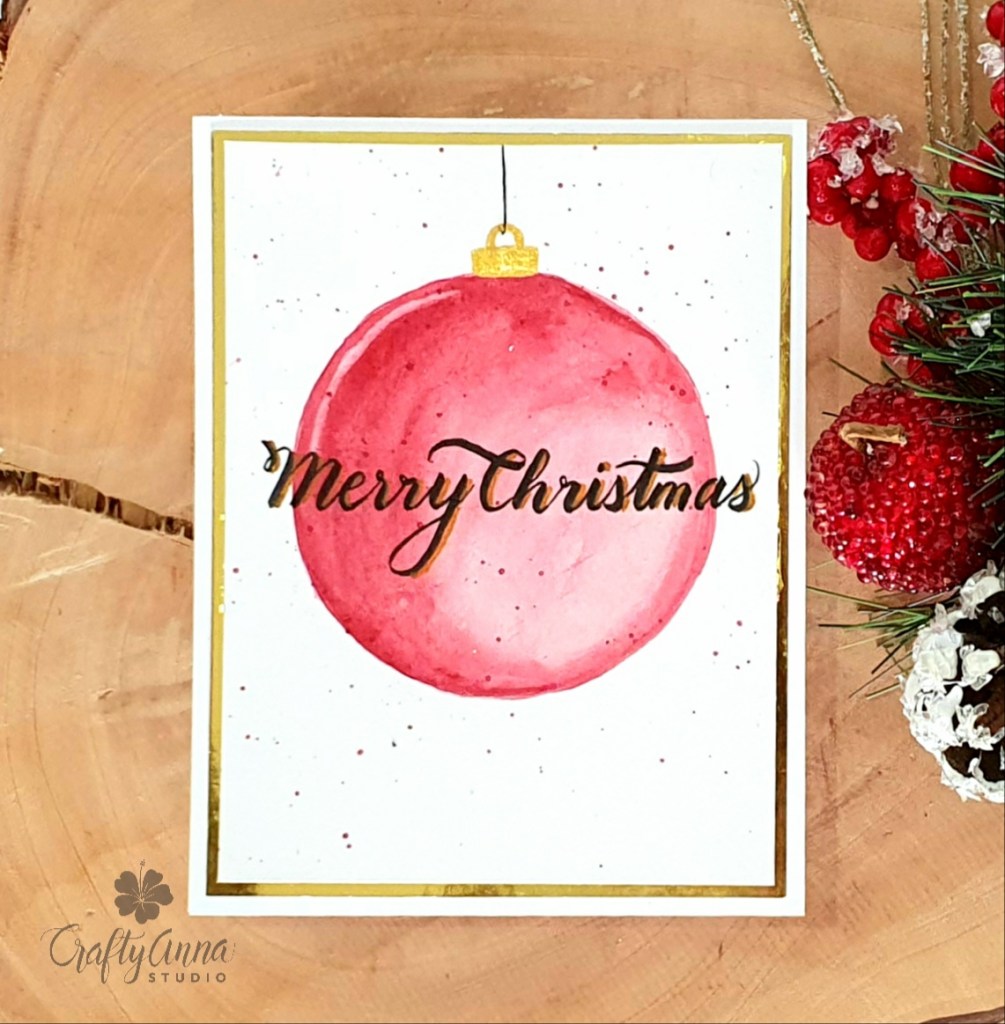
DAY 3: Ornament Card
Kelly Latevola Taylor was guest designing for this class and her lesson focused on watercoloring an ornament. It was a bit challenging but I’m glad for the tips and tricks on creating highlights in the ornament. I also handlettered my own sentiment and gave it a gold shadow with the same gold metallic paint I used for the top of the ornament.
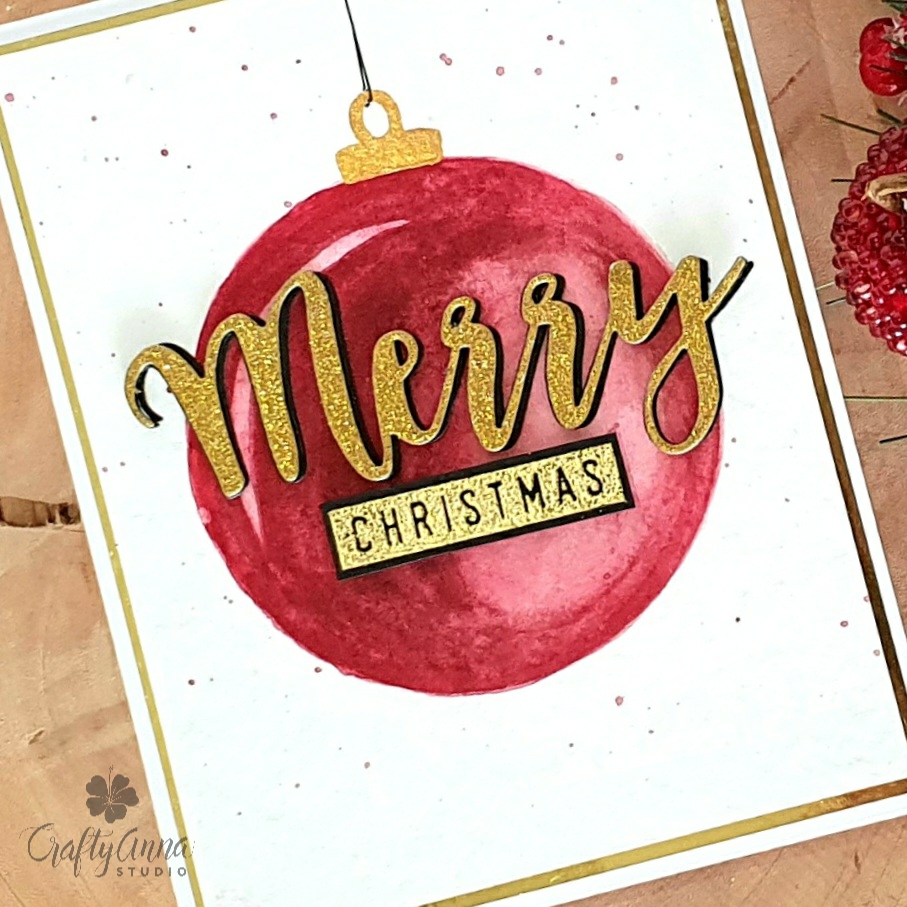
I created another card using the same technique but this time I used the word “MERRY” die cut out of gold glitter cardstock. That die is from the Altenew Holiday Script Words die set. I also die cut it in black and glued it behind to create a shadow. The word “Christmas” is gold heat embossed using Antique Gold embossing powder on black cardstock, from a Concord & 9th Very Merry Sentiments set.
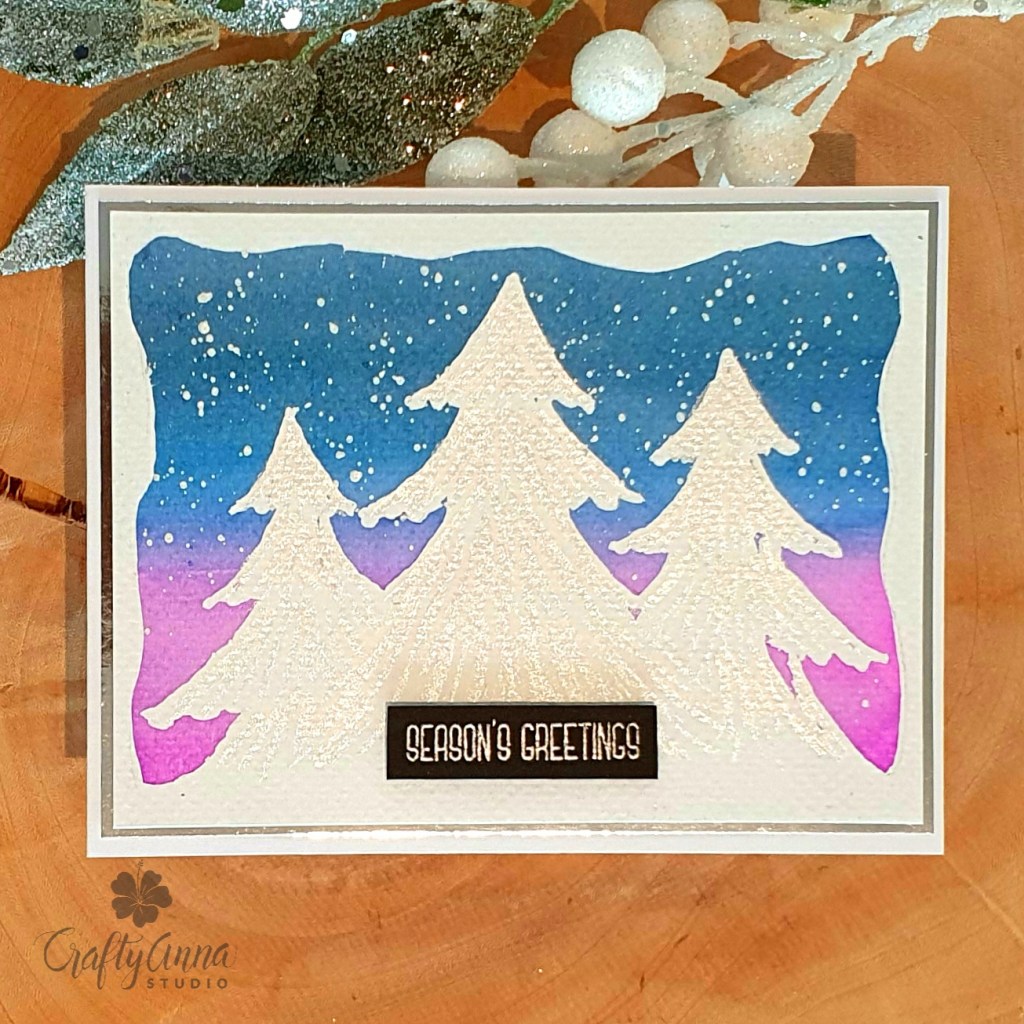
DAY 4: Large Tree Card
The card Kristina created in this class was one giant tree that filled a whole card front. This is my interpretaion of her card. I used masking fluid to mask of the trio of trees and the border. Then I used an inexpensive set of watercolors that I bought from Amazon. I used a gradient wash from purple to darker blue. After the paint was dry, I rubbed off the mask with my fingers. There were some stubborn parts that did not come off easily so I used an adhesive eraser.
I painted a subtle texture of leaves using downward strokes with silver metallic paint. The “Seasons Greetings” sentiment was silver heat embossed and is from the Altenew Holiday Flower stamp set.
Card #2:
I did the same technique for this card except it was a bit more similar to the one Kristina painted. I wasn’t too happy with it but I decided to finish it off anyway and added sequins to give it a little more interest.

DAY 5: Plaid Patterns
This was a super fun class where Kristina and her guest designer, Yana Smakula, taught us how to different kinds of plaid patterns. This is my take on the class.
I used the same inexpensive watercolor set and used the greens and reds. I started with the red lines using a wide watercolorbrush. Then I added the green lines on top with a thinner brush. With gold paint, I painted additional lines in between the green lines. I accented the plaid with white lines using a white gel pen.
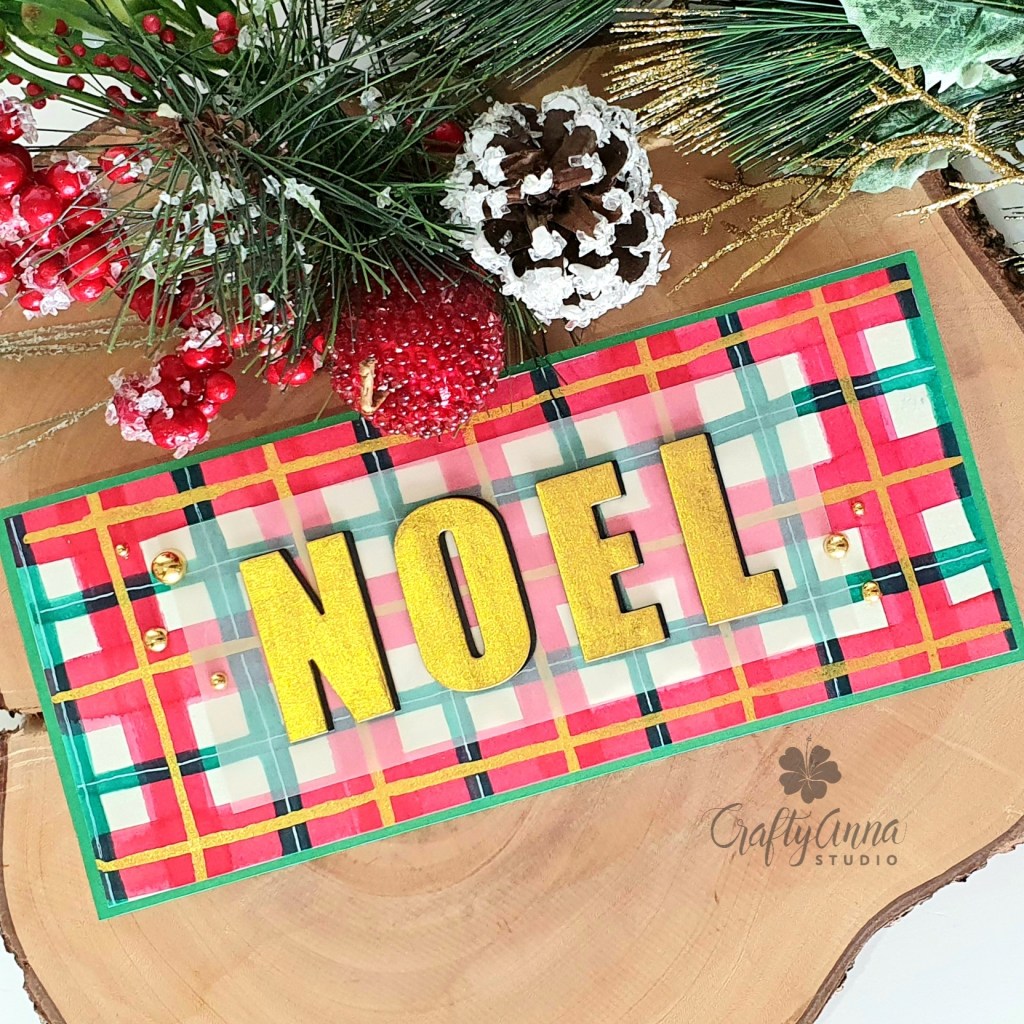
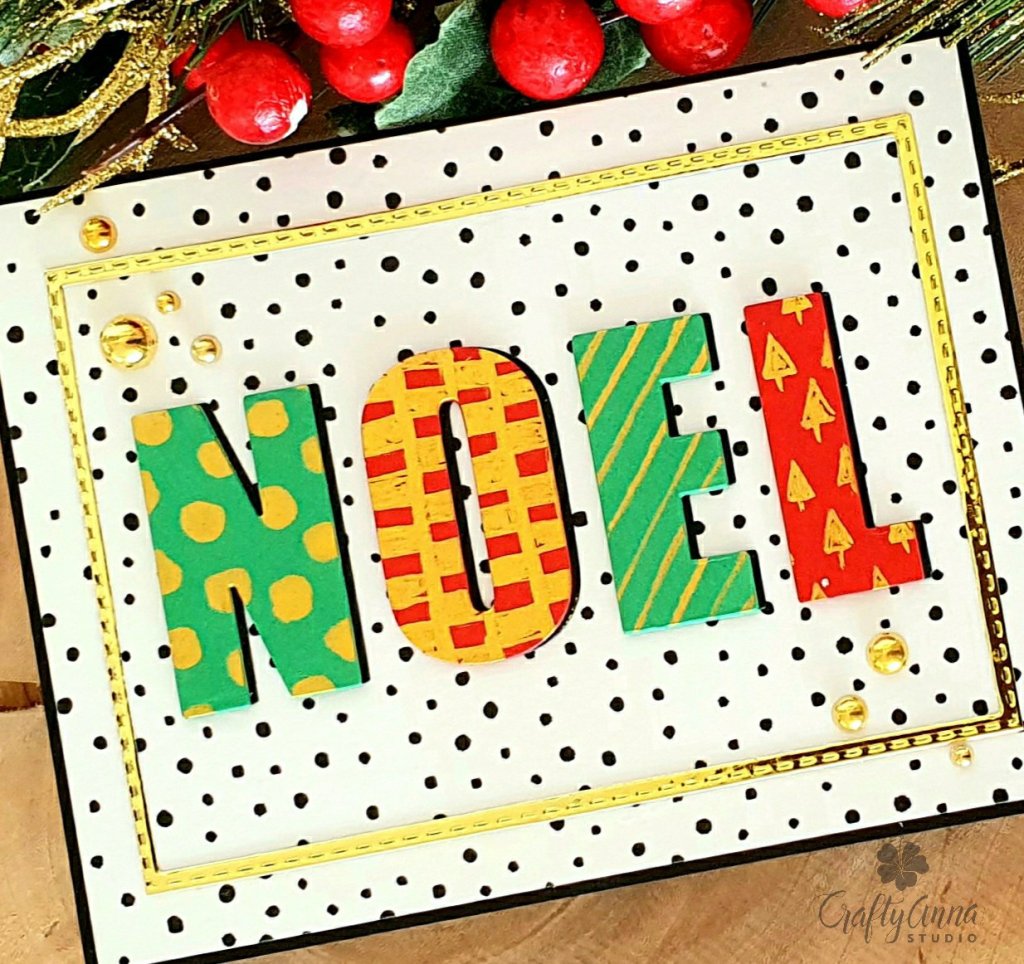
I die cut the letters N-O-E-L from the Altenew Caps Bold Alpha die set, out of black cardstock which I painted with gold. I also die cut three layers out of black cardstock and used it to create a shadow behind the letters. I used vellum behind to in order to mute the background a little so the word would stand out more. I added Gorgeous Golden Baubles from Trinity stamps.
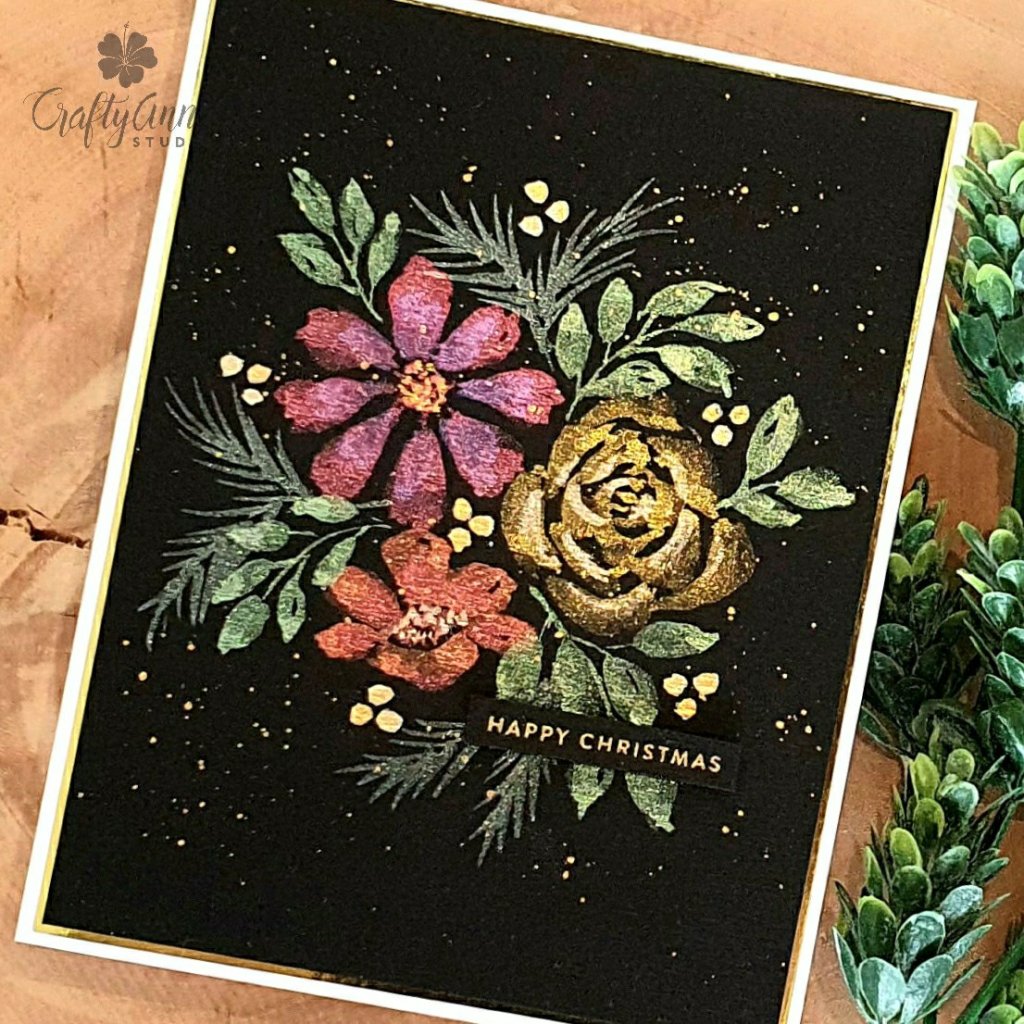
Day 6: Dramatic Backgrounds
Card#1:
For this card, I used the Altenew Metallic Watercolor pan set and did some loose watercolor flowers on black cardstock. I really loved the effect! I wish the photos did it justice! The sentiment is from the Simon Says Stamp Tiny Words Christmas stamp set, gold heat embossed on black cardstock.
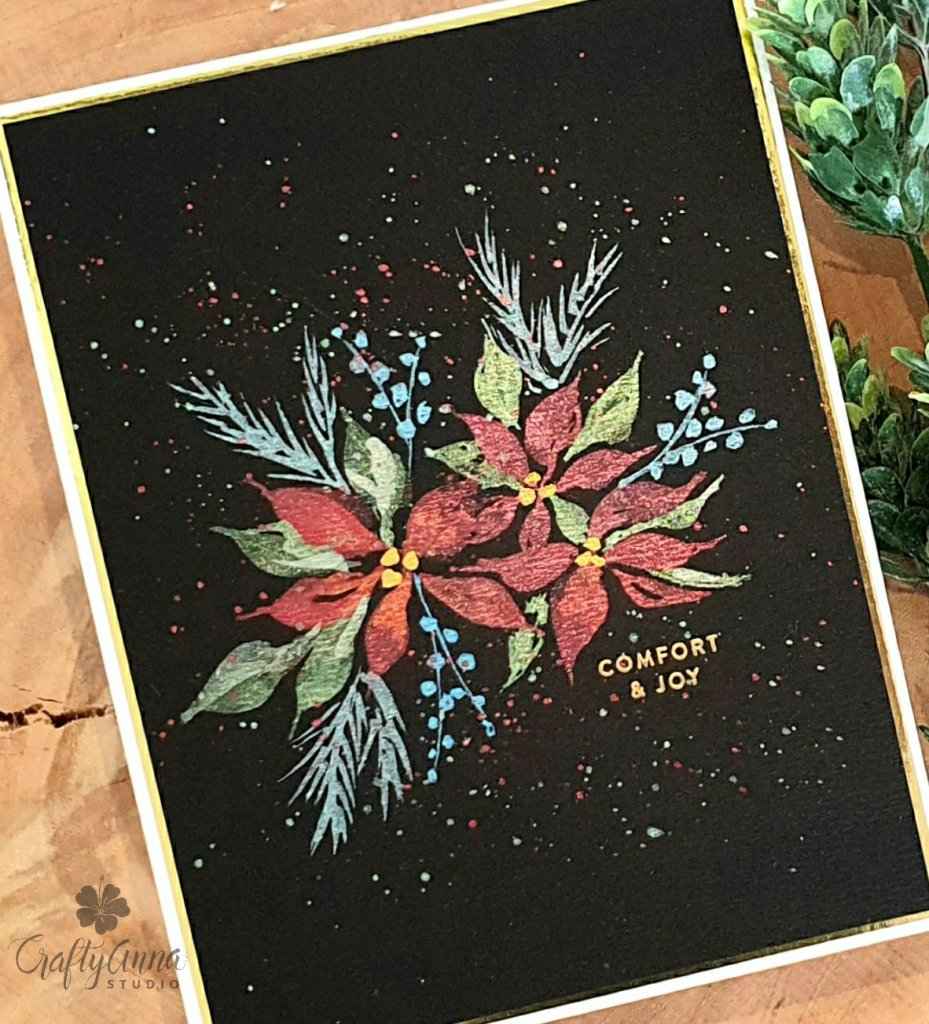
Card #2:
For this one I used a more traditional holiday image – the poinsettia. This was surprisingly easy to paint as most of the strokes were like leaves.
DAY 7: Christmas Words
I painted patterns on red and green cardstock using the same gold paint. Then I die cut them using the same Caps Bolda Alpha die set. I die cut additonal letters from black cardstock to give the letters shadow and dimension.
I used the Trinity Stamps 4-bar die set to cut the stitched frame in gold mirror cardstock. The background is actually a wide washi from Altenew. In my mind, this looked like snow falling. I embellished the card with Gorgeous Gold Baubles from Trinity Stamps.
DAY 8: Reindeer Card
This was a bit nerve racking but super fun to create! Kristina made a santa card, but I decided to make it a reindeer. First I sketched out the reindeer on watercolor paper, then i watercolored him using the inexpensive paint set.
I finished it off by splattering some white paint and handwriting the sentiment on a strip of black cardstock with a white gel pen.

The cards I created are my own interpretations of the cards taught in the class. Which means, they are a little different. The concept is similar in some cases but that’s what I like about taking classes like this, it helps boost my creativity and I always come away brimming with ideas.
I am not affiliated in any way with Online Card Classes but I encourage you to check it out if you want to learn more about watercoloring cards.
‘Til next time!
❤️
Anna
Thank you for visiting my blog. I truly appreciate it! You can also find me on Instagram, YouTube, Pinterest and Facebook.
Materials used:
Note: I am affiliated with some online stores including Altenew, Concord & 9th, Hero Arts, Brutus Monroe and Trinity Stamps. If you use any of the links above, I get a small commission from these wonderful shops at no extra cost to you. Thank you for your support!

You have created so gorgeous cards, Anna! Love them 🙂
LikeLiked by 1 person
Thank you Bory! 💕
LikeLike
Very pretty cards! Thanks for sharing!
LikeLiked by 1 person
Thank you so much! 💕
LikeLiked by 1 person