

When I was still single, I owned a chain of boutique clothing stores called “Island Spice”. The store specialized in tropical/resort clothing. I had about six stores at its peak but unfortunately I could not compete with the big box brands that were then starting to come into the market. The year I closed it down was 2003. It was also the year I got married. One door closes, a window opens – as they say!
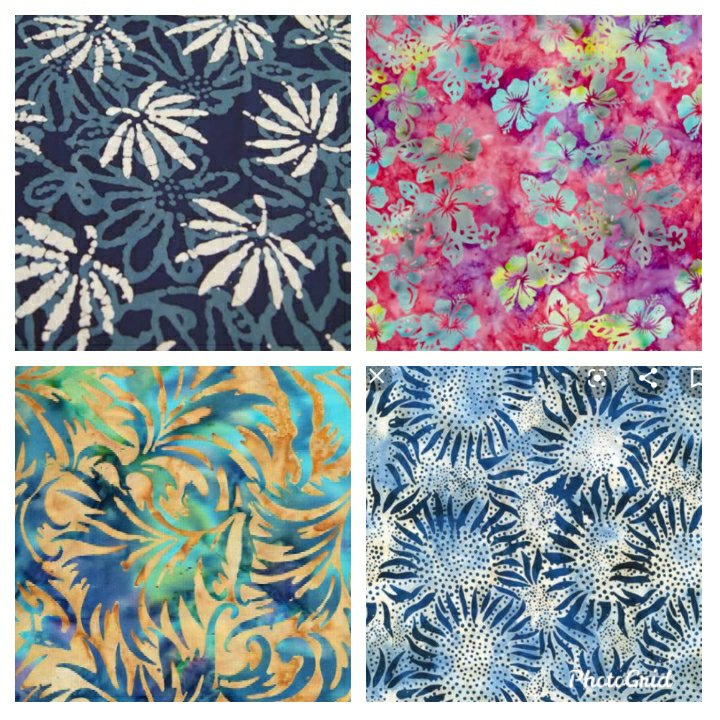
One of the many things I enjoyed about owning that business was that I got to travel to many places in Southeast Asia, India and even the US to source my products. One of the places I frequented was the island of Bali in Indonesia.
It was there where I sourced local materials called Batik. I made sarongs, blouses, lounge pants, swimsuit cover-ups with them.
After I finished with the AECP Impressive Heat Embossing class, I was inspired to create batik-style cards using the heat emboss resist technique.

As it turns out, my husband’s cousin who lives in India is getting married in Bali in April during the Easter holiday. I thought this would be perfect to use for the occasion!
The first step is the basic embossed resist technique. I ink blended a white cardstock with 2-3 different ink colors. I did not really take care in blending them well as this technique is quite forgiving of that as you will see.

Then I stamped images from the Hibiscus build a flower stamp set with an acrylic block and heat embossed it using clear Embossing powder.

The next part can get pretty nerve-wracking. I crumpled the panel into a ball! This is how you create that “batik” effect.
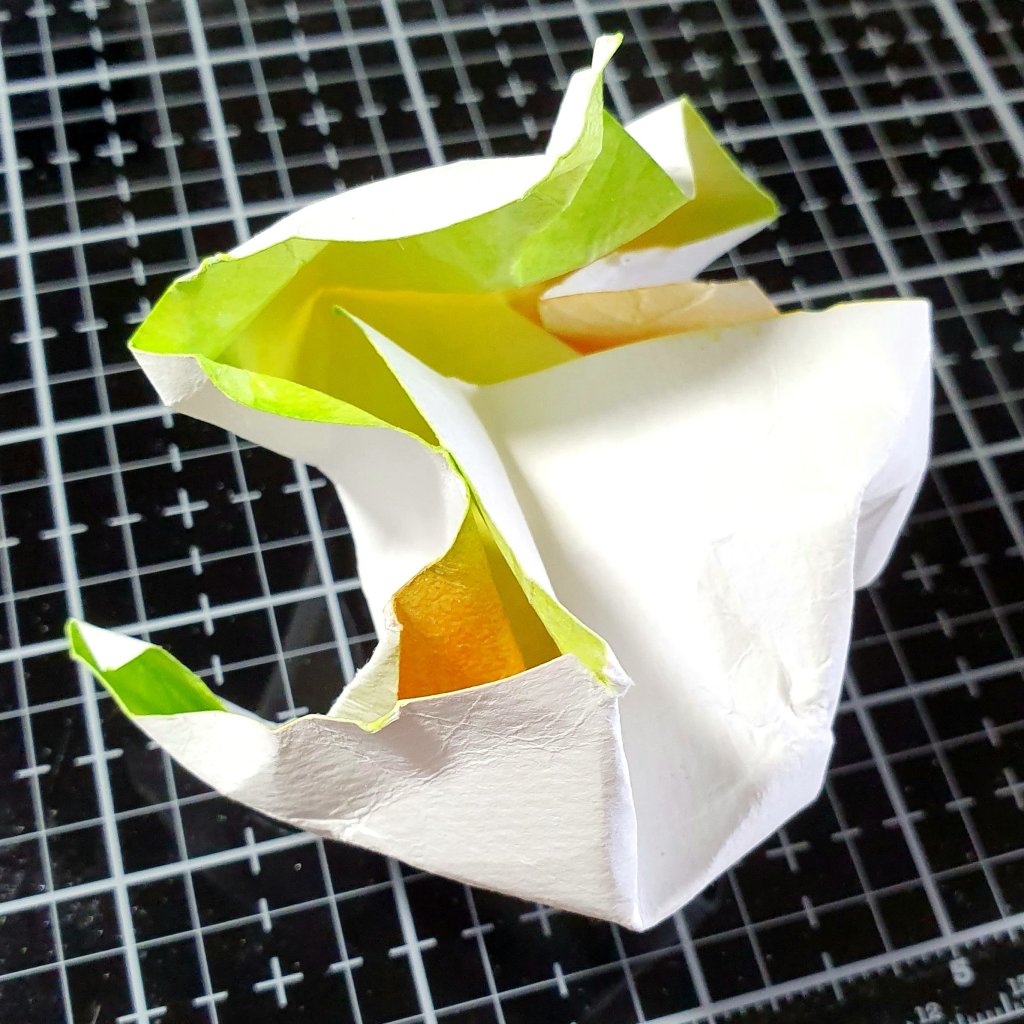
Then I unfolded it and lay it flat on my glass mat. I took another ink and blended it all over the panel.

The crease from crumpling the paper gave it the “texture” that batik is known for.
Here is another example, a panel I did using the same technique but instead of crumpling, I folded it in several places. This is for those of you who want a more “controlled” look to the panel,

Now, if you do not want to crumple or fold, you can still achieve the “batik” look. For the final card I made, I stepped it up by double Embossing it. I first clear embossed a flower from the Totally Tropical stamp set on light blue pearlized cardstock.

Then I applied ink all over. Then I stamped one of the leaves from the Parrot Paradise stamp set overlapping some of the flowers. Then I heat embossed it again trapping the color. Then finally I ink blended on top for its final monochromatic look.

Then I used a 1″ strip of vellum as a band around the cards and added four rounds of twine on top. I used the Label Love set to stamp and heat emboss coordinating sentiments for each of the cards

Then I finished it off with matching sequins for a much needed bling!


I added crafters foam at the back then adhered the panel onto a 4.25″X5.5″ card base. I will bring these cards with me to Bali.
Here are the final photos of the cards I made.


The Altenew Academy Impressive Heat Embossing class gave me so much confidence to use heat embossing in my cardmaking. I encourage you to check it out!
Hope you enjoyed my tutorial!
‘Til next time!
❤️
Anna


your cards are fantastic, Anna – love the technique and your colors and design are gorgeous!
LikeLike
Thank you so much Betty 💕
LikeLike
What a fabulous batik effect, Anna … so bright and vibrant! Thanks so much for your visit and kind words! Anita 🙂
LikeLike
Thank you Anita! 😊 And thank you for dropping by my blog 💕
LikeLike
Wow! What a lovely technique. Such gorgeous cards. thank you for sharing.
LikeLike
Thank you so much! 💕
LikeLike
What a great technique! I will certainly give this a try! Thanks for sharing your process.
LikeLike
Thank you! 💕
LikeLiked by 1 person
Lovely cards, Anna. The width took me back to my college days. I was a Textile Design student and we used to do batik and tie-dye in the labs. It was so much fun!
LikeLike
Lovely cards, Anna. The width took me back to my college days. I was a Textile Design student and we used to do batik and tie-dye in the labs. It was so much fun! You have got the effect spot on!
LikeLike
Simply stunning. Thanks for giving us the lesson. I’m off to try it!
LikeLike