

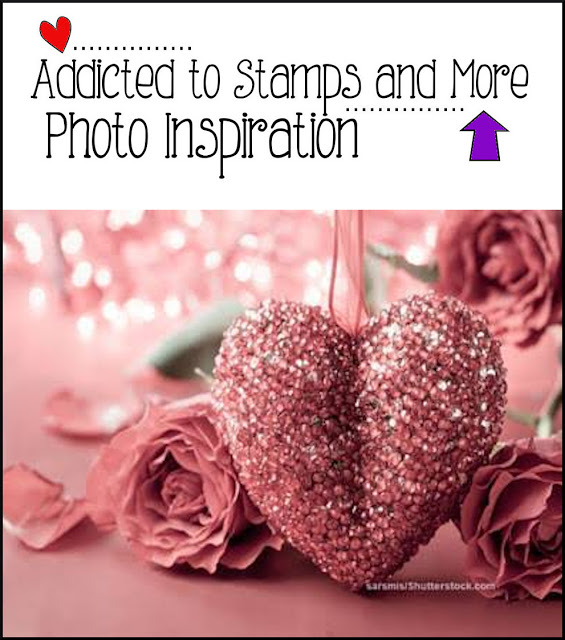
Love is in the air! The My Monthly Hero January 2020 kit is my inspiration for this challenge. This is an absolutely amazing kit as it has a lot of dimensional floral dies, a mini envelope die and a flower bouquet wrap die, among many other goodies. Unfortunately, this kit sold out within days of its release.
I am also using this kit as my Design team project for the ATSM photo challenge. I took the heart and shiny, shimmery elements in this photo as the inspiration for my card.
This is how I created my card:

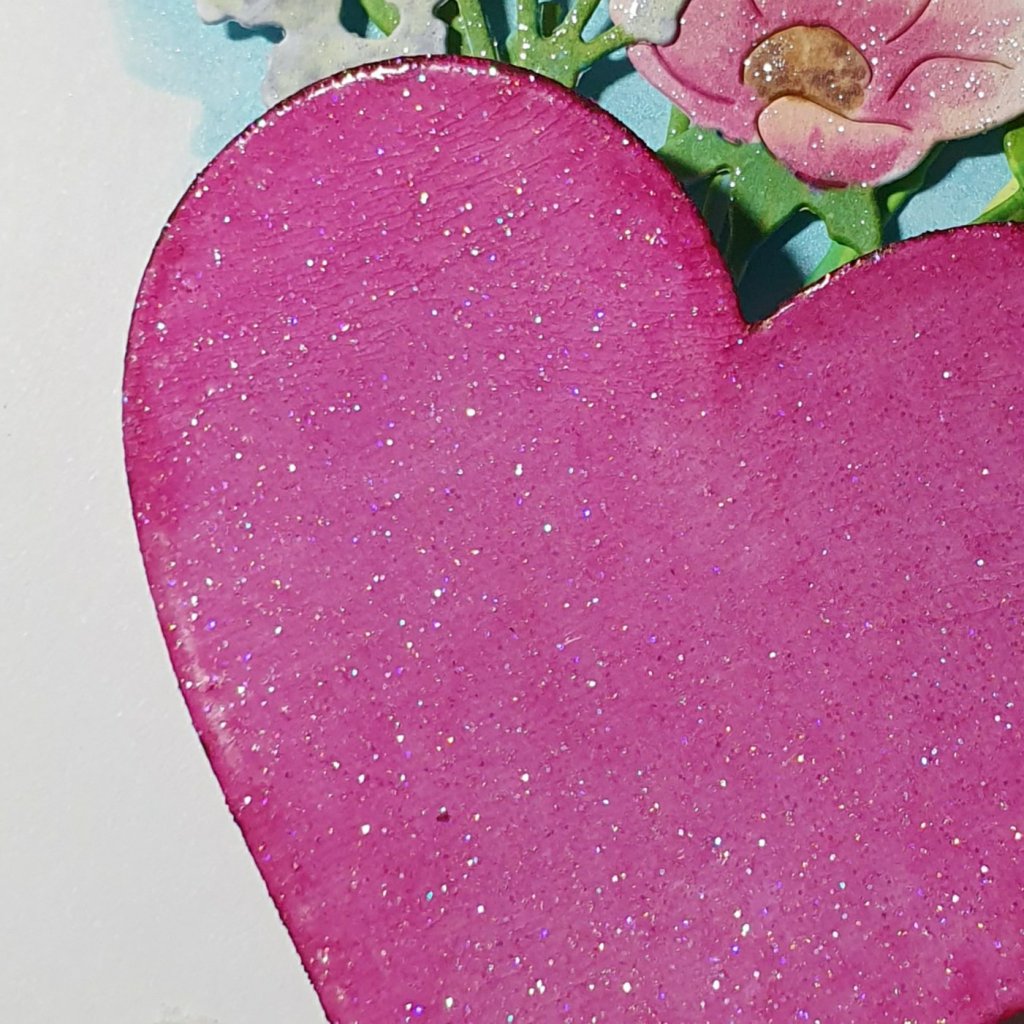
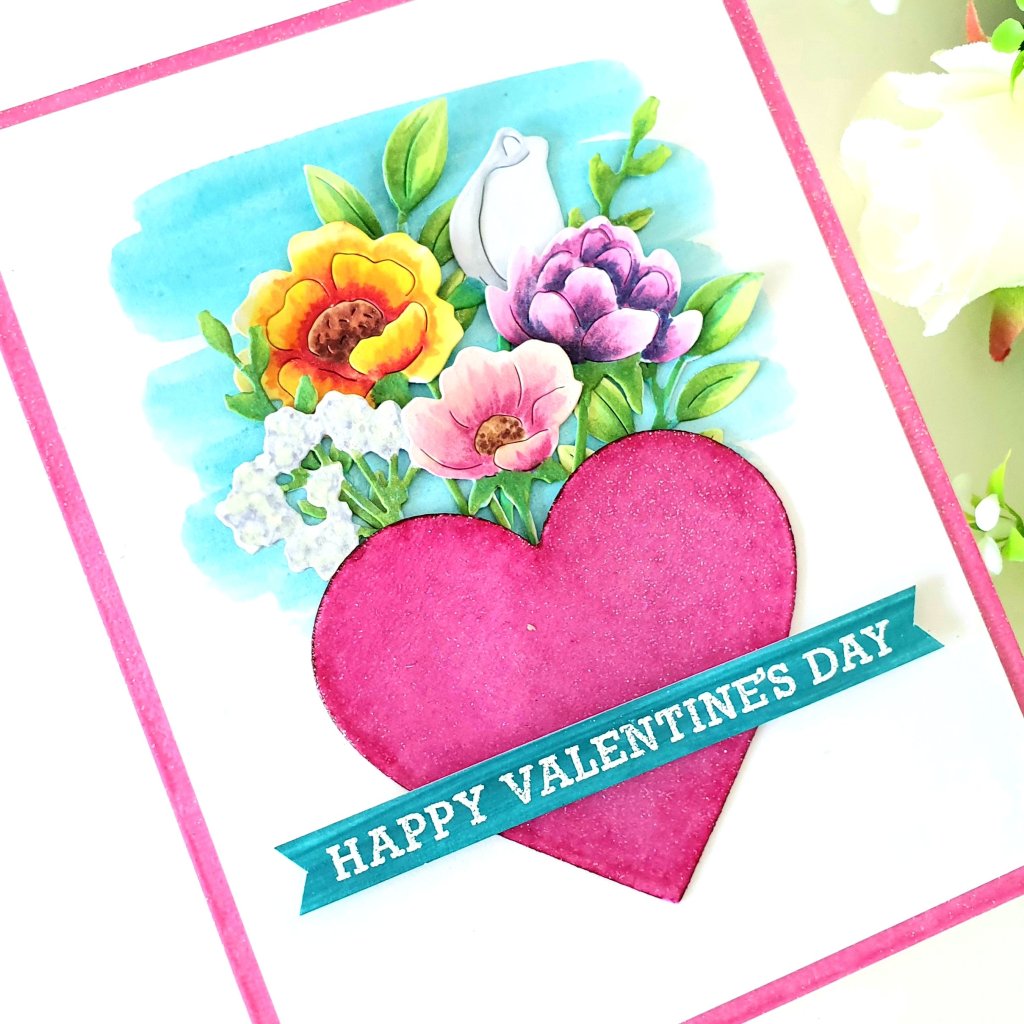
First I used the Hero Arts Heart Infinity Die to die-cut the heart. The size of heart is approximately 2.5″ X 2.25″. I took the Pink Sparkle Embossing powder that came with the kit and embossed the heart four times to give it a beautiful shiny and dimensional effect. I used RV69 copic marker and colored the edges of the heart, then used a piece of tissue soaked in isopropyl alcohol to blend and soften the color. This gave the heart a little shaded effect.
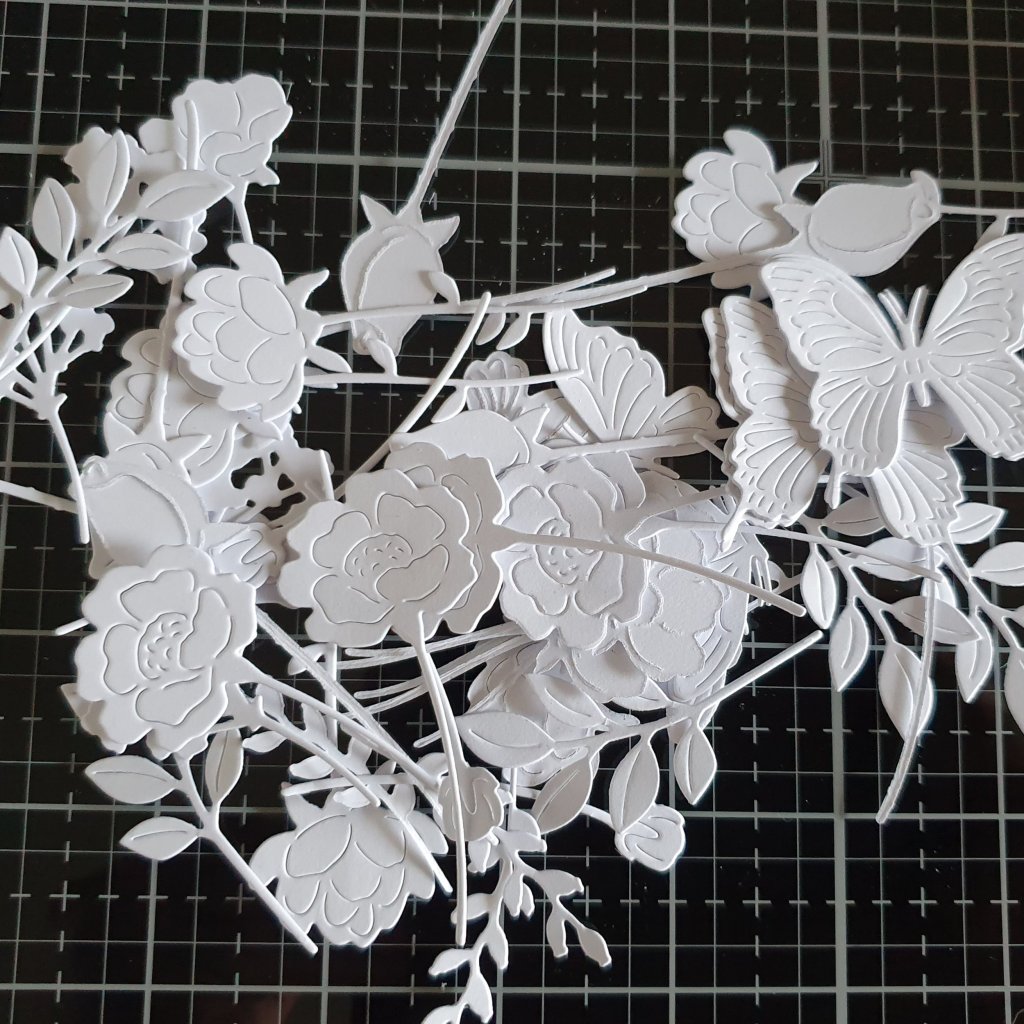
I die cut several flowers from the kit. I made more than needed as I plan to use them for future cards.
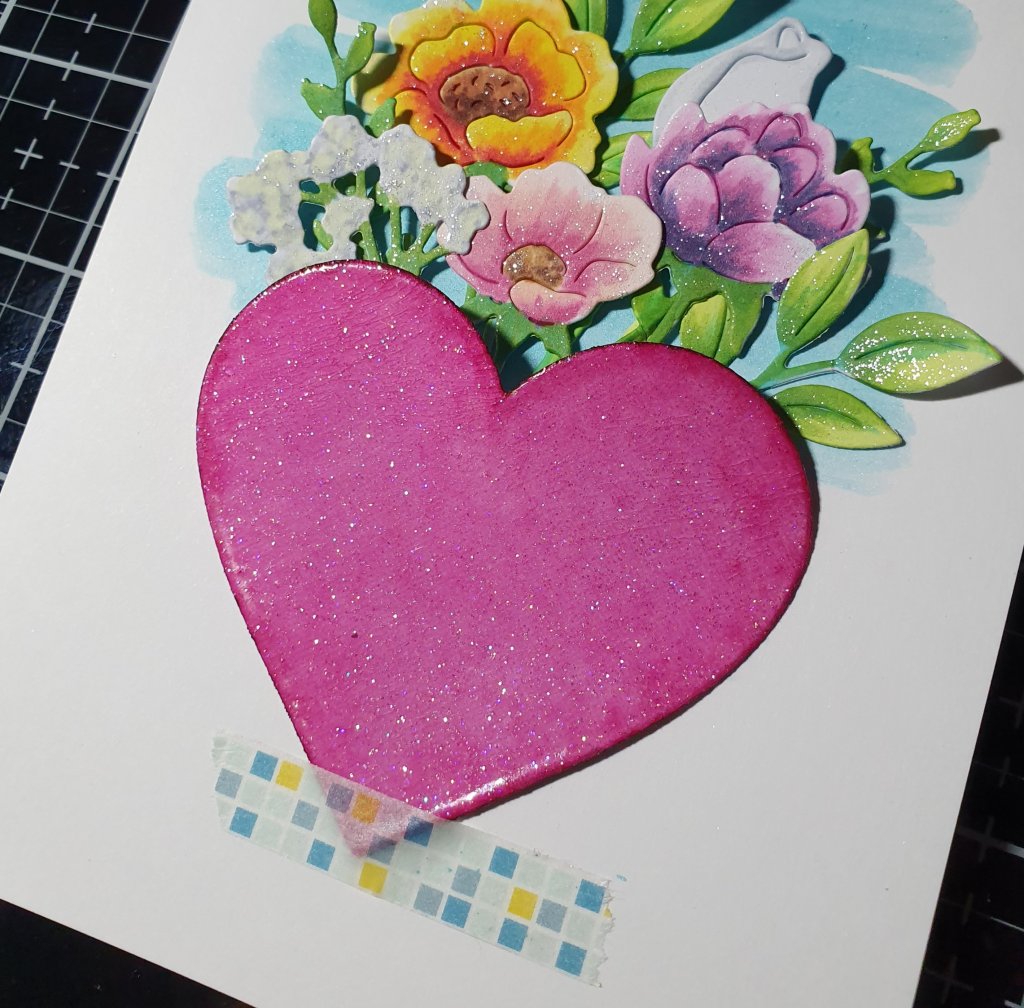
Then I proceeded to color the flowers and leaves with my copic markers.

Flowers: R01, R29, BV17, RV19, RV34, RV55, RV66, E15, E29, E31, Y00, Y02, YR16 & C2
Leaves: YG01, BG15 & YG17
I used a Tonic Aqua Shimmer pen to apply a light coating of shimmer on the flowers and leaves.
For the background, I used a diluted amount of the Hero Arts Aqua Glimmer Metallic Ink that came in the kit and just scribbled it on some plain white cardstock.

After I had all my elements ready, I proceeded to arrange them on my card. I secured the heart temporarily with washi tape so I could insert and arrange the flowers and leaves inside the heart.
When I was satisfied with the arrangement, I used Press n Seal and placed the “tacky” side on top of my arrangement, pressed it firmly to make sure everything stayed put before lifting it off . I learned this Press n Seal technique from Jennifer Mcguire on Youtube.

I flipped the Press n Seal arrangement on its backside and put dots of liquid glue here and there, making sure I got glue on all the elements with the exception of the heart. Then I flipped it the right way round and pressed it onto my card base. I carefully removed the Press n Seal from the arrangement. The good thing about liquid glue is that you still have the time to “fix” the arrangement before it dries.

I adhered the heart, positioning it in the middle of the arrangement. I mounted it on a piece of cardstock. I heat embossed the edges with the same pink sparkle embossing powder I used for the heart. I finished off my card by adding a white heat embossed “Happy Valentine’s Day” sentiment, also from the kit, on cardstock painted with the Aqua Glimmer Metallic Ink.
I hope you were inspired by my project to create a card for your loved one. Head on over to the ATSM challenge blog, I can hardly wait to see how you are inspired by the ATSM inspiration photo!
I am also entering this card project in A Blog Named Hero: Anything Goes Challenge!

‘Til next time!
❤️
Anna

beautiful card, Anna – love how you used the heart as “vase” for those lovely blooms. thanks for entering our ABNH challenge for this month – Betty Keefe, FB ABNH Inspiration Team
LikeLike
Thank you so much for your kind compliments Betty 💕
LikeLike
Such a pretty card! Thanks for sharing!
LikeLike
Thank you and you’re welcome ! 💕
LikeLiked by 1 person
Thank you for taking us through how you made this beautiful card! Your colouring and design are fabulous.
LikeLike
This is so stunning and a work of art considering the time you put into creating it! I love that big shiny heart holding the stems – which a colored beautifully! As for press n seal, I would be lost without that stuff, but I’ve never tried crafting with it, so I’ve learned something new today! Thanks for the tip and beautiful card!
LikeLike
Thank you so much Carol! I really appreciate you stopping by! 💕
LikeLike