


Hello friends! Welcome to my crafty blog! Today the Global team will be showcasing their creativity using products from the Hero Arts Summer Catalogue 2023!
The three cards I created for this release uses acetate as a base instead of regular cardstock.
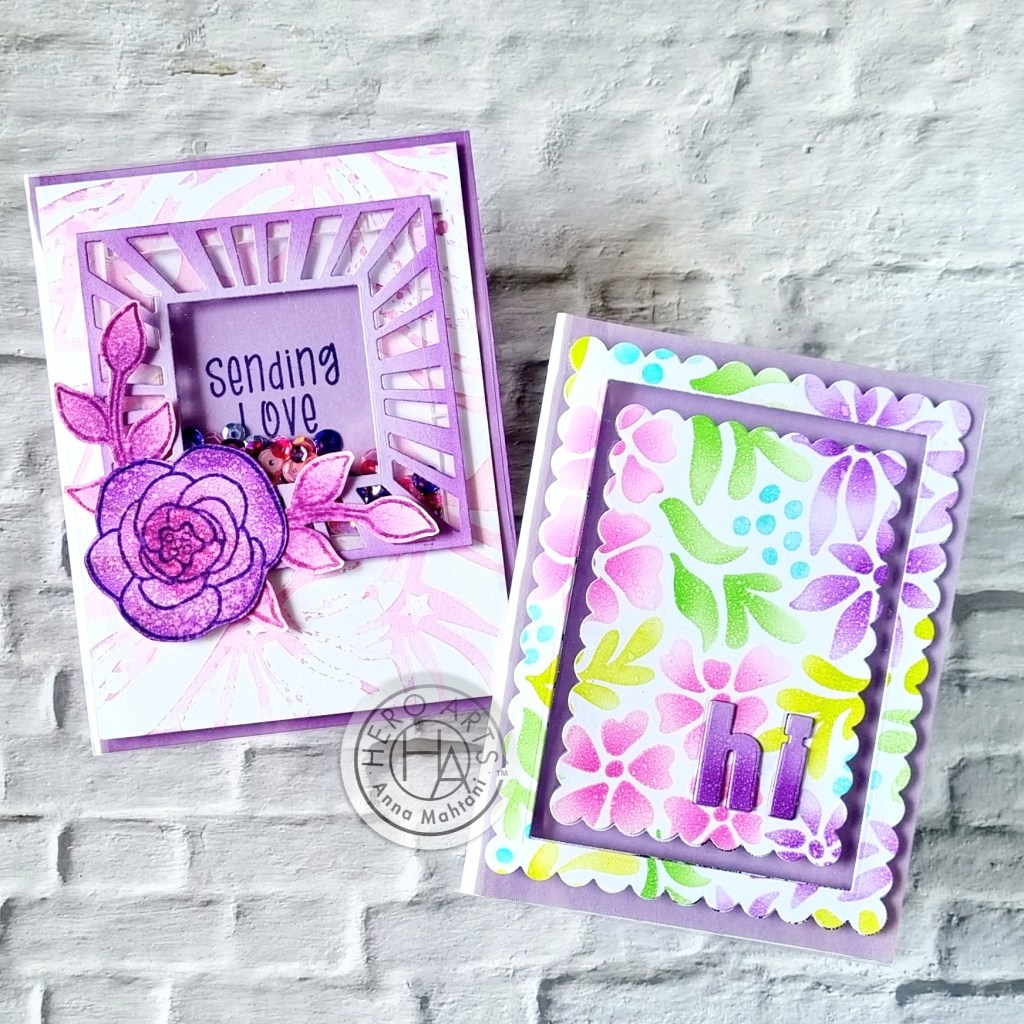
For the first card, I used the Summer Blooms stencil and ink blended a 4.45″X 5.5″ panel of white cardstock, using different colors of reactive inks. After ink blending, I sprayed the panel with Shimmer spray to create some additional interest.
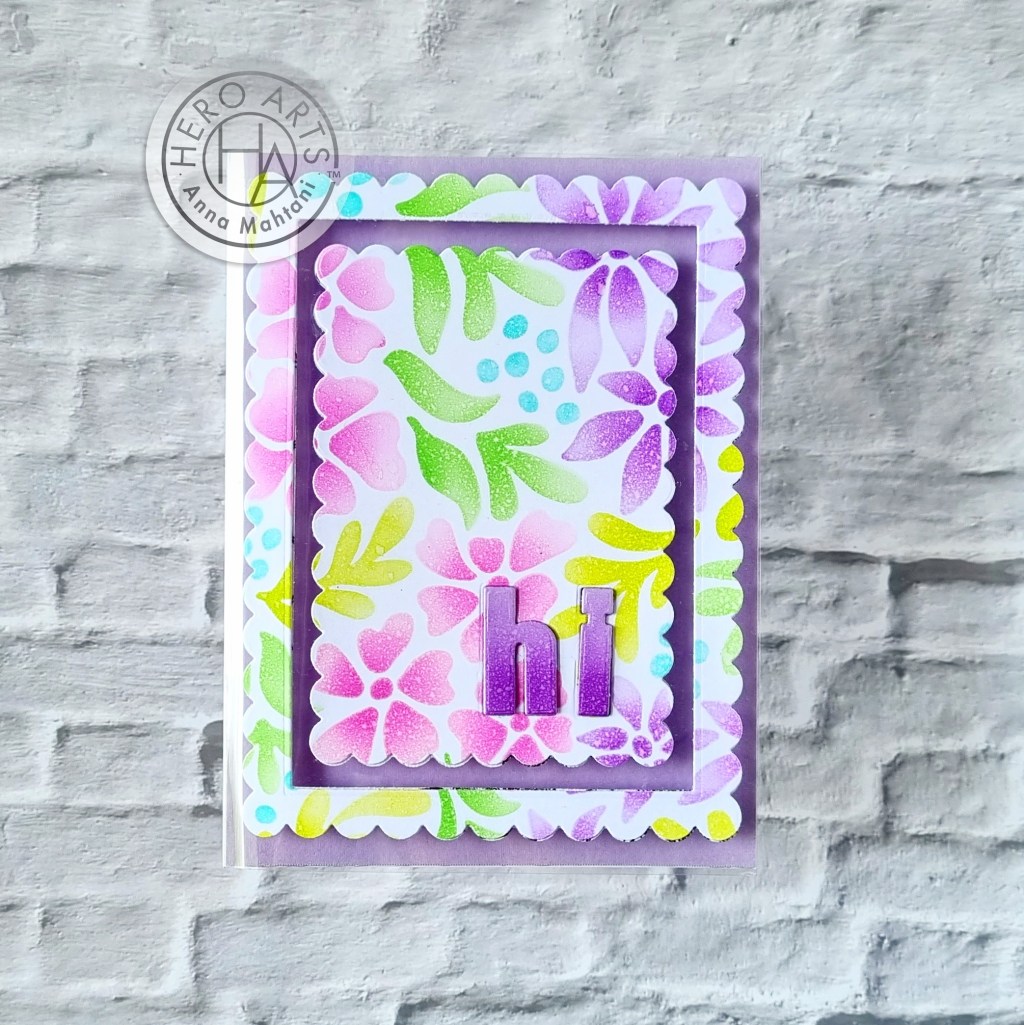
Then I used the the second largest Scallop infinity rectangle die to die cut. Next, I die cut it once again with a smaller rectangular die. Then, I die cut the negative piece using a smaller scallop infinity die. Then I used the Lower Case Luggage alpha die to die cut the word “hi” on the bottom right corner. I placed a purple ink blended, die cut word inside the cut out letters. I had also sprayed it with Shimmer Spray before ahering it.

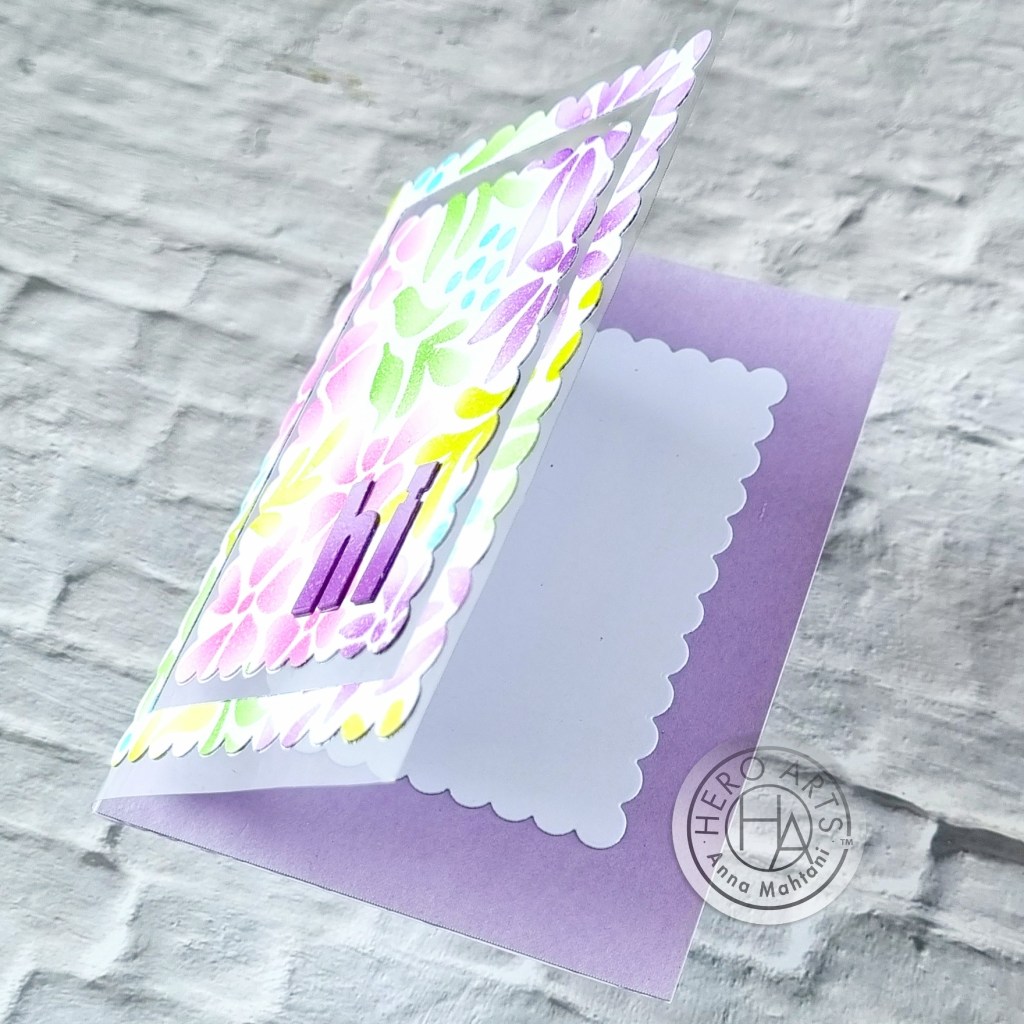
Next, I adhered the scallop frame onto the front of an acetate card base measuring 4.25″X 5.5″. Then the scalloped piece with the word Hi.
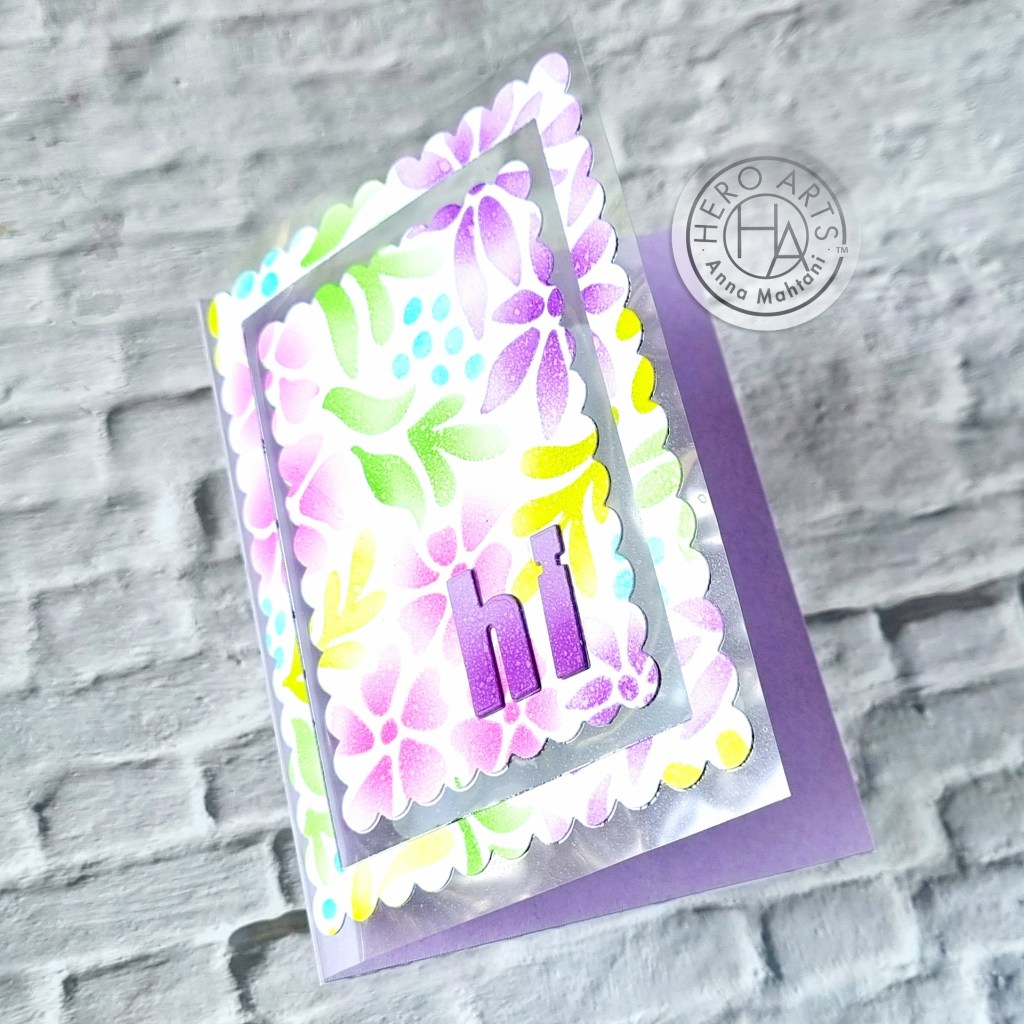
On the inside of the card, I adhered a full panel of purple cardstock. This serves as the background when the card is closed. Then I also adhered a panel of plain white cardstock behind the card to hide the glue marks. I also added same size scalloped panel on the inside to serve as a place to write a message.
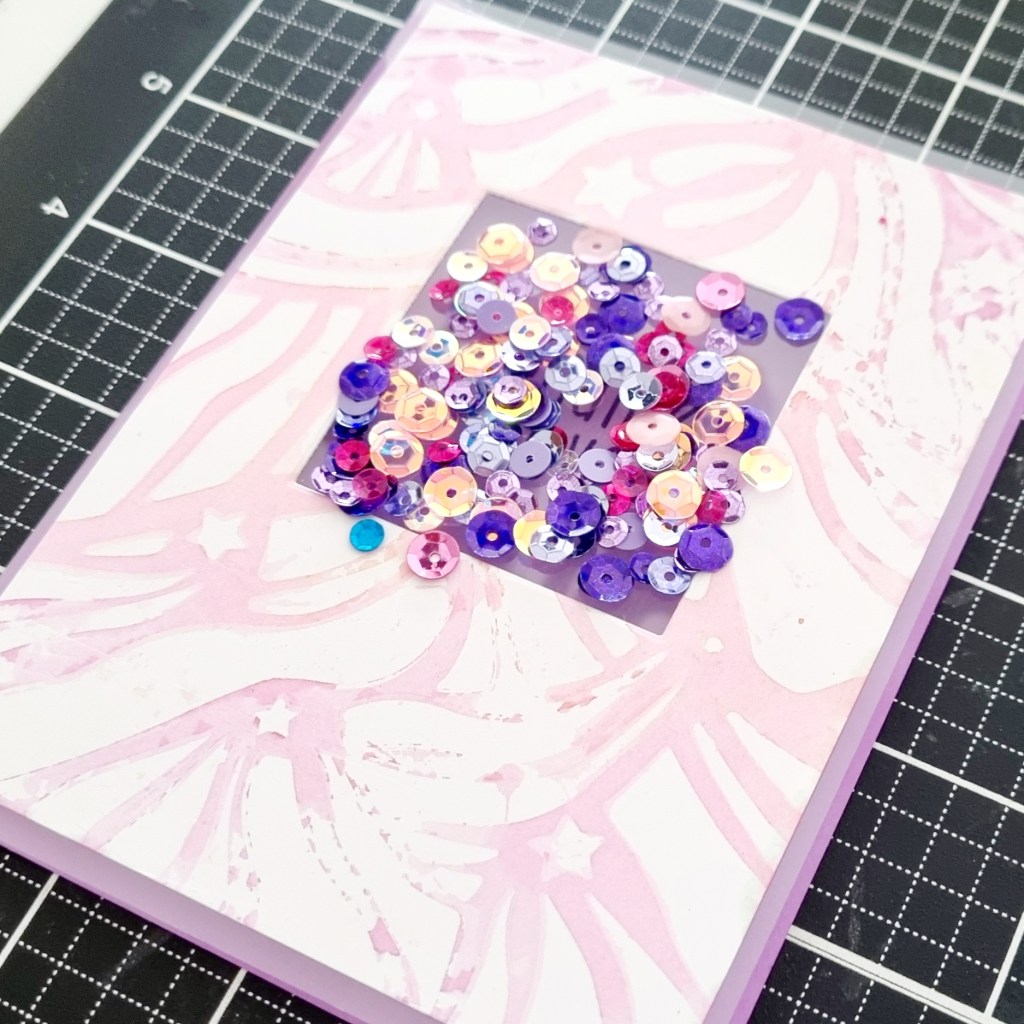
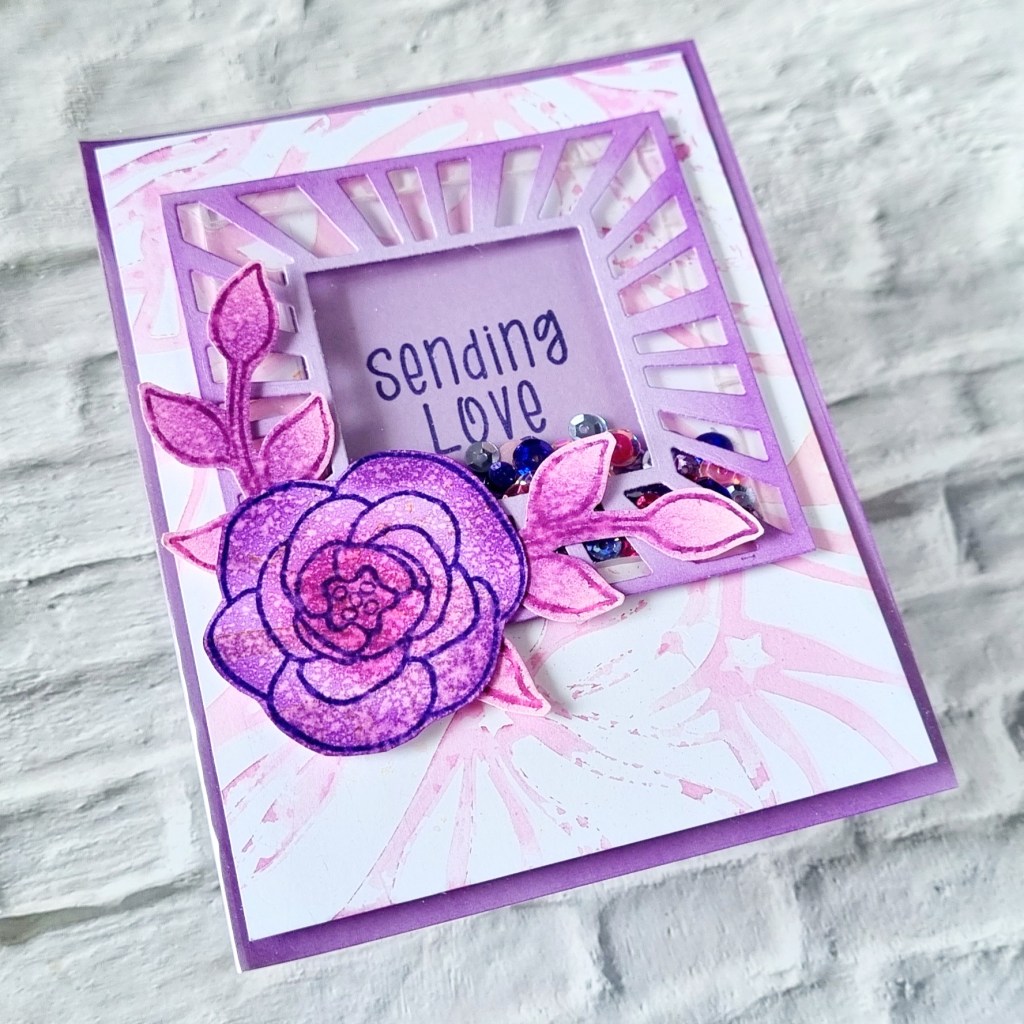
For the second card, I did it a little differently. I made a shaker card! There was some leftover ink from a previous project. I had used the Stralight Rays stencil to ink blend and before cleaning off the stencil, I spritzed it with water and placed it on top of a white cardstock panel to transfer the pattern then set it aside to use another day! And that day came!
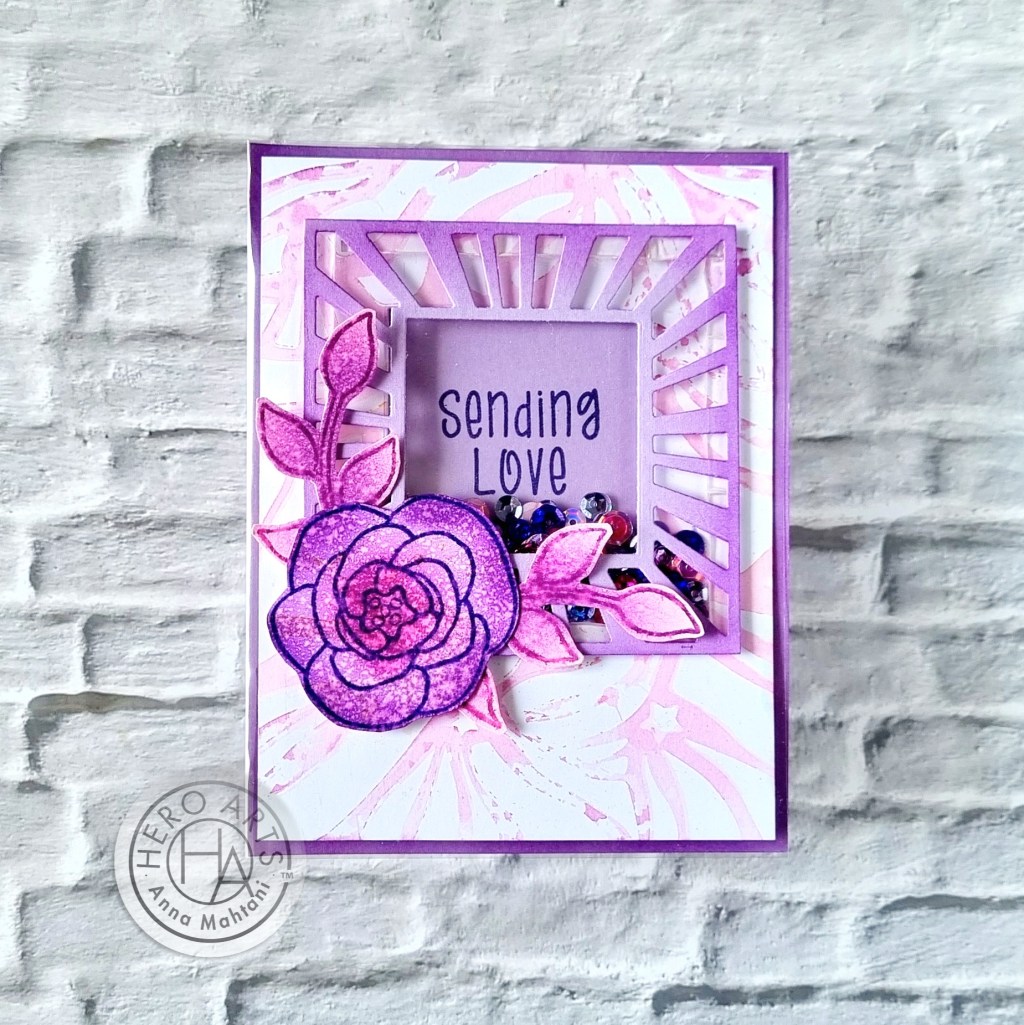
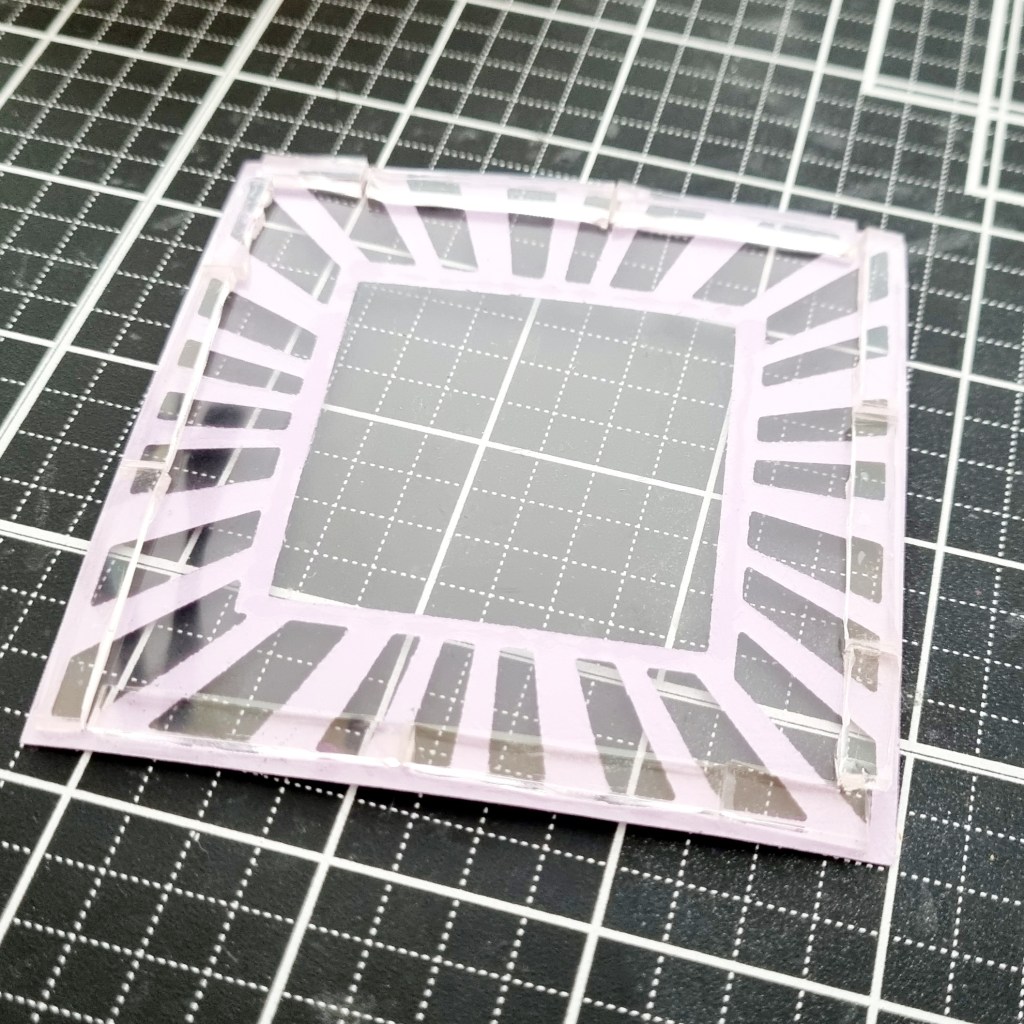
Next, I took a piece of Passion Flower Hero Hues cardstock and die cut it using the Square Set fancy die. Then I cut a little window in the middle using a small square die from the Square Infinity die set. I used the same size die to die cut the background panel. Then I ink blended the die cut piece on all sides using Purple galaxy reactive ink.
To create the shaker element, I used Nano tape. Nano tape is a clear silicone dimensional tape and I use this if I do not want it to show thruto the other side.
To assemble the shaker, I adhered the stenciled background onto a clear acetate card base. Then I place the sequins on top of the opening before adhering the die cut square piece.
I stamped the sentiment “Sending Love” and adhered it on the inside of the acetate card base but not before ink blending the sides with Purple Galaxy reactive ink.

I stamped and ink blended a flower and leaves from the Beautiful Day stamp set. I spritzed it with Shimmer Spray before fussy cutting it. Then adhered it to the bottom left corner of the window.
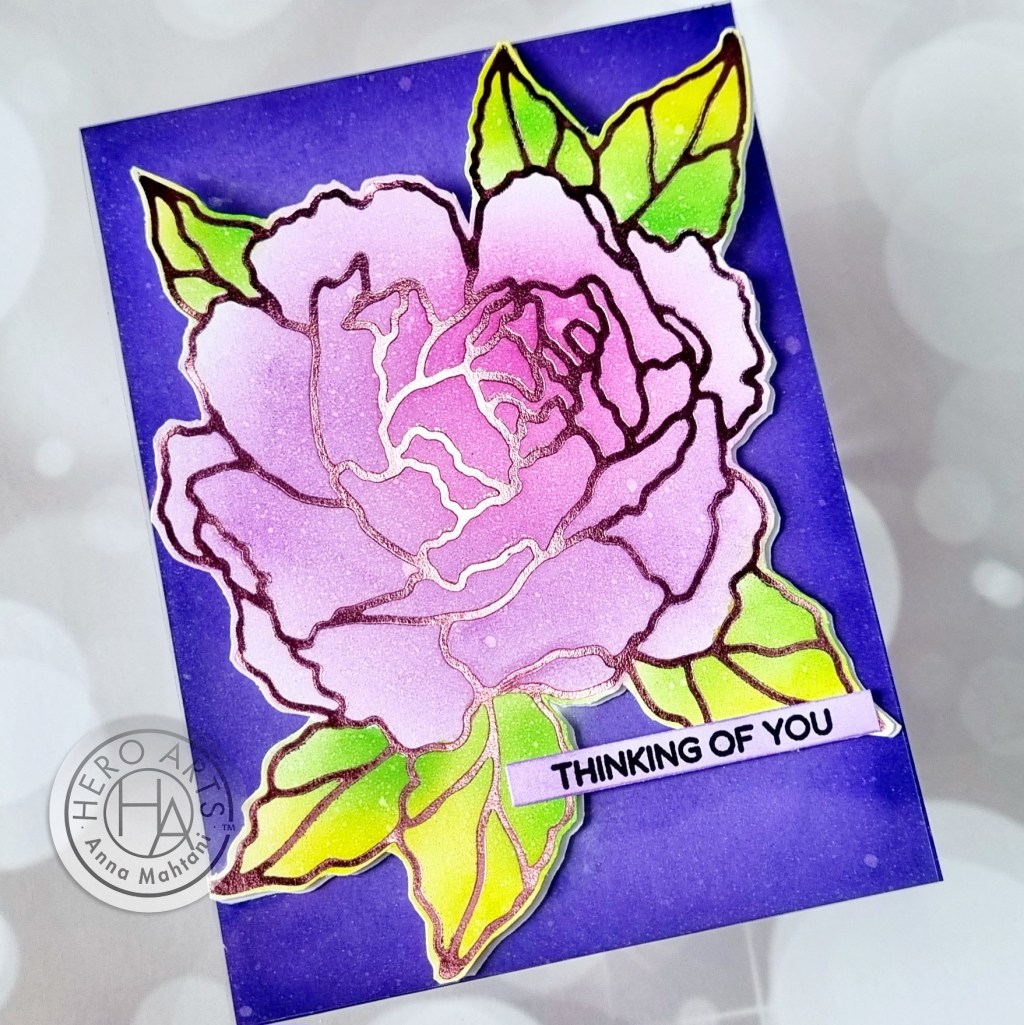
For my third card, I used the beautiful Peonies Hot Foil plate and hot foiled it on white cardstock using a pinkish foil.
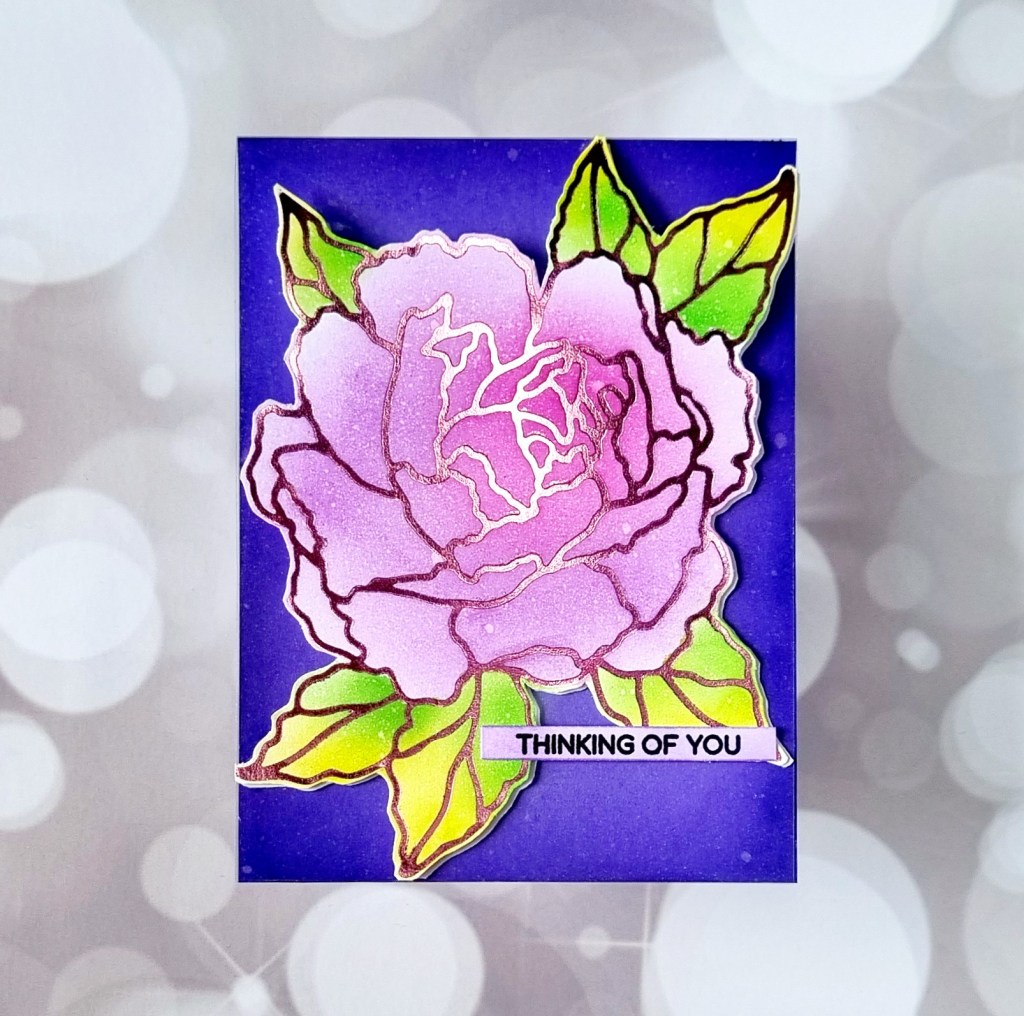
Then I ink blended the peony with reactive inks from the floral & nature mini ink palettes collection and then sprayed it lighly with a shimmer spray.

After ink blending, I placed another panel of white cardstock underneath and taped it on all sides with washi tape. Then I used sharp scissors to fussy cut it.
Then after fussy cutting, I separated the two pieces and adhered the hotfoiled Peony on top of a top-folding acetate card base. Then I added a panel of Amethyst cardstock inkblended on the sides with Purple Galaxy reactive ink.
Next, I added glue to the other plain white fussy cut piece and placed it at the back of the acetate cover aligning it exactly with the peony, closed the it on itself and the piece adhered exactly in place. This is where the message can be written on the inside.

I added the sentiment “Thinking of You” on the lowerleft side of the flower. The sentiment is from the Everyday Sentiment Strips stamp set, die cut using the Sentiment Strips die.
Hope you were inspired to add acetate to your cards! If you do create something using these cards as inspiration, do tag me on social media. I would love to see your wonderful projects!
Next on the hop is the beautiful Arjita, for more inspiration using the products from the Hero Arts Summer Catalogue! Drop me a comment below for a chance to win a $50 gift card to the Hero Arts store! You have until June 4! Let me know which of the three cards is your favorite.
Have a happy craft day!
❤️
Anna
Hop List:
Anna
Product List:


Fabulous cards, Anna!
LikeLike
Stunning cards Anna! They are all beautiful – I really love the shaker element on the second, the first card looks amazing with how you have layered the stencilled panel and of course what’s not to love about a foiled floral image. Beautiful!
LikeLike
Love them all ! Anna ! Great use of the acetate !
LikeLike
These are stunning! I LOVE the shine and foiling! Gorgeous colors!
LikeLike
I have never made a card with an acetate base. Thanks for the great instructions as well as the shaker card. I’m going to try that. Many new things to try. Thank you!
LikeLike
I love your colors and always go for a shaker card! Perfect!
LikeLike
I love using acetate on cards! I especially like matching the shape on the peony card to the inside message area. You’ve inspired new card ideas in me. Thanks!
LikeLike
Acetate for cards is new to me! Thank you for sharing your lovely creations!
LikeLike
Great cards. I was especially intrigued with the cards created on acetate.
LikeLike
Beautiful cards Anna!!! I loved that your card bases were acetate…..TFS
LikeLike
Love the look of the acetate bases! Such beautiful designs for your cards! I love all of the pretty flowers!
LikeLike
Beautiful cards Anna. what lovely use of acetate in cards<3
LikeLike
Wonderful cards and so much fun! Look like acetate is something to try for a different look and fun for the recipient!
LikeLike
Such gorgeous cards! Love the awesome colors.
LikeLike
wow – your cards are stunning – so original!!!!
LikeLike
Great cards. I love the bright colors and your use of acetate!
LikeLike
These cards are all gorgeous! Love the ideas for using acetate, and your color palette is delightful! Those purples, pinks and greens are all so pretty together.
LikeLike
Beautiful cards! I especially love the card using the Summer Blooms stencil.
LikeLike
Beautiful cards! Love how you use acetate for cards! Thanks for sharing!
LikeLike
Such pretty soft colors and great use of acetate!
LikeLike
Pretty colors and I like the use of acetate and the foiling.
LikeLike
oh my, I can’t pick just one. Love alll of these. And have never heard of Nano tape – will definitely be checking into that!
LikeLike
Such gorgeous cards! I really love how you used the acetate and the colours on the first card are spectacular!
LikeLike