Hello crafty friends! I usually post a video every month featuring the latest Hero Arts My Monthly Hero kit but so many things happened beyond my control and i couldn’t find the time so it’s back to the old school blog post! The Global Team is hosting a hop over in Instagram and details of the hop is at the end of my blog post.
This month’s kit is all about butterflies! And the big surprise is that Hero Arts is launching a premium kit which is basically additional crafty goodies in the classic my monthly hero kit. See photo below.

Kit Contents: (Premium kit inclusions highlighted in bold)
• Clear Stamp Set, 3″ x 4″
• Butterfly Window Fancy Die
• 9 Butterfly Fancy Dies with 9 Frame Cuts
• 4 Color Layering Stencils, 5.25″ x 6.5″
• Butterfly Garden Palette Reactive Ink Pad
• Small Ink Blending Brush
• 4 Sheets of Butterfly Hero Transfers, 6″ x 8″
• Fuchsia & Gold Luster Duo Spray
• 1 Sheet each of Stardream Coral, Azalea, Lagoon, and Amethyst, 5.5″ x 8.5″
• 2 Sheets each of Iris and Mustard Cardstock, 5.5″ x 8.5″
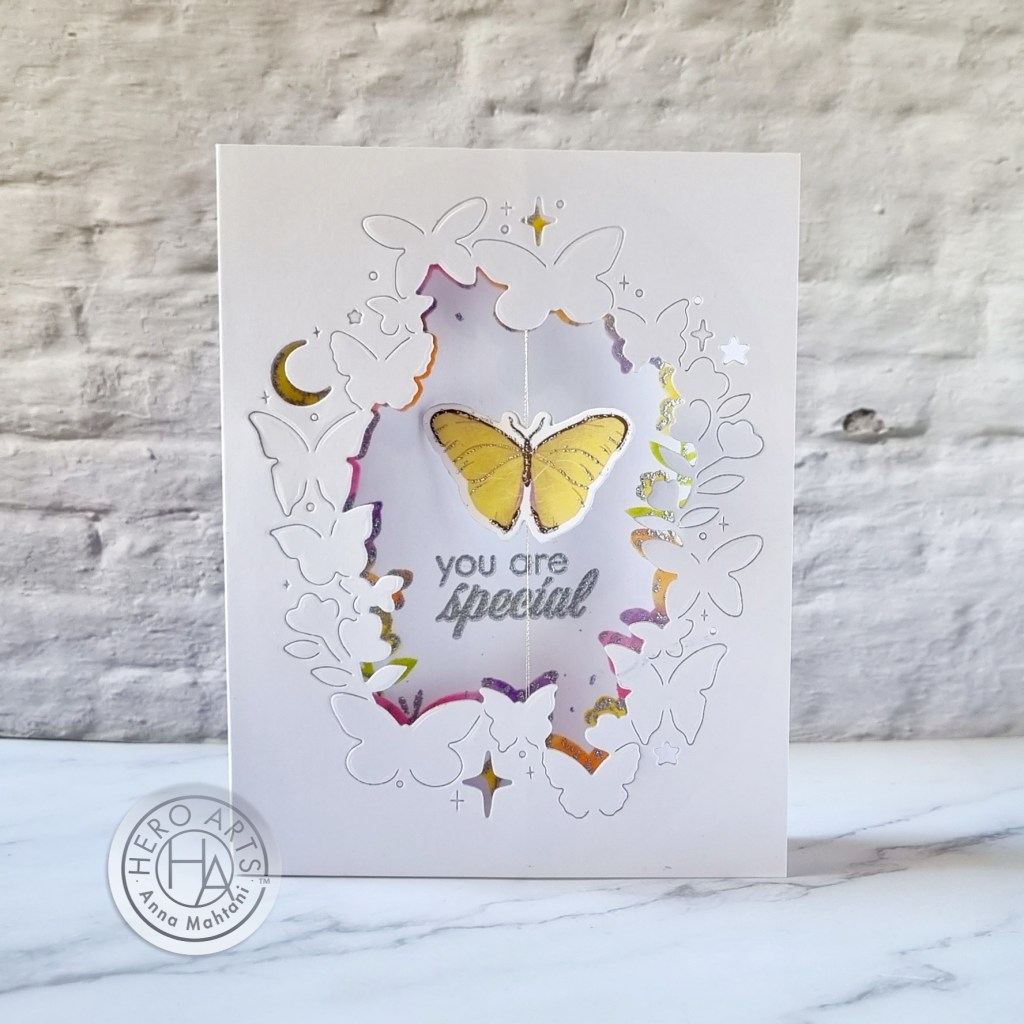
The butterflies in this month’s kit were just screaming “MAKE ME INTO A SPINNER CARD!”. I have never made a spinner card before and decided it was time to make one. I’ve watched tutorials on this technique but I wanted to try it on my own to see if I could do it. My take on this is a tri-fold spinner card!

I have a video linked below you can watch for an up close look at the kit and step-by-step instructions on how to create this card.
First, I used the butterfly window fancy die that came in the classic kit and die cut the front of an A2 size side-folding card base. Then I took another side folding card base and using the 4-pc stencil set, also from the classic kit and stenciled in the design. I made sure to stencil it with the side fold opening on the left. I used the colors in the Butterfly Garden palette reactive ink pad. Stencil #1 colors in the butterflies, I used alternating colors of Thistle, Creamsicle and Taffy. I skipped stencil # 2 and went to stencil #3 to color in the little flowers, leaves, moon and stars using Lemon Drop and Key Lime Fizz. To add sparkly details, I went back to stencil # 2 and used embossing ink to dab into the little openings in the stencil. Then I sprinkled Silver Sparkle embossing powder and heat set it. I did the same with Stencil #4, which was for the details of the flowers, moon and stars.
There is a technique on how to align the design to the die cut opening. It’s a bit difficult to explain without showing it but basically, lay out the area to be stenciled behind the cut out window, then put the stencil on top and align it. Tape the stencil down, then slowly remove the die-cut window, being careful not to move the panel underneath. Et voila! Almost perfectly aligned! I promise, when I get a chance I will make a video on this!

To make the spinner element, I took the Butterfly transfer sheets and chose two butterflies that had the exact same shape & size. The butterflies in this kit were perfect for spinner cards as they are symmetrical. I chose the blue and yellow one, so when it spins, the colors of the butterfly changes. I transfered them onto plain white cardstock using the popsicle stick that came with it. Then die-cut it out using the coordinating die from the butterfly fancy die in the premium kit.
I took some thin silver embroidery thread from my stash, doubled it up and adhered it vertically at the back of one the butterflies and placed a bead of glue before putting down the washi tape. Then I glued the other butterfly on top.
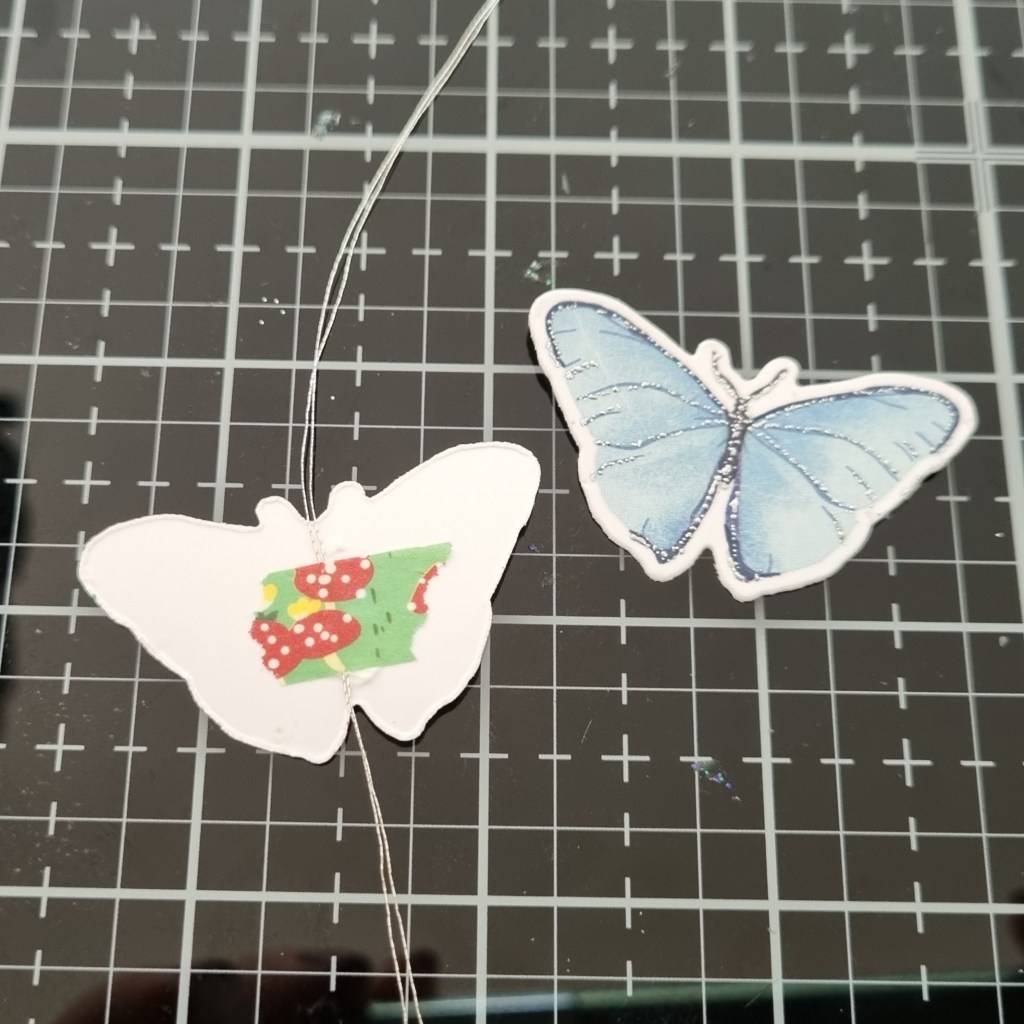
At the back of the window cut out, I adhered the string vertically using lots of glue before secruing it down with washi tape. This is to ensure the string will not move. I used the grid of the glass mat to make sure it was aligned straight down. Then I used anothe die cut window panel and adhered that on top to hide the mechanism.

I trimmed off the excess thread hanging of the top and bottom, then glued the two side folding panels together to create a tri-fold card.
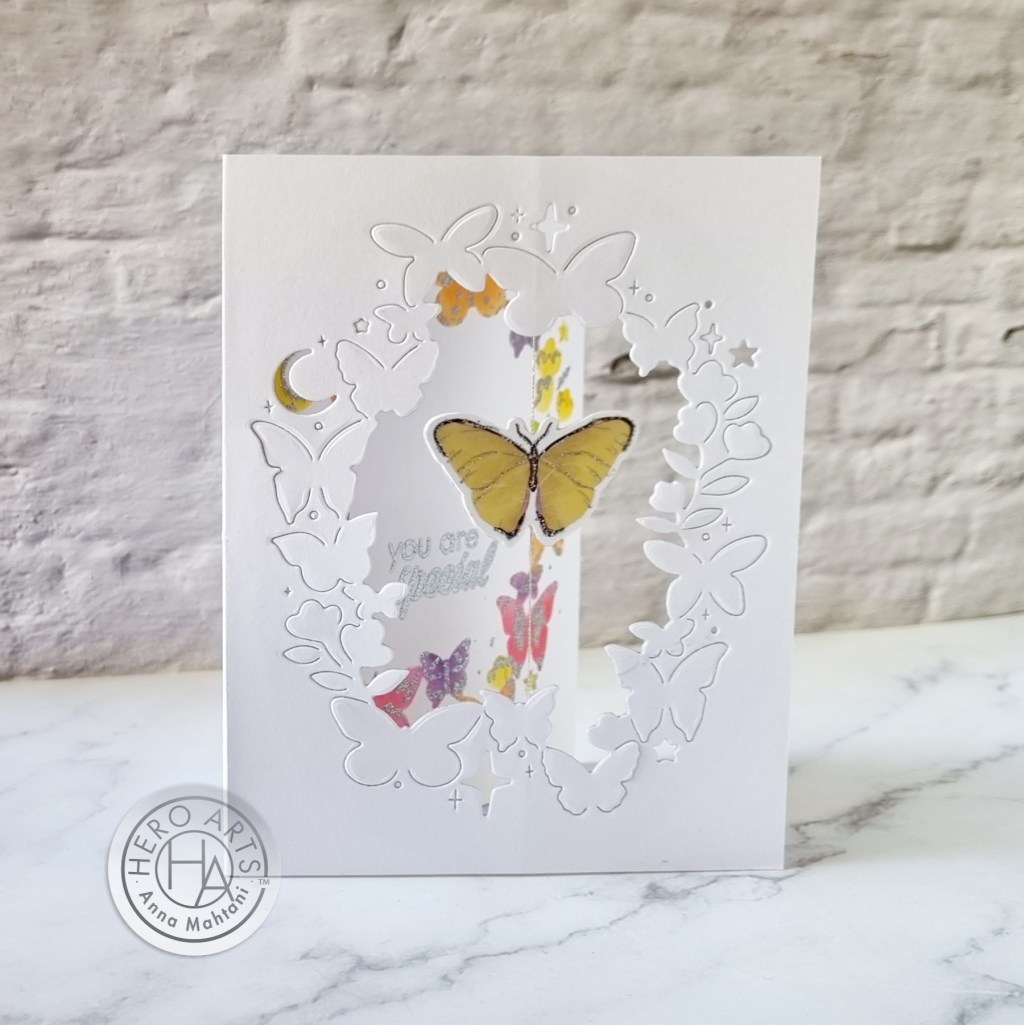
Before assembling the card, I heat embossed the sentiment “YOU ARE SPECIAL” from the classic kit with the Silver Sparkle embossing powder.
To test the mechanism, I twisted the butterfly several times in one direction, then let go, The butterfly spun around and it was so satisfying to look at!

I forgot to mention that I added little embossed silver sparkles on the butterflies using a fine tip embossing pen. It’s a bit hard to see in the photos but it’s there!
I hope you were inspired to try making a spinner card. It’s super easy and so much fun!
The Hero Arts Global Design team is hopping on Instagram today, sharing inspiration for our December product release. We have a $25 voucher to Hero Arts to give away to one lucky winner!The giveaway will close March 6th, 2023. Winner will be notified by IG message. So be sure to drop by my Instagram to start hopping with us!
Unfortunately, the Premium and Classic kit are sold out but if you do have one, I hope you try this technique out. You can also use this as inspiration for the supplies you may already have.
Have a wonderful crafty day!
’til next time!
❤️
Anna
Thank you for visiting my blog. You can also find me on Instagram, YouTube, Pinterest and Facebook.
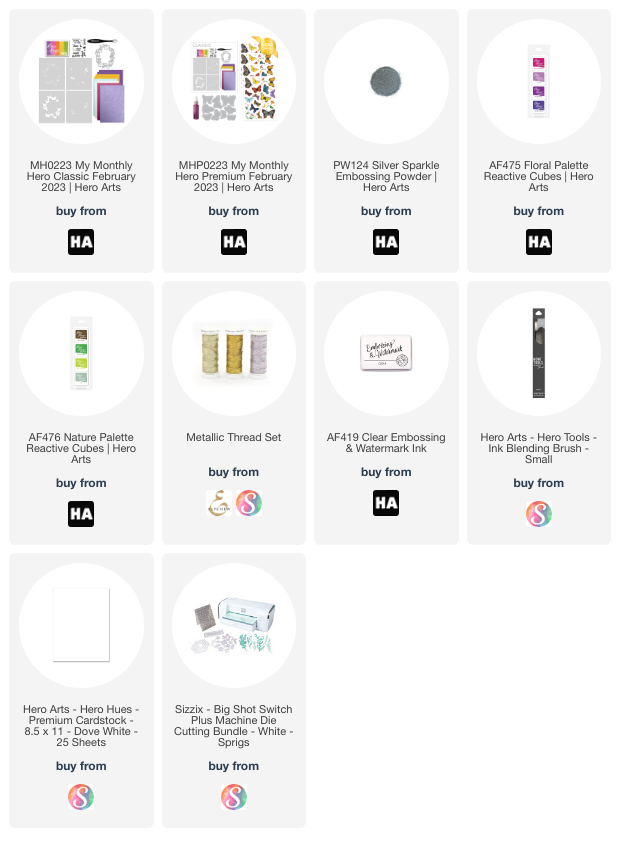
Product List: