Hello! Scrappy Tails Crafts just launched their holiday release called “Candlelight Christmas”. One of the main products from their new release is a Lantern Pop-up Die. The moment I saw this lantern die, I knew at once that this is a must-have! The lantern comes with so many Christmas themed add-ons that it will be so difficult to choose a favorite!
My project today is to show you how we can use the lantern and the christmas add-ons for non-christmas projects. I was so inspired with the versatility of these dies!
As some of you may know, I am part of a multi-cultural family. My husband is from India and we recently celebrate Diwali – the Festival of Lights – with his family. I created this hanging lantern specially for this occasion.

I rummaged through my stash of pattern paper and found this colorful one that would be perfect for the vibrant colors of Diwali.
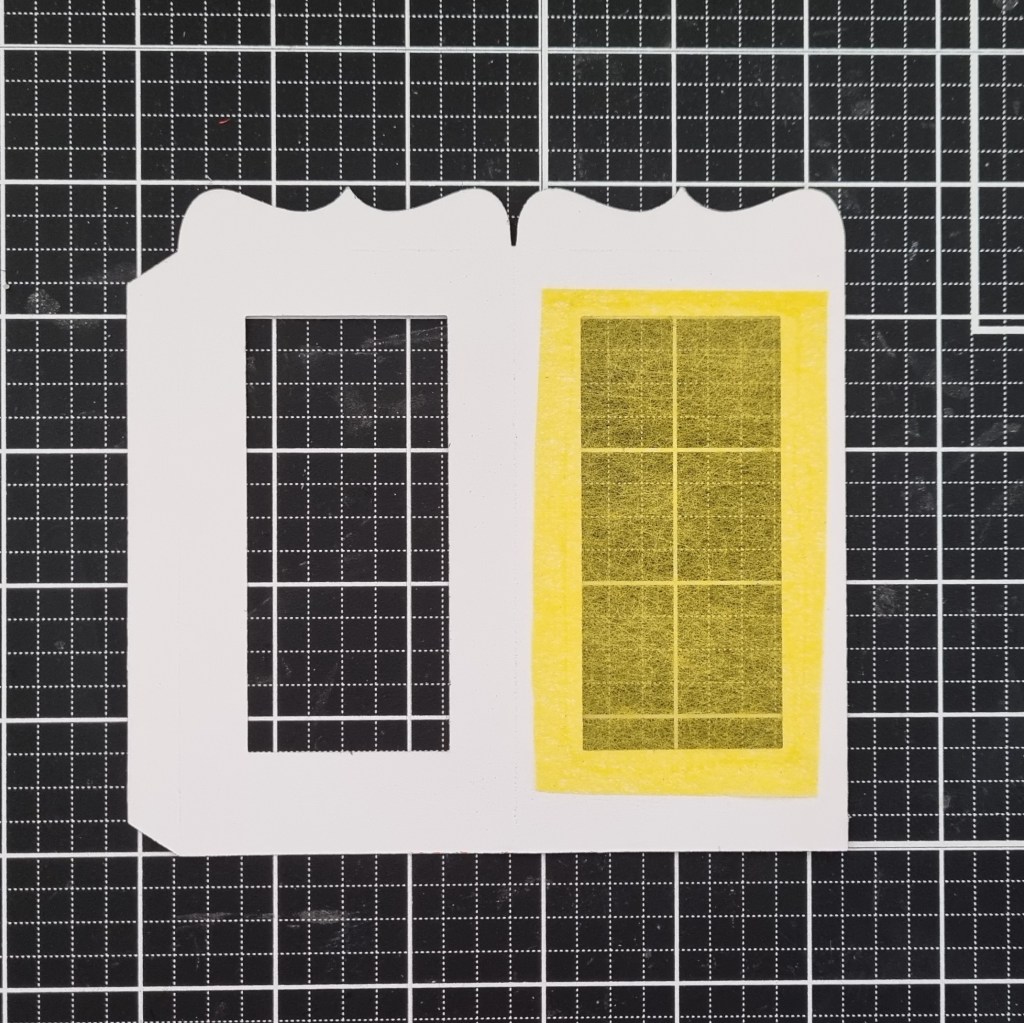
I die cut 2 pieces for the main body of the lantern. Then I added a yellow tissue at the back of each opening. This will allow light to show thru just in case I wanted to add mini string lights or fairy lights.
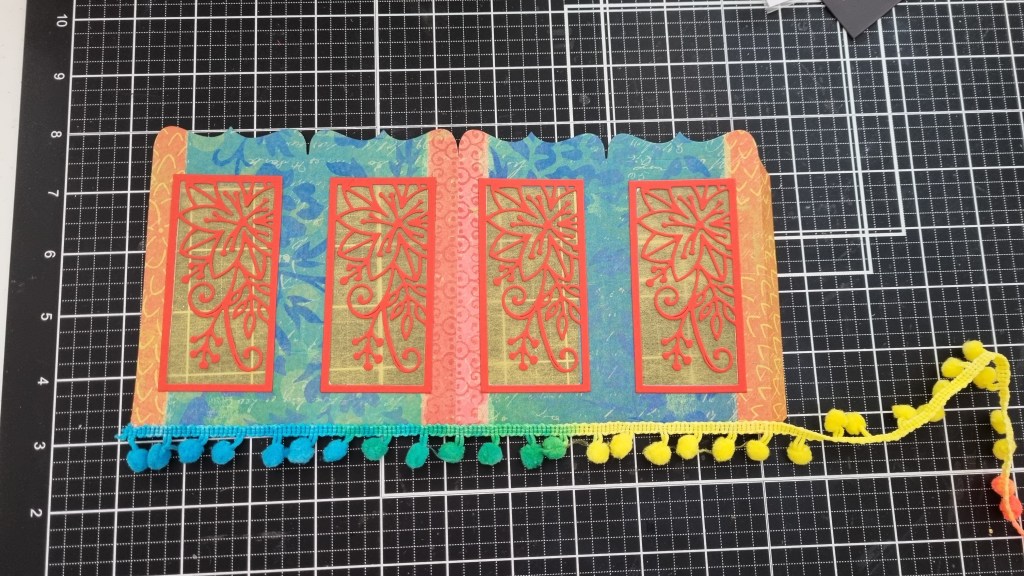
Then I die cut one of the three window designs from the A7 Pop Up Foliage Panel die set out of red orange cardstock. I took some laminating film, which has a nice frosted look and glued it to the back of the die cuts, trimming off the excess on all sides. I then adhered it to each window.


Then I adhered the panels together, lining it up on the tabs located on one side. Then i took some colorful pompom ribbon trim from my stash and adhered it to the bottom edge of the panels. Then added glue to the end tab to close it.
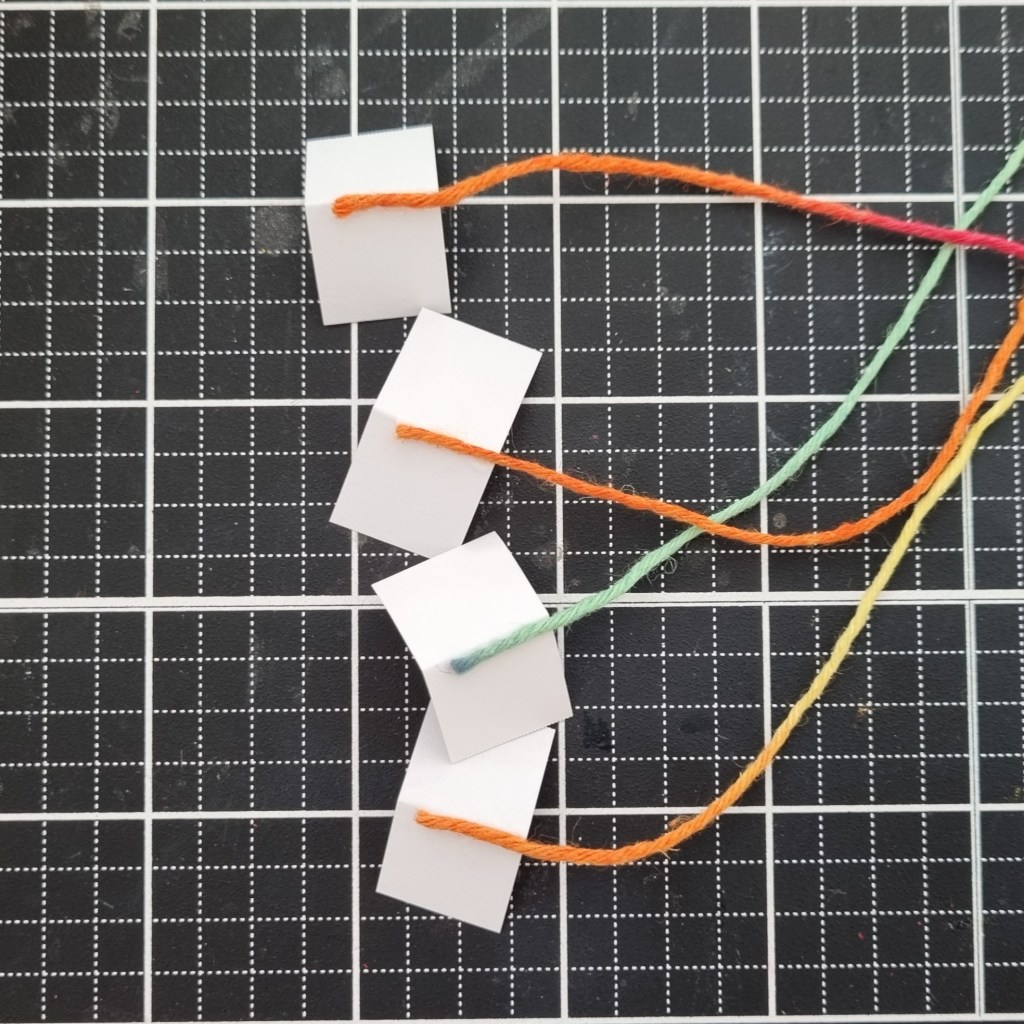
For attach the hanging the string that will become the hanging element, I cut four pieces of twine that are 12″ long. You can cut longer pieces as you require. Then I took pieces small pieces of paper cut to about 3/4″ square, folded it in half and glued the ends of the twine to the middle of the fold.
Next, I added the small tabs to the inner corners of the top of the lantern, with a generous amount of glue to make sure it will not break. The lantern is very light weight so it’s really not an issue but I just wanted it to be extra secure.
Then I gathered the strings together at the middle and tied a knot. To finish it off, I added a few beads above the knot.

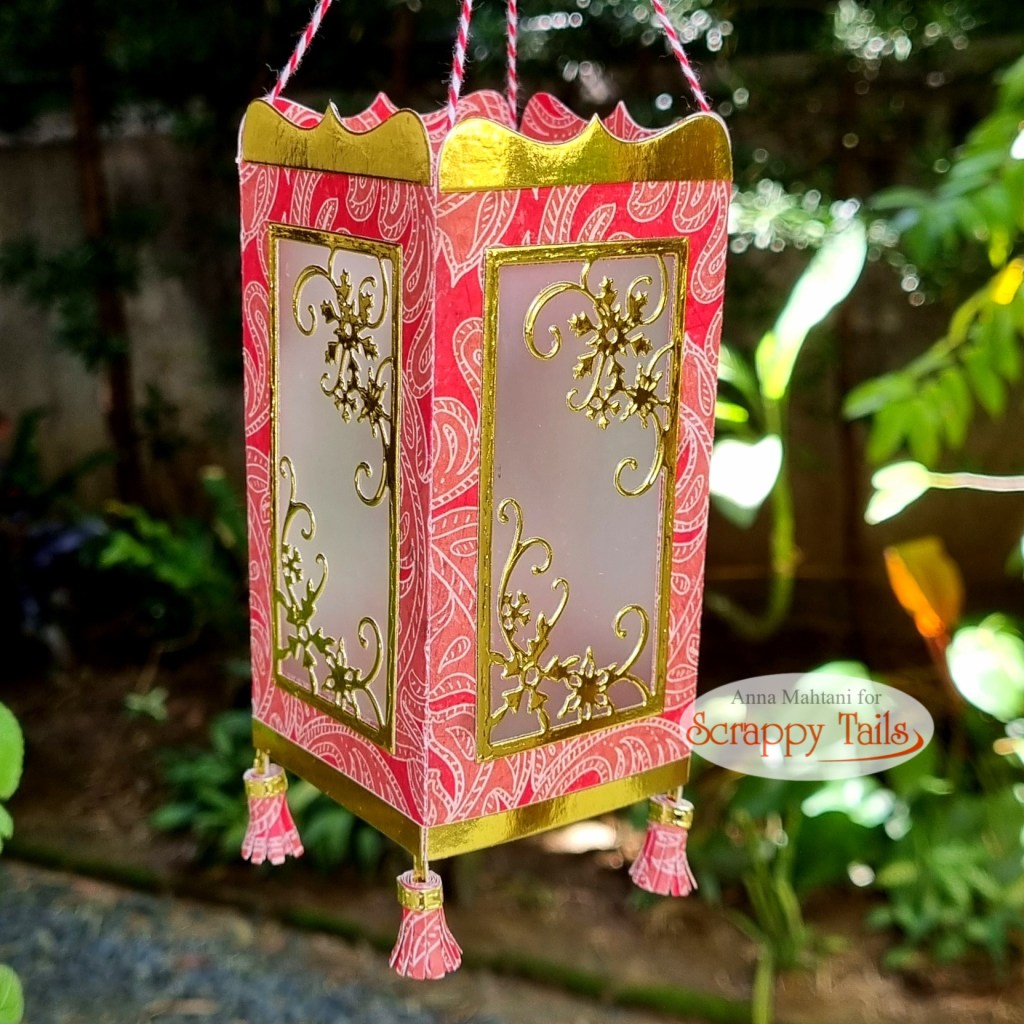
I had so much fun making these lanterns, that I created another one but this time with a more elegant look.

With this lantern, I didn’t use the tissue behind the openings. I opted to just use the laminating sheet. I just love the look of the laminating sheet as opposed to vellum, as it adds more stability to the lantern. I also used another window die set, this time from the A7 Pop Up Snowflake Panel dies, die cut with gold mirror cardstock. I also die cut the upper part of the lantern in gold mirror and cut it to fit. I added a 1/4″ gold trim to the bottom as well.
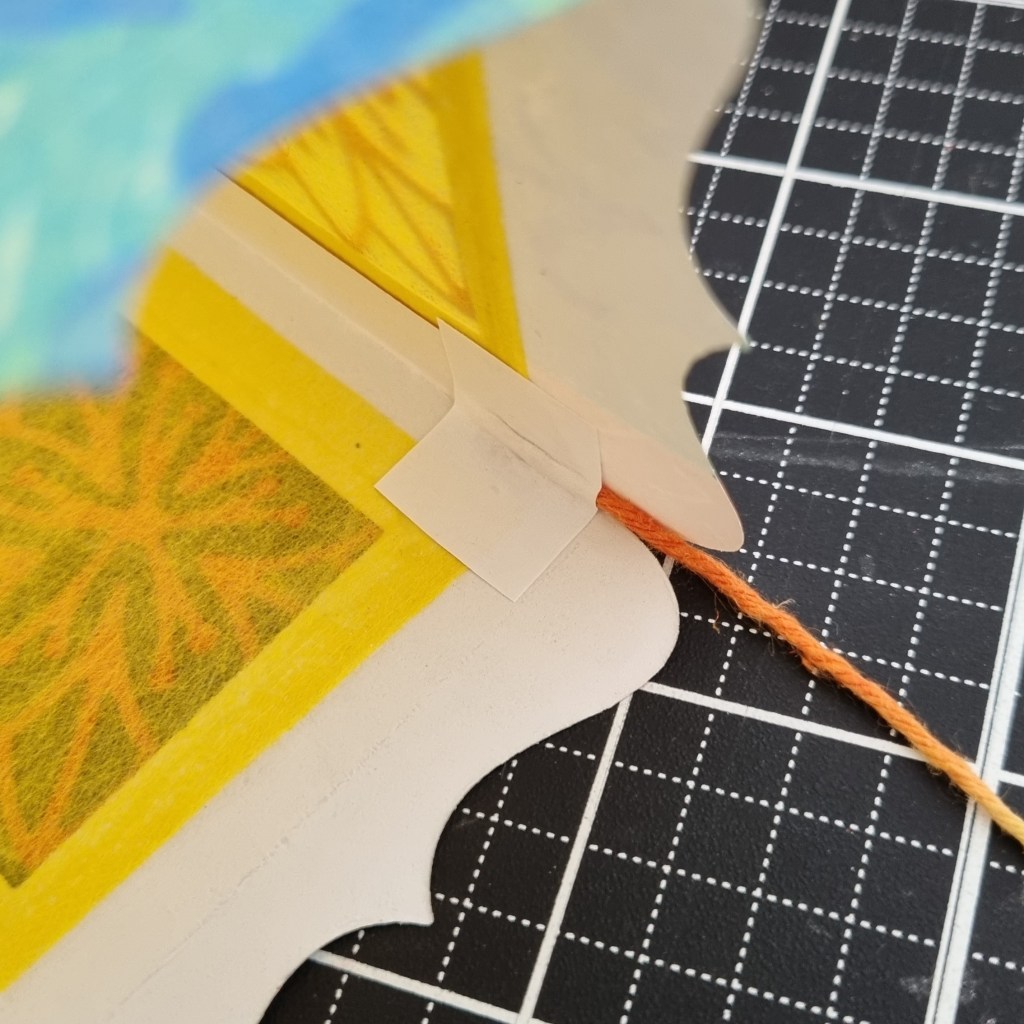
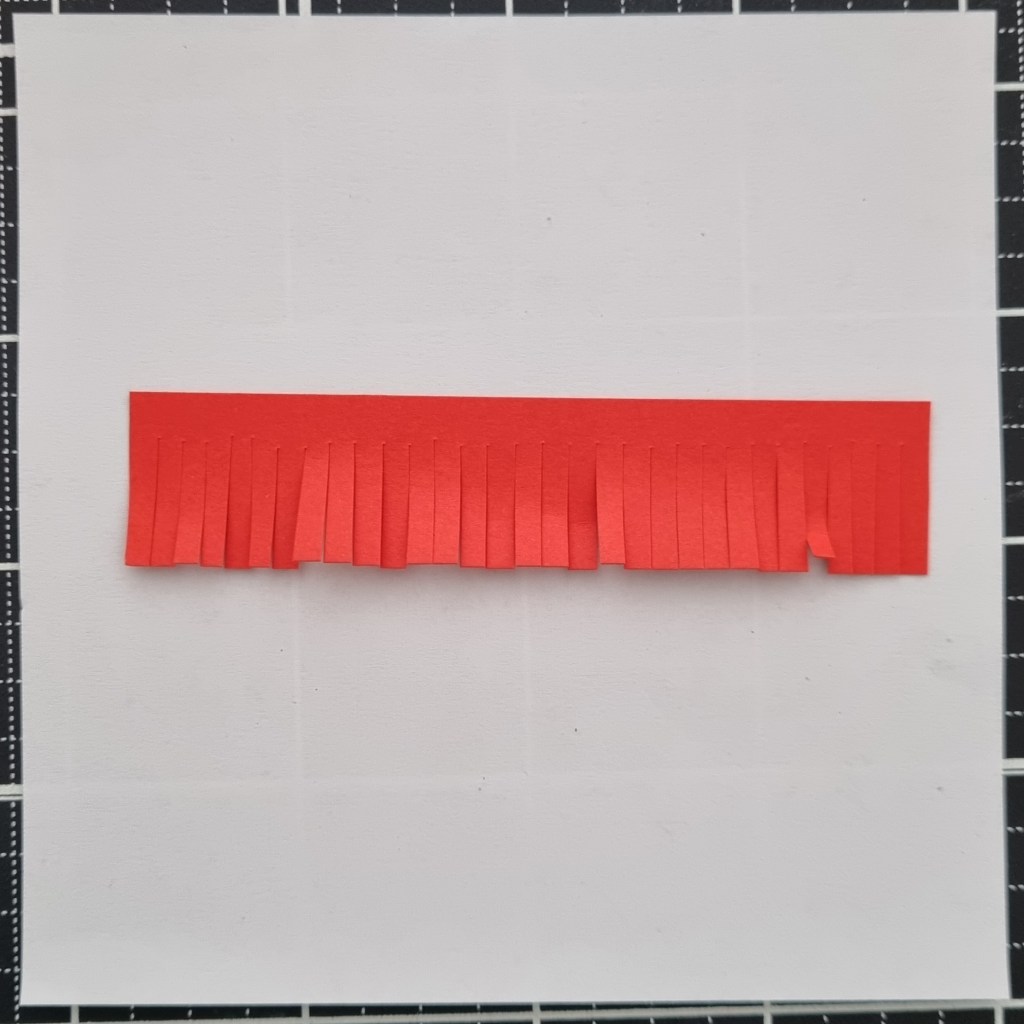
For the tassles, I used a piece of the cardstock left over from the window and cut it into half inch strips. Then with my scissors, I cut the fringes about 3/4″ of the way up. I rolled it up then added a 1/8″ gold band around the top of each tassle to secure it. I then adhered the paper tassle to the bottom corners of the lantern with thin strips of gold cardstock.

I just love the versatility of these lantern dies. Even if the add-ons were specifically designed for Christmas, just by changing the pattern paper and the color theme, it could be for any occasion! Imagine using bright colors and adding a tissue paper fringe all around the bottom that could be for a Mexican themed party! The possibilities are endless!
I hope you were inspired to create these lanterns. If you would like to add these lantern dies to your stash, you can find them here on the Scrappy Tails website or you can click on the product links below.
Oh and I almost forgot! The Scrappy Tails design team is having an Instagram hop for this new release. Come join in the fun and you can have a chance to two $25 gift cards to the Scrappy tails shop. You can find the hop link here.
Have a wonderful and crafty day!
’til next time!
❤️
Anna
Product List: