

I have tons of alpha dies and I am constantly looking for inspiration on how to use them on my cards. The Altenew Academy Easy as ABC is just the perfect class for this! I wanted to make some personalized tags to send with happy mail so I thought this would be the best time to break out my alpha dies and make a few tags. I drew some inspiration from the class and added my own twist to it!
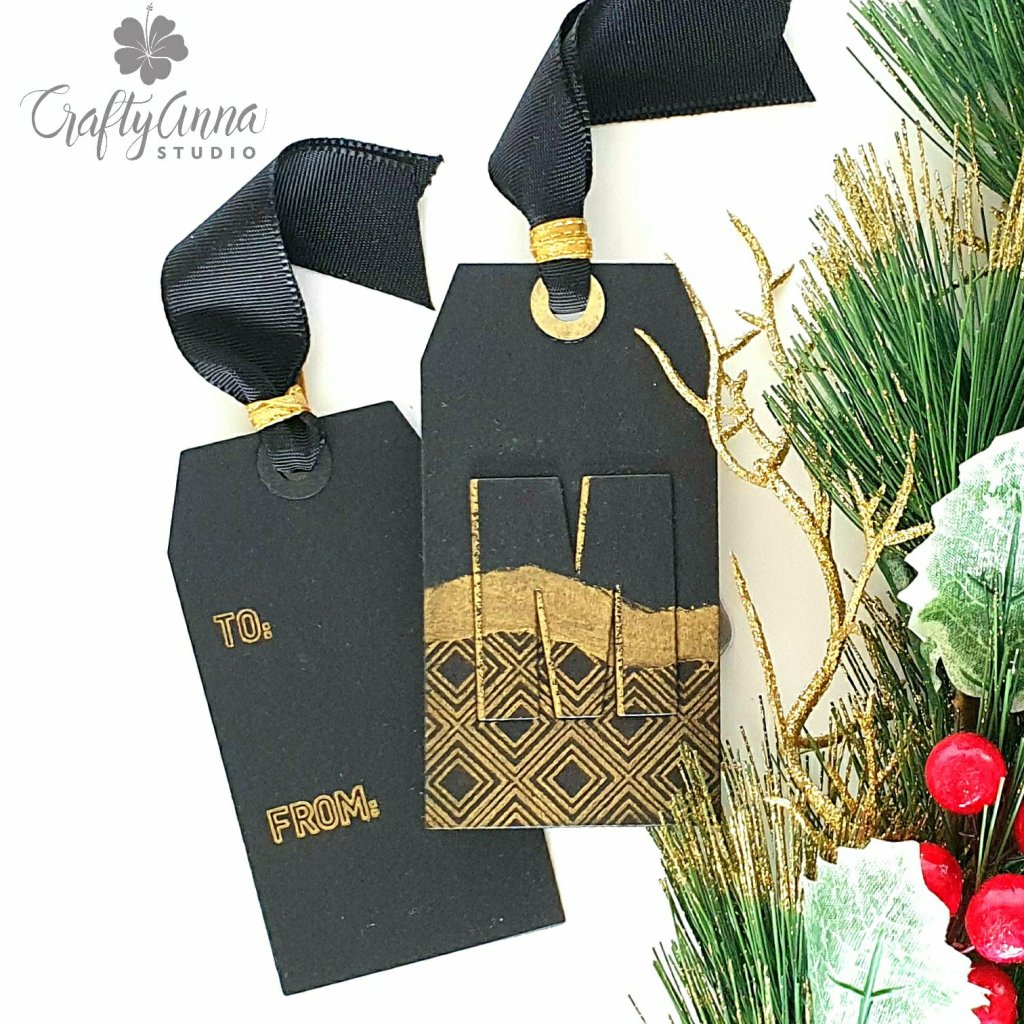
To create these tags, I first cut 2.5″ strips from a 8.5″X11″ piece of black cardstock with the long side facing up on my paper trimmer. I used an old tag die I had from Sizzix. Altenew has a versatile tag die called Terrific tags but I did not have it yet. I ordered it but I’m still waiting for it to arrive. With one sheet of 8.5″x11″, I was able to make 6 tags. I used 2 sheets and made 12 tags in total because each tag would be adhered back to back.
For the first set of 6 tags, I stamped “To & From” from the Holiday Sentiments Tag set using gold pigment ink . This will be the back of the tag.

For the second set of 6 tags, I used the Shine Like a Diamond background stamp set as the main design element.
I took a piece of painters tape and tore it on the long side. I made sure to tear it as unevenly as possible. If you don’t have painters tape, you can do the same with masking paper or a wide washi tape. I made sure I kept both sides of the torn tape.
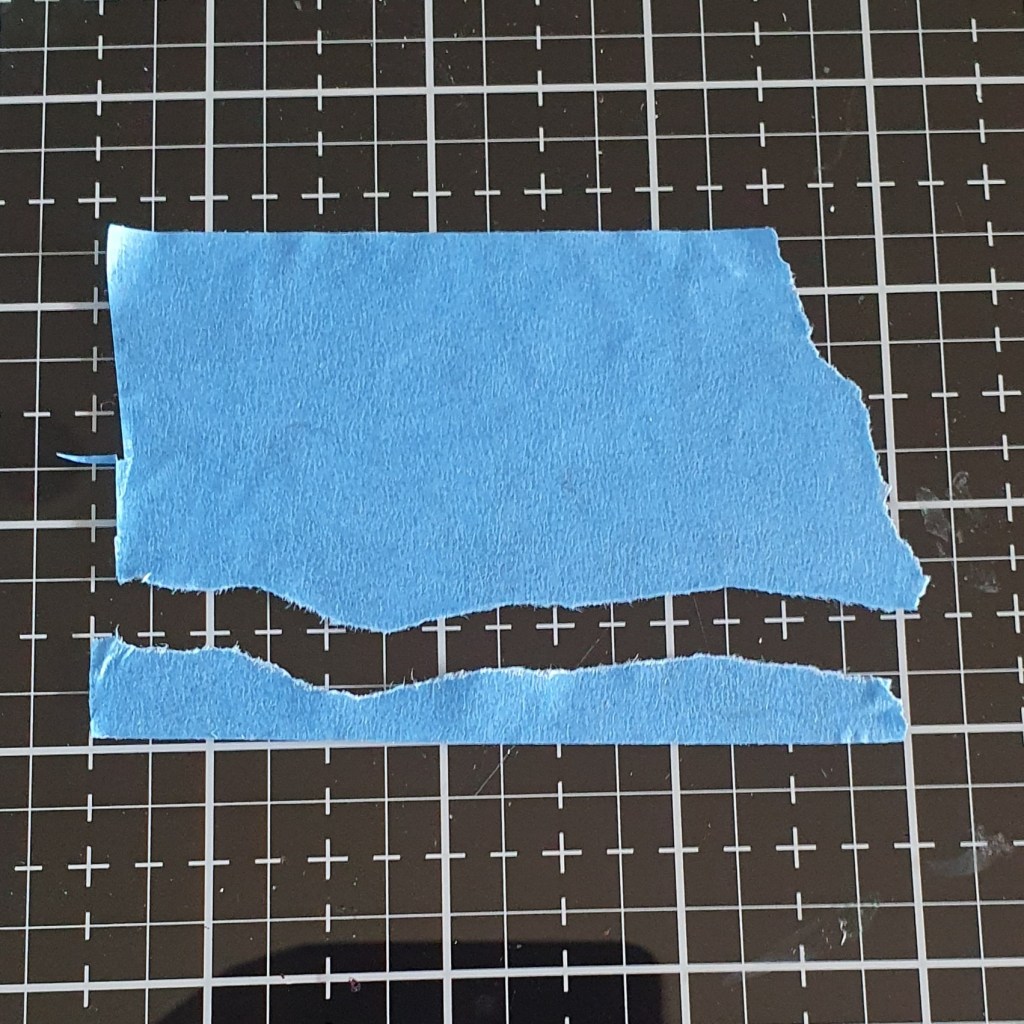
First I mounted the Shine Like a Diamond background stamp onto my Misti stamping platform. Then I took the tag and placed it on the Misti and placed the torn painters tape across the tag about a little less than half way. I inked up my stamp and stamped it onto the tag.

I peeled off the tape on one side, took the tag out and placed another in the exact same place and stamped it. Doing it this way saved me a lot of time.
After I finished stamping all 6 tags, I took the first tag I had stamped and placed it back in the Misti. I took the other part of the torn painters tape and used it to mask the upper part of the stamped design. Then I placed the other part of the tape about a 1/2″ above. I swiped the gold ink pad across the gap until it was covered in gold pigment ink. I peeled off one side of the masks and then laid the next tag and proceeded to do the same.

If you want an even quicker way to create a similar look, you can do what I did to the last tag as a sort of experiment, by just swiping the ink pad in an upward motion. It has a similar effect as shown as a comparison in the photo below.

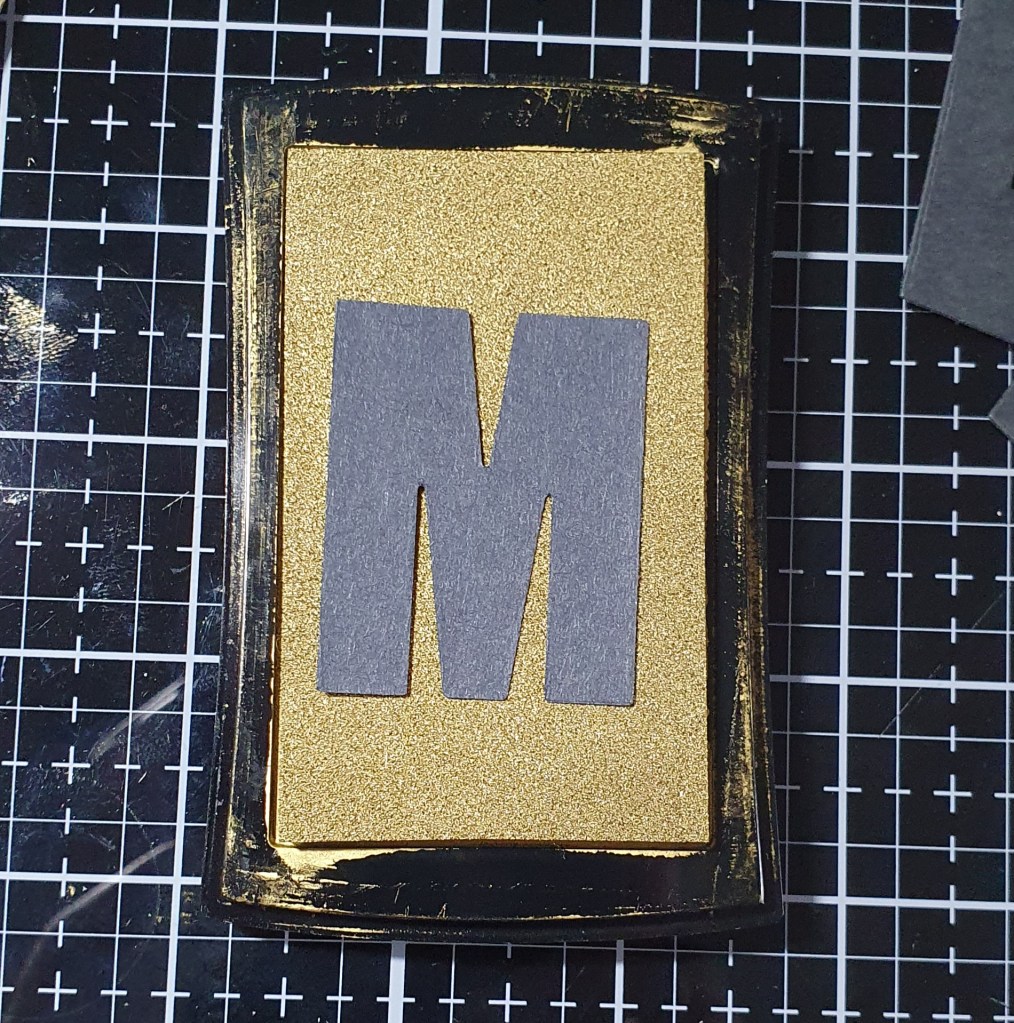
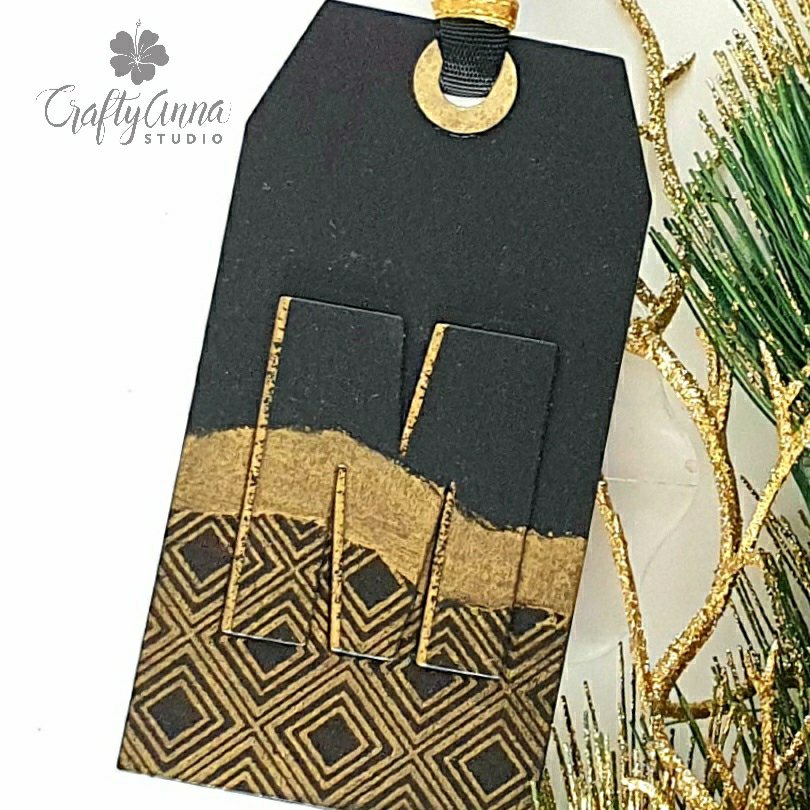
For the initials, I used the Caps Bold Alphabet Die set. I just love this alpha die set as its perfect for projects like this! I die cut the letter M somewhere in the middle of the stamped image on the tag.

I also die cut three additional M’s from black cardstock to use as a backing to add dimension. I adhered all three additonal M’s together. After adhering them together, I placed it on top of the gold ink pad and pressed it down onto the ink pad surface using the eraser end of my pencil until it was all covered in gold ink. This is what I will use as the shadow of the letter.
Before I adhered the letter M to the tag, I took the other tag with the To & From and glued it on the back. Then I took the gold covered letter M and adhered it onto the tag. Then glued the top layer design offsetting it a little.

To finish off my tag, I used a reinforcer punch to create an added decorative element to the tag holes. I used a 3/4″ thick black grossgrain ribbon secured with a 1/8″ width of gold ribbon.
I had so much fun making these tags that I am eager to make more. If you would like to learn creative ways of using your alpha dies, I encourage you to check out the Easy as ABC class over at the Altenew Academy.
Hope this inspired you to make your own personalized tags!
‘Til next time!
❤️
Anna
Thank you for visiting my blog. I truly appreciate it! You can also find me on Instagram, YouTube, Pinterest and Facebook.

Suggested materials:
Note: I am affiliated with some online stores including Altenew, Concord & 9th, Hero Arts, Brutus Monroe and Trinity Stamps. If you use any of the links above, I get a small commission from these wonderful shops at no extra cost to you. Thank you for your support!

Another fabulous tag! I really must CASE this design!
Hugz,
Chana Malkah
LikeLiked by 1 person
Thank you Chana! I would love to see your take on it ! 💕
LikeLike
What a great idea! Thanks for sharing!
LikeLiked by 1 person
Thank you! 💕
LikeLiked by 1 person
WOW!! I can’t get over how unique looking this tag is! You have really stepped up your crafting in Level 3 Anna! So proud of you!! Did you see your card/tutorial feature in the AECP member newsletter?
LikeLiked by 1 person
Hi Erum! Thank you so much!! 💕 I didnt get to see it — will look out for it!
LikeLike