

The Altenew Academy AECP Masking Unleashed series of lessons is truly inspirational! I learned so many new techniques using different masking mediums. This technique I am showing you today is a technique using masking fluid to create interesting elements for your projects.
Masking fluid is usually used in watercoloring – to mask out elements that you don’t want paint to go on. It is liquid when you apply it but it soon hardens into a rubbery coating, thereby resisting water.
Here is the card I created:

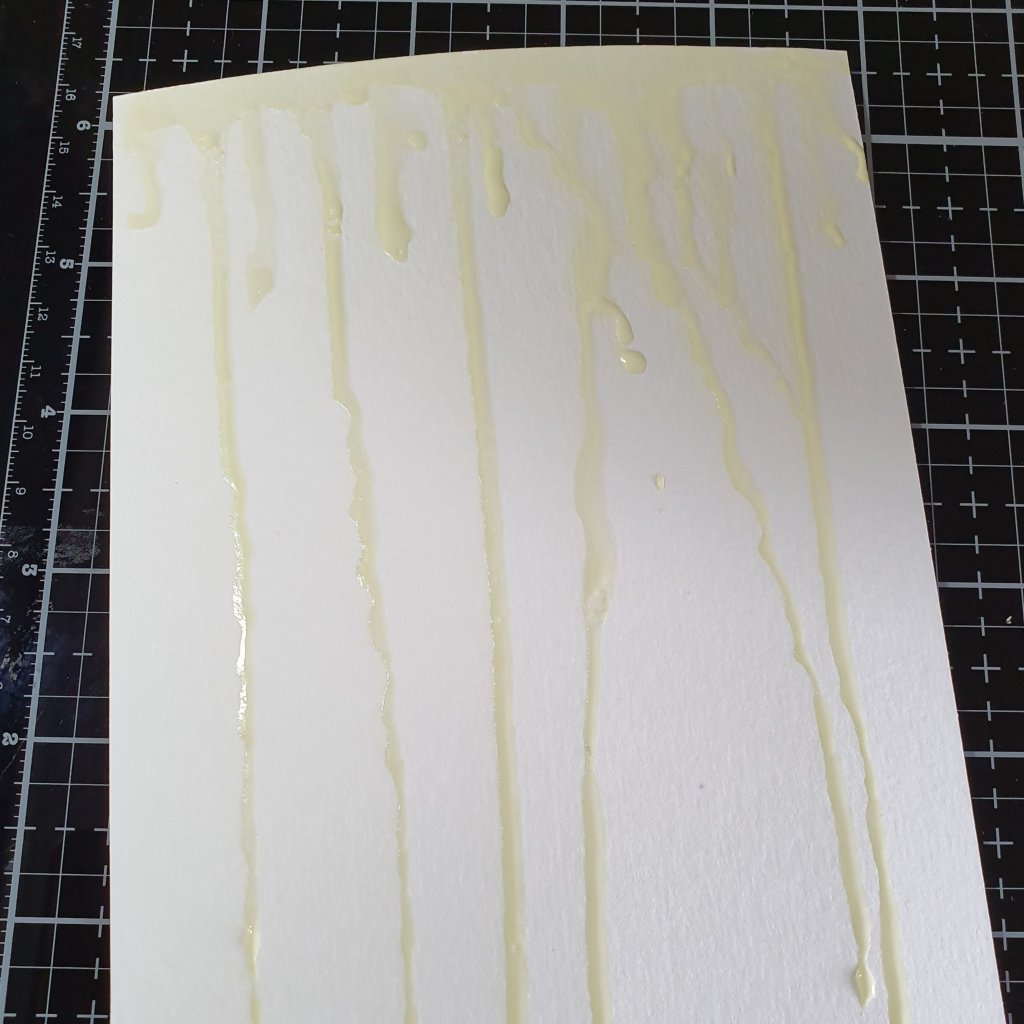
To create the drip effect on the background, I took masking fluid and with an old brush I applied a generous amount of fluid at the top and let it drip down the watercolor cardstock. I suggest using an old brush as the masking liquid could damage your good brushes by hardening on the bristles.
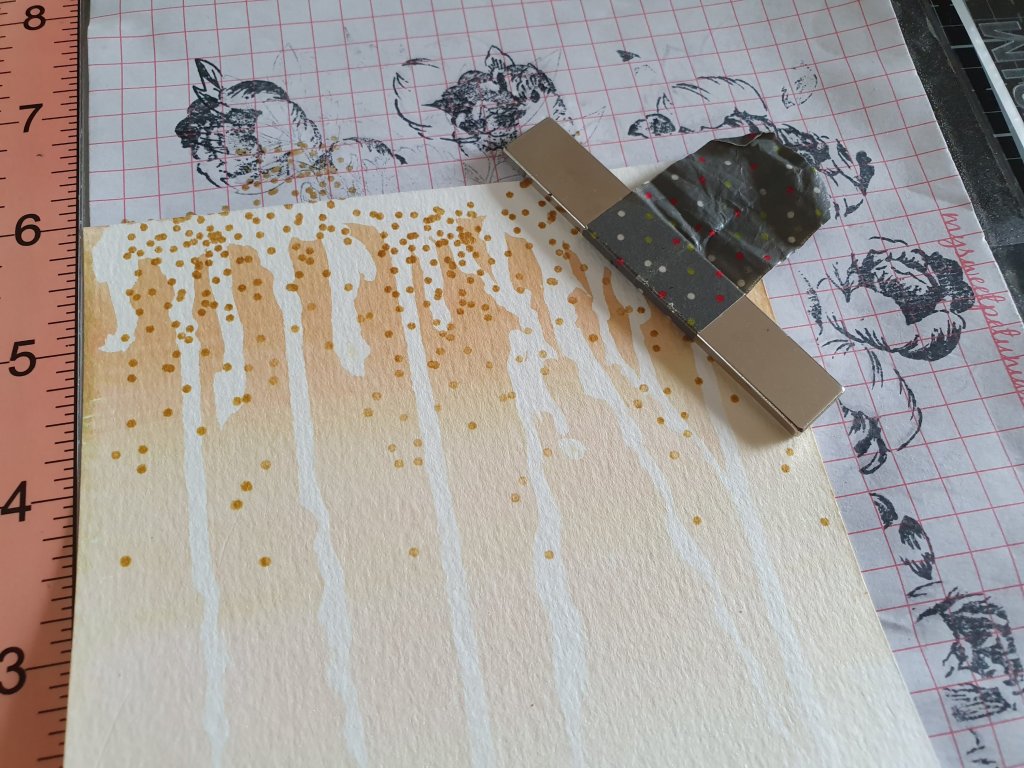
While the masking fluid was drying, I smooshed some Altenew Almond Butter Crisp Dye ink onto my glass mat, sprayed on some water. The masking fluid does not take too long to dry so with a flat watercolor brush, I applied a wash of color on my card, going from dark to light.

After my panel dried, I gently rubbed off the masking fluid with my fingers. I applied light pressure while I rubbed and slowly the “rubbery” coat starts peeling off leaving the color of the paper underneath untouched by the paint.
I then placed my panel on my MISTI stamp positioner and stamped one of the images from the Altenew Kind Confetti Stamp Set. I used the same Almond Butter Ink and stamped it across the top of my card, varying the position of the stamp to create uneveness.
After I finished stamping with the dye ink, I repeated the process but this time I heat embossed the same image using Antigue Gold Crisp Embossing Powder. Then I set it aside to work on my flower design.

I took the beautiful Wonderland Stamp set and gold heat embossed all the three large flowers on a thick piece on vellum. I then fussy cut the flowers out. I did have the coordinating die but opted to fussy cut as I wanted the flowers to have an uneven, more handmade edge.
Before I adhered my flowers, I decided to add gold stippling to the base of the petals just to create more interest and to echo the background. The process of stippling is to add little dots to an image. I put the gold stippling on top of the vellum image. Then I flipped the flowers over and added stippled “shadows” to the back using Light Brown Zig Clean Color Brush Markers.

Then I adhered the flowers on to the background, just putting spots of glue behind the stippling. Then I cut the panel down and adhered it to a gold glitter 4.25″X5.5″ cardstock.
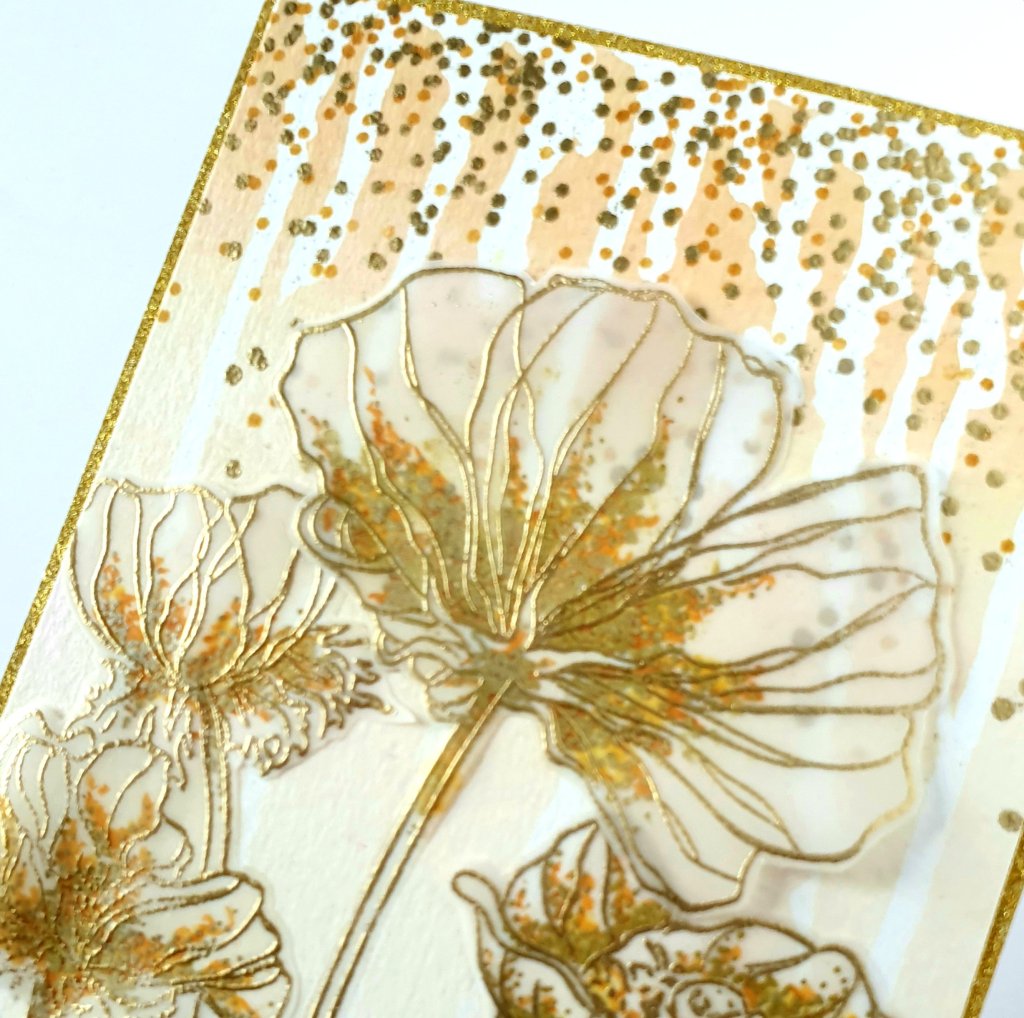
Then I added a gold heat embossed “Thankful for You” sentiment at the base of the flowers. This sentiment is from the Best Sentiment mini stamp set that Altenew sends as a free gift to their loyal customers every year.

Here is another card I created using the same masking effect for the background. This was actually the first and only experiment I made using this technique. I wasn’t too happy with it, but decided to turn it into a card, anyway!

I encourage you to check out the Masking Unleashed lessons over at the Altenew Academy. There you will learn how to take your masking to a whole new level!
Hope you enjoyed my tutorial and if you have masking fluid in your stash, give it a try!
‘Til next time!
❤️
Anna
Note: I am affiliated with some online stores including Altenew, Concord & 9th and Hero Arts. If you use any of the links above, I get a small commission from these wonderful shops at no extra cost to you. Thank you for your support!

Magnifique ! Merci pour le tutoriel.
Merci aussi pour le commentaire laissé sur mon blog.
Bises
LikeLike
Thank you for visiting my blog! Have a wonderful day
LikeLike
Gorgeous details on your cards. I love how you used the masking fluid. Lovely ❤
LikeLike
Thank you for your kind compliments 💕
LikeLike