

I am on my final challenge for Level 1 in the Altenew Educators Certification Program (AECP) and I’m excited to take up the challenge and show you what I’ve learned.
For this challenge, I am to create one set of Masculine cards and one set of Feminine cards using at least three techniques I learned from AECP Level 1 Courses. I am also to use a recycled item as part of the packaging and/or as part of the cards.
AECP Level 1 Techniques used:
1) Clean & Simple Boutique Cards
2) Easy Die Cutting Techniques
3) All about layering 1
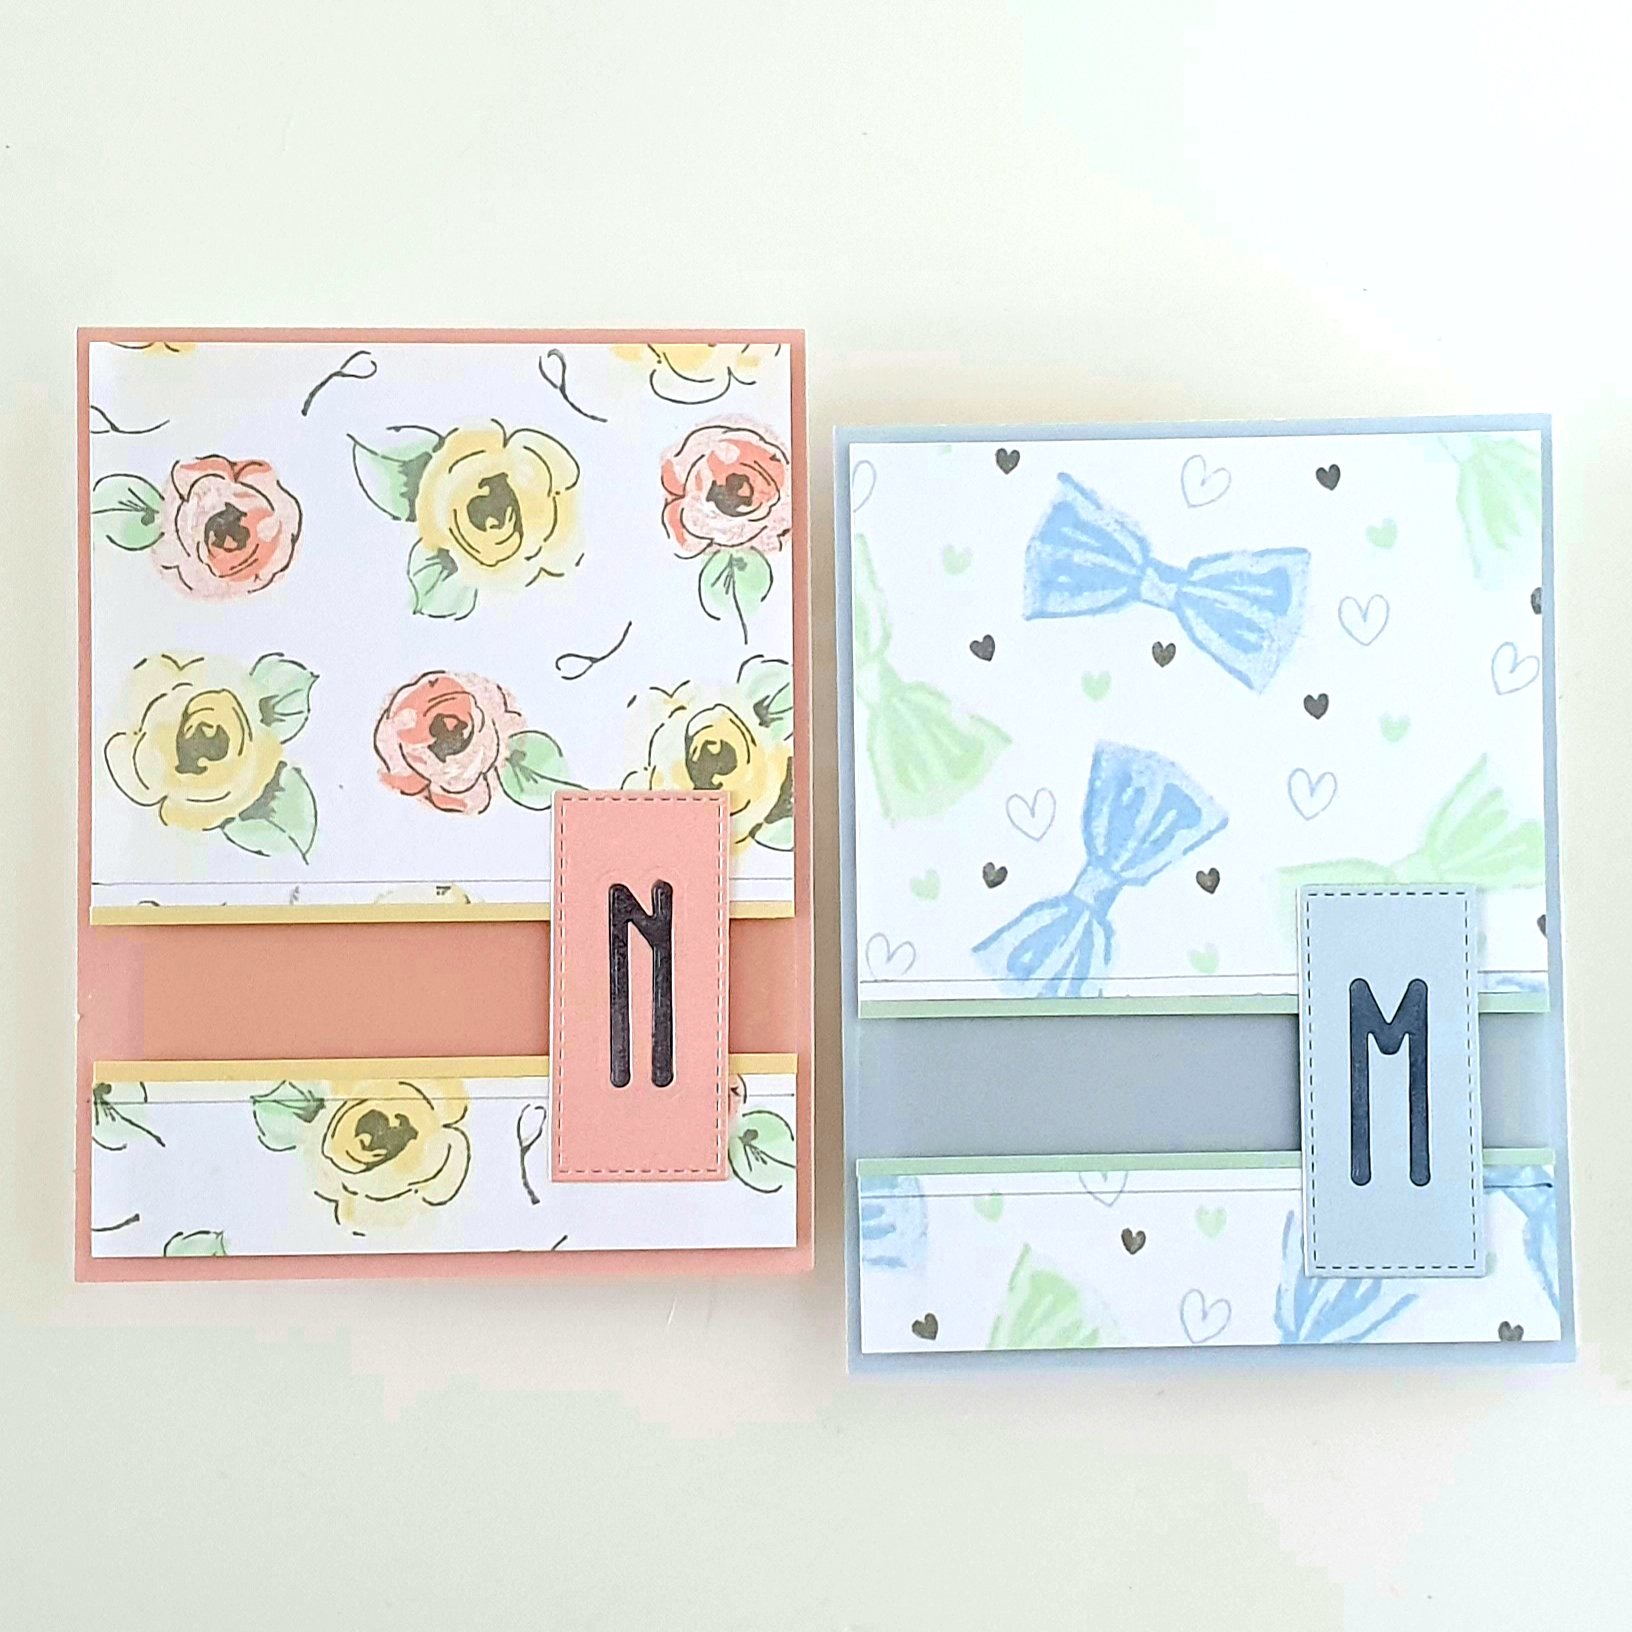
I decided to create monogrammed card sets for a baby boy and a baby girl. I thought this would be perfect gifts for a couple who just had a baby or to give as Christening gifts. A monogrammed set of cards bearing the baby’s initial would be practical for the parents to use as thank you cards for gifts they received from well-wishers.


Creating card sets can often seem intimidating and labor intensive. I have five tips to share with you when making your own card sets to help make the process a little bit easier.
TIP #1: PLAN AHEAD AND HAVE A UNIFYING THEME
I don’t often do card sketches as I enjoy just creating as inspiration hits. But when creating card sets, it’s important to sketch out the designs so you can better prepare for the materials to be used. As much as possible, specially when creating card sets, I always go for a “two for one” design method, as you can see in some of my card sketches below. The “‘two for one” design method is using the positive piece you cut out from one card to use in another, as you can see in my card sketches below.

It is also important to have a theme that carries throughout all the cards. This makes it look more like a real set of cards rather than a hodgepodge of cards hastily put together to make a set.
TIP #2: CHOOSE INKS, CARD STOCKS, STAMPS & DIES THAT COORDINATE
Based on my cards sketches, I looked through my stash and see what I had that would work well together. I laid them out so I can choose inks that match my card stock. At first, I had wanted to use white color cardstock as my base color but as I went through my stash, I found other colors that worked even better! As much as possible, make sure you choose just a few elements to carry through all the cards in the sets.
I chose the following pearlized shimmer cardstocks and matched it with Altenew crisp dye inks as shown in the photo below – Baby Blue/Iceberg Ink, Mint Green/Minty Mint Ink, Baby Pink/Pink Pearl Ink, Light Yellow/ Buttercream Ink and Gray Denim Ink (not in photo) for the outlines.

As for the stamps: I used the TALL ALPHA LETTER DIE (for the in-lay monogram), TALL ALPHA STAMP (for the envelopes), CANDY CANE STRIPE COVER DIE (for the in-lay background), PAINTED FLOWERS (for the Feminine cards), THANKS, DAD (for the masculine cards) with the hearts from the WAY TOO SWEET stamp set. I also used MEGA ALPHA die for a couple of cards.

TIP #3: DO ALL YOUR STAMPING AND DIE CUTTING AT ONE TIME
This tip is to save time and the effort of bringing out all your materials and tools again and again. I did all my die-cutting in one evening while watching Netflix, stamping in one afternoon etc. Prep work takes time but as you go through the next steps with me, you will see how it is a huge advantage later on!
The stamp sets I chose for this project are very forgiving in terms of layering which makes it perfect for stamping without a stamp positioning tool. This is where the ALL ABOUT LAYERING 1 class came in really handy!
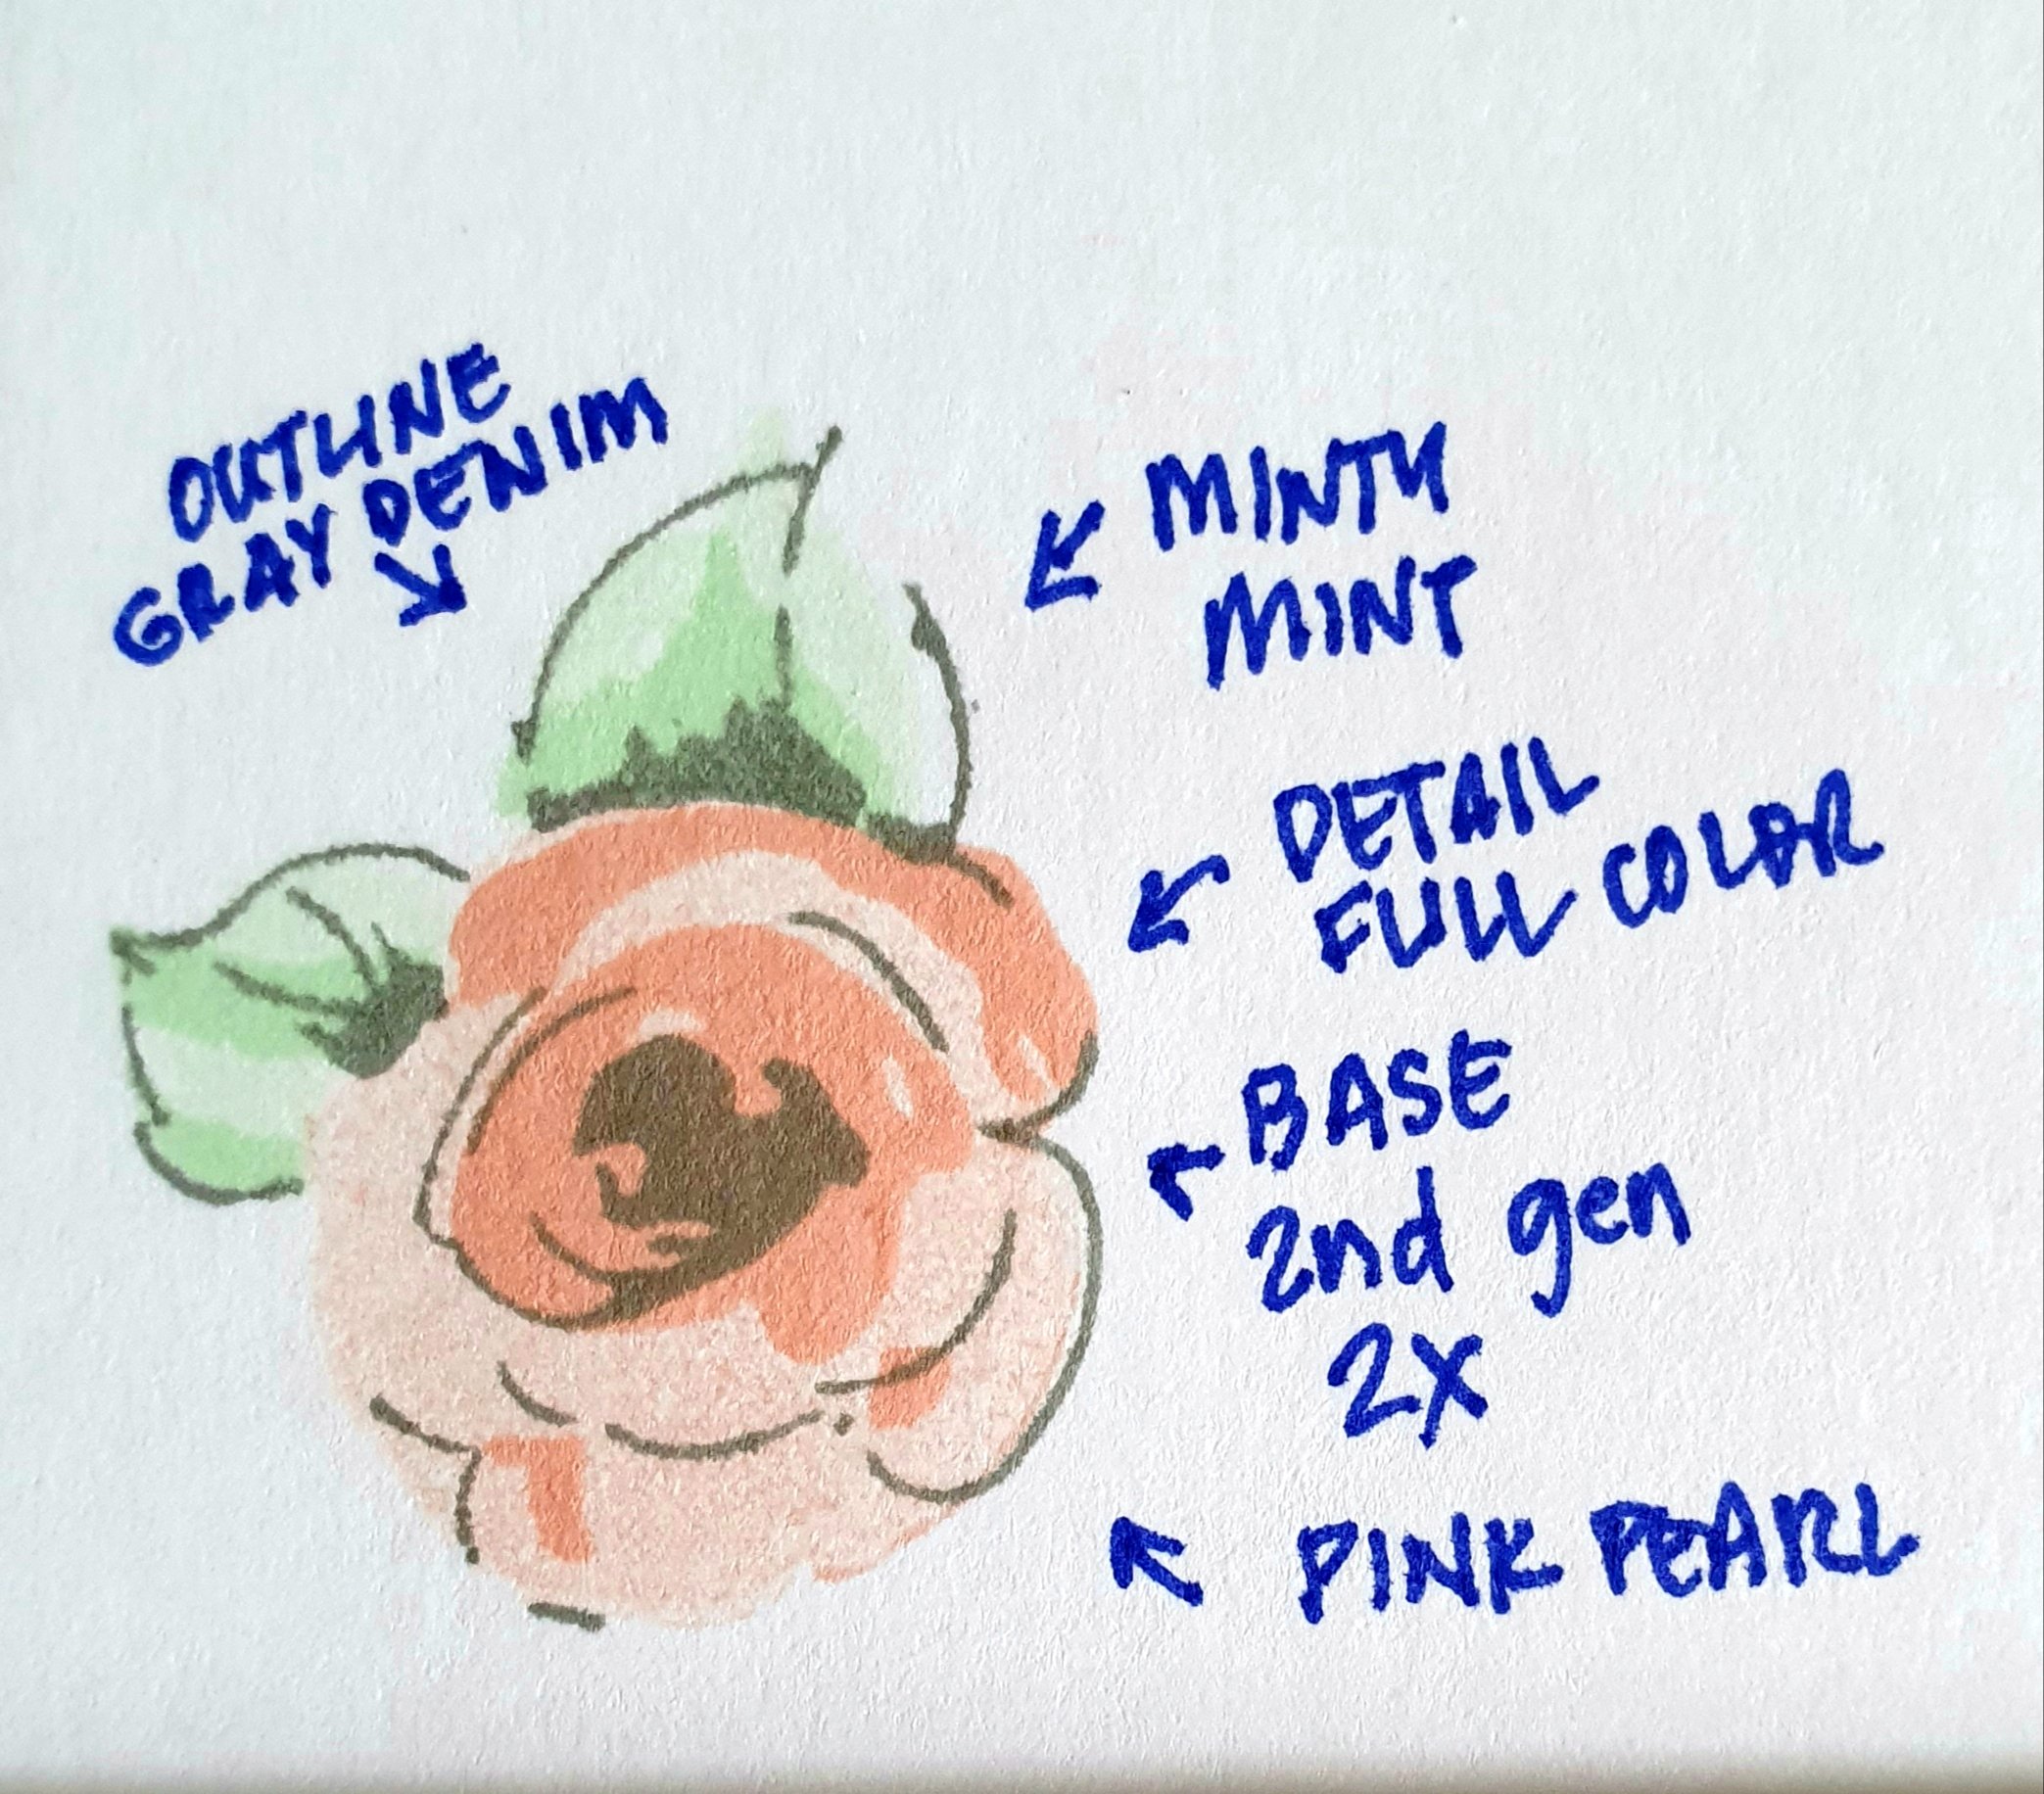
The photo below shows how I was able to create different shade intensities of the same ink to achieve depth to the image. I did this by doing 2nd generation stamping for the base layer and fully inked stamping for the top layer. If you are not familiar with 2nd generation stamping, it is simply inking up your stamp, stamping it first on a scratch piece of paper, then without reinking, stampi it onto your project. This creates a lighter version of the same ink color. The photo below shows the inks I used for the feminine card.
I also did the same for the masculine card, in which I did 2nd generation stamping for the base layer of the bow tie and full ink stamping for the details.
In the CLEAN AND SIMPLE BOUTIQUE CARD CLASS, I learned how to do repeat stamping. Here in this project I created a template first so I will know the position of stamp design.


After I finished with all my stamping, I die-cut several pieces of the different colored cardstocks using the same Candy Cane Stripe cover die and did the inlay technique which I learned in the EASY DIE-CUTTING TECHNIQUE class. I explain this process more in detail in a previous post linked here.

To create the inlaid monogram letters, I die-cut a small stitched rectangle and then die-cut the Tall Alpha letter centering it on the rectangle. I colored the letter with C4 copic marker, before inlaying back into the rectangular piece.

TIP #4: PUT ALL THE ELEMENTS TO CREATE EACH CARD INSIDE INDIVIDUAL PACKS
Being a busy mom and an entrepreneur with a business not related to crafting, I have to find time in my schedule to craft. Placing each card element inside individual packs gives me the freedom of not having to scrounge around for what I need to assemble a card. If I find, say, an hour to craft before the kids get home from school, I grab a couple of packs and assemble a few cards. All the elements I need is in there and it really saves time!

TIP #5: LAST BUT NEVER THE LEAST, HAVE FUN!!
The tips I am sharing above is what works for me. It may be different for you. But TIP #5, I believe, is something we can all agree on and the reason why we enjoy this hobby of ours!
THE CARDS:
Now lets get into making the cards. I made 10 cards per set, using the same theme with a few varying elements. I really wanted to make it as clean and simple as possible.
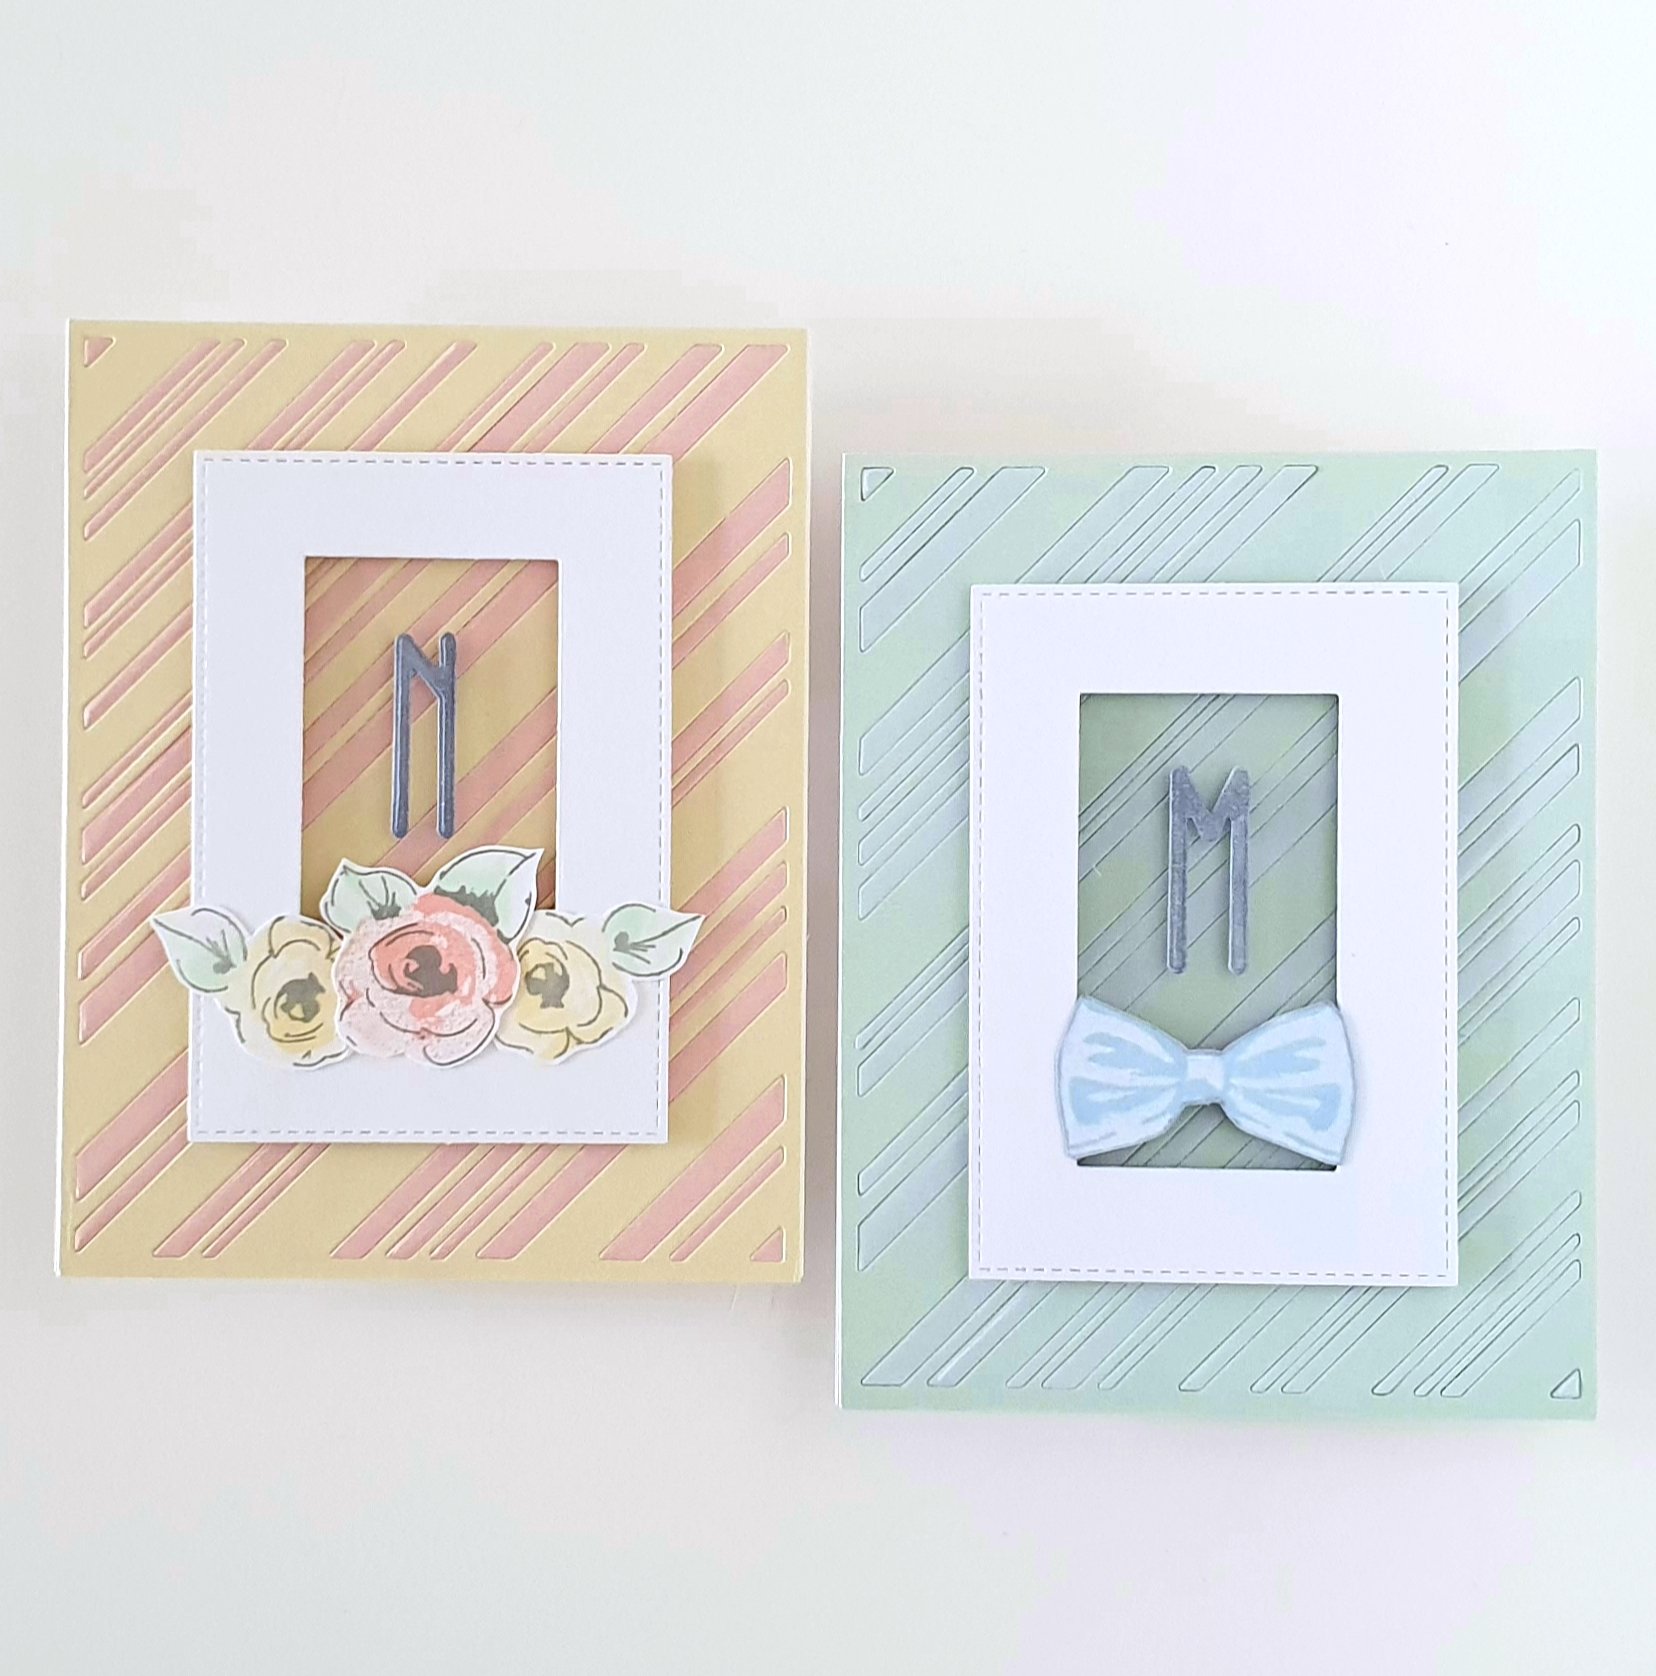
CARD #1&2: FLOATING MONOGRAM WINDOW
CARD #1

I die cut a window uisng the MFT Stitched Rectangle Stax die creating a frame. Then I placed sturdy clear acetate behind the large frame. I drew a border by hand around the frame using a thin gray marker. I placed foam tape behind the frame and mounted it on a candy cane stripe background. Then I placed the inlaid monogram letter in the center.
With the rectangle piece left over from the frame, I die cut another window and created another card also with clear acetate and mounted onto the other color combination of the candy cane stripe background.
CARD #2
I also fussy cut flowers and bow tie elements and added it to the card to give it a more whimsical feel.
CARD #3&4: HORIZONTAL FLOATING WINDOW
This one is fairly straightforward. I cut 3″ from the base of the panel then sliced 1″ off. I set aside the 1″ strip to use on the other version of this horizontal window card. I placed clear acetate in between and mounted it onto the candy cane stripe background using foam tape. I also drew a thin line with a gray marker and then I added a 1/8 inch strip of coordinating cardstock before attaching the monogram to give it a finished look.
CARD #3

I proceeded to do the same with the Candy Cane stripe background, but this time I used the left over strip from the card above to use as the background behind the window.
CARD #4

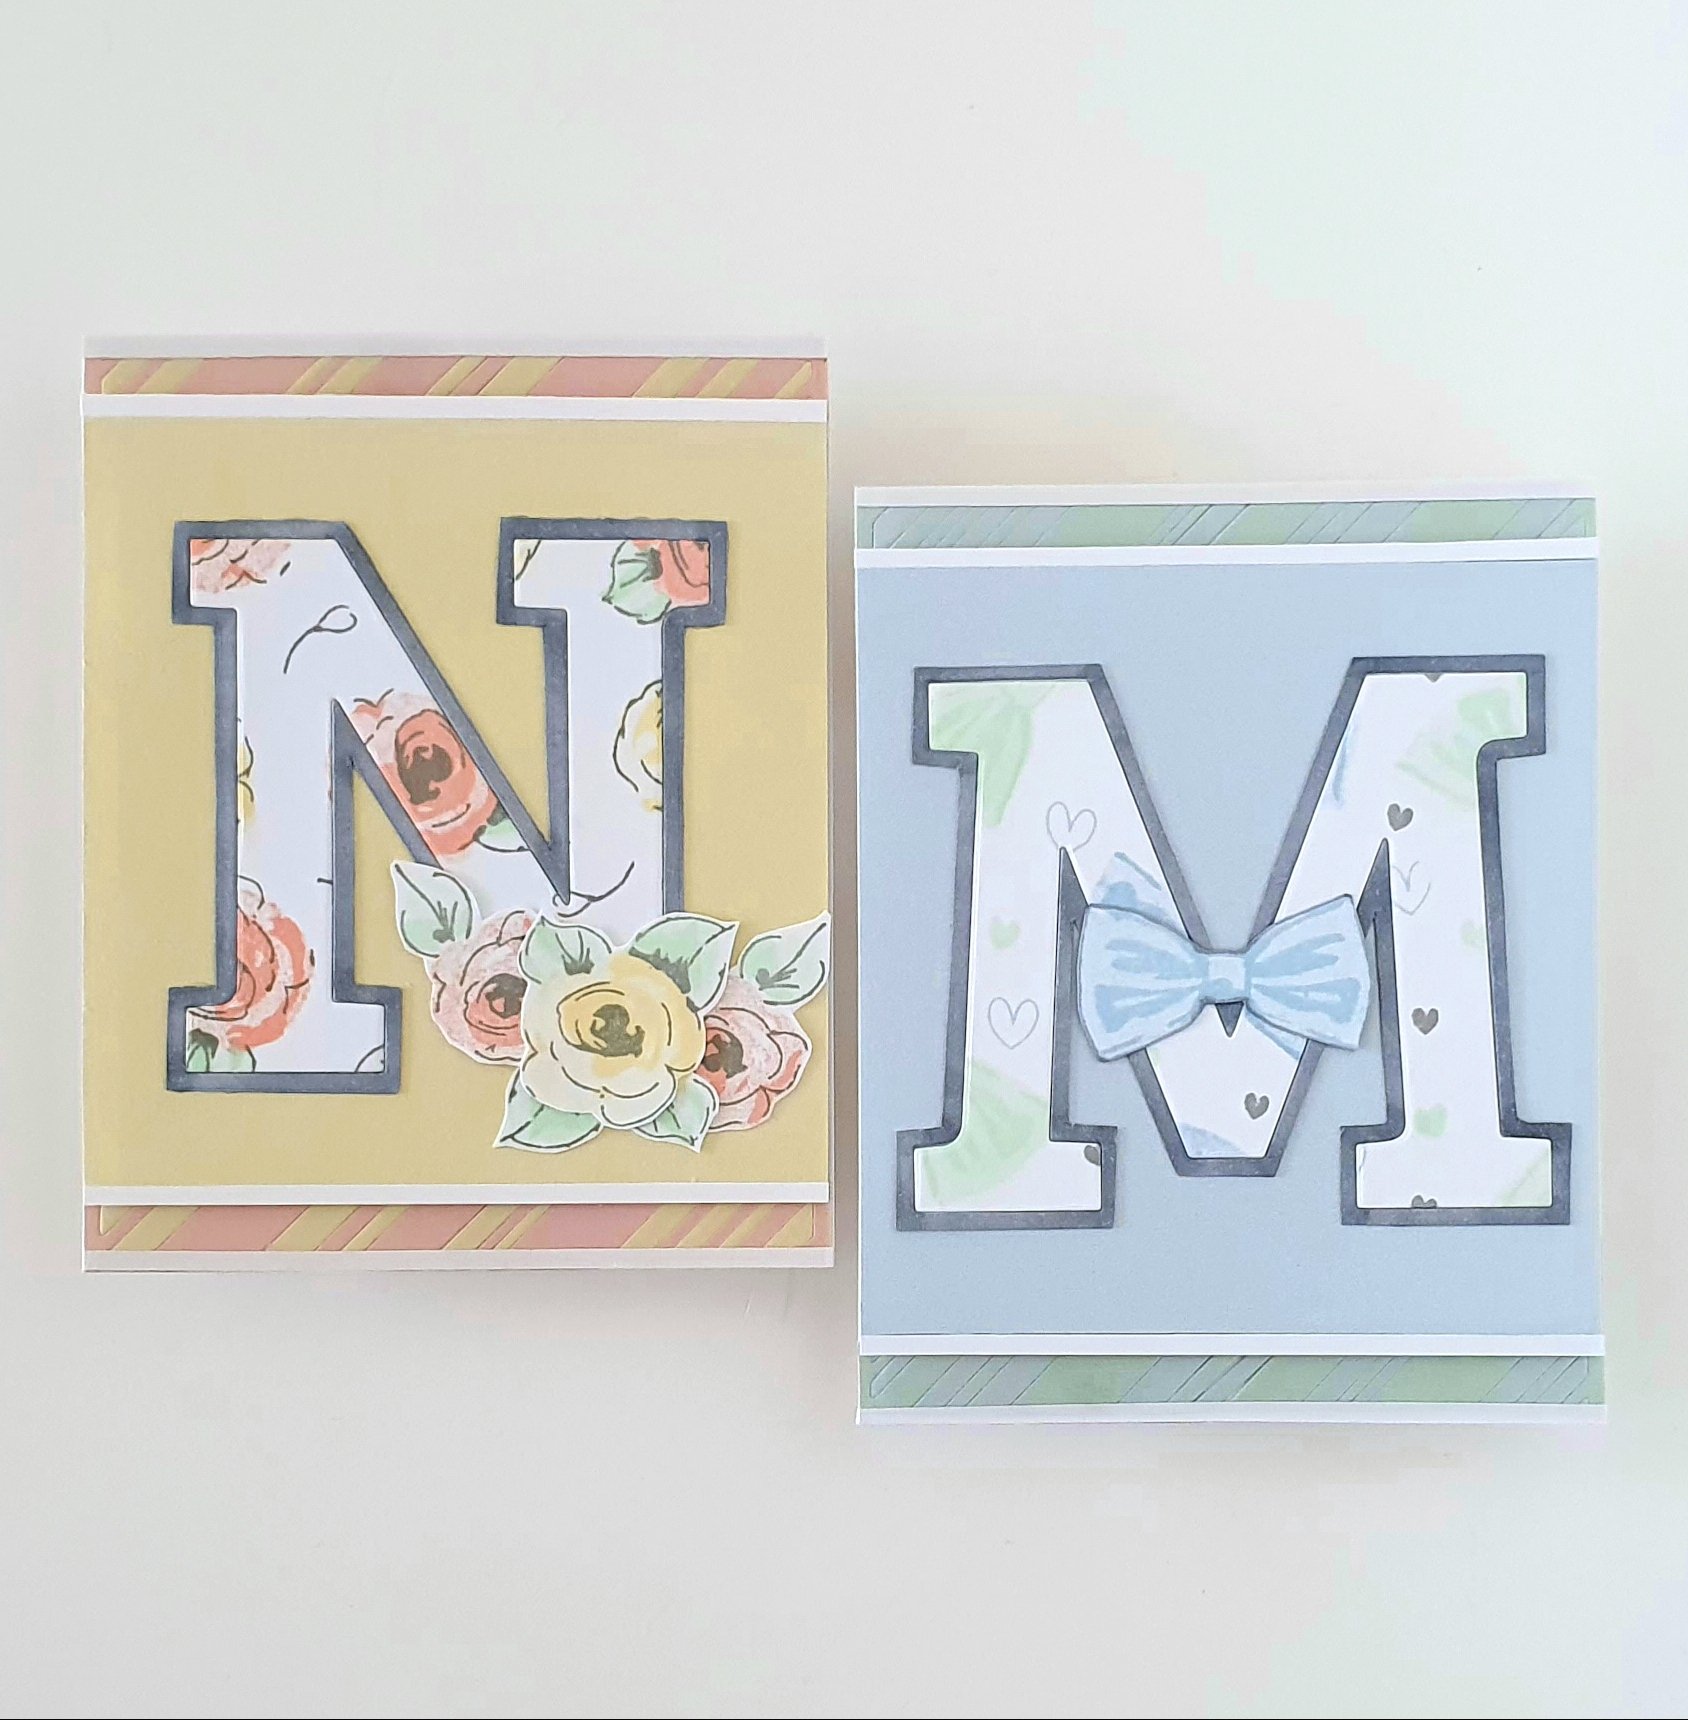
CARD #5: MEGA ALPHA MONOGRAM SHAKER CARD
To create this shaker card, I used the Mega alphabet die to cut out the letter from the patterned panel.

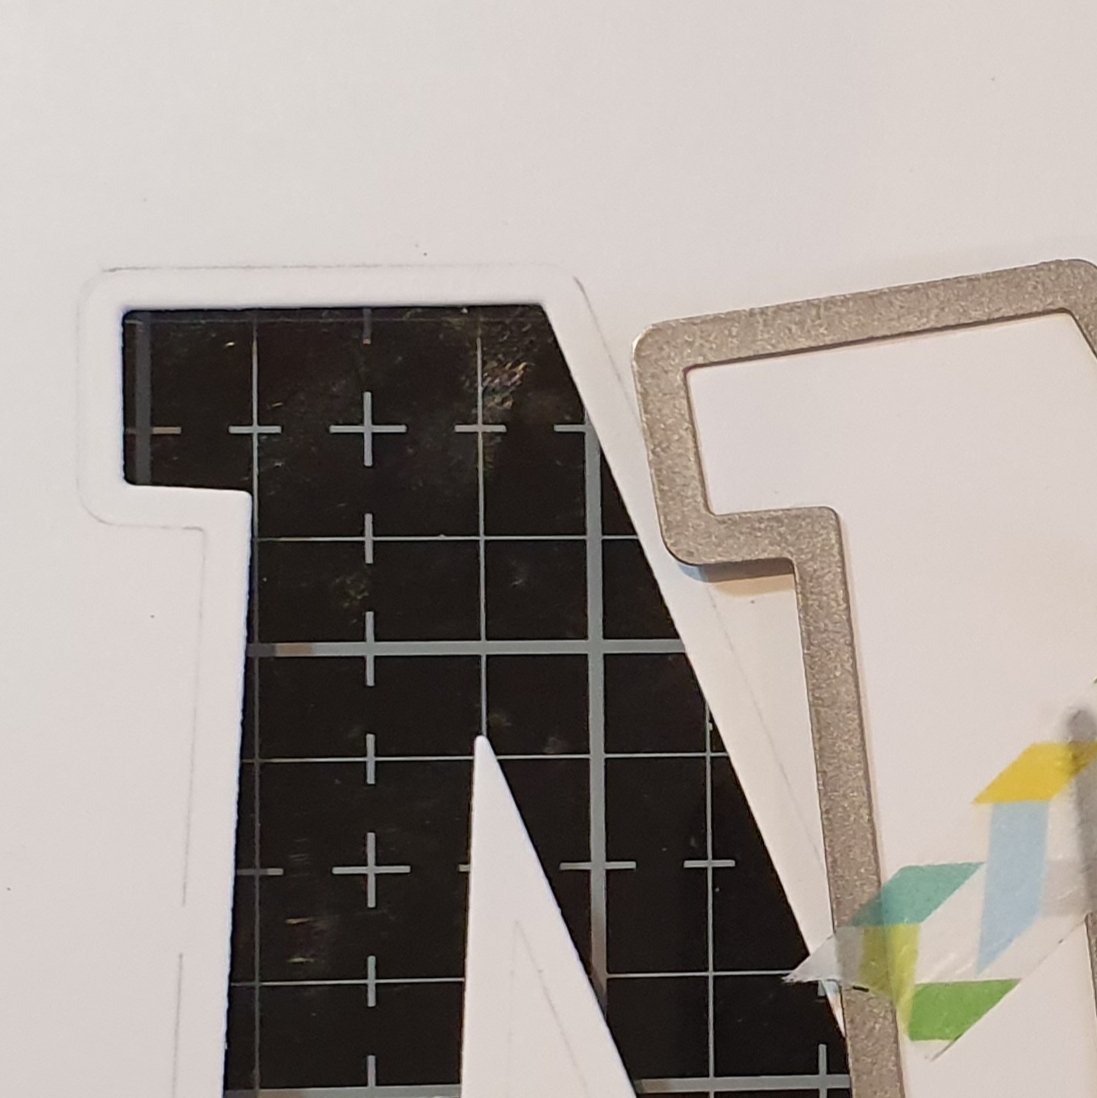
To create the gray border around the letter, I cut the same letter out of white cardstock, then without removing the die, I outlined the die using a pencil to create a border. See photo below.
Then I cut around it and colored it with Copic C4 marker to match the Gray Denim ink outlines on the card. Then glued it onto the letter.
I assembled the shaker card by placing the foam tape around the open space in order to trap the sequins. I then placed gray and clear sequin mix inside before sealing it.
I embellished the card with the fussy cut flowers and bow tie elements.
CARD #6: MEGA ALPHA MONOGRAM CARD
I used the positive letter of the card above to create this card. The candy cane stripe strip on the top and bottom are the leftovers from the horizontal window of the #4 card above. I added 1/8 inch strips and also added fussy cut elements to the card.
CARD #7&8: VERTICAL MONOGRAM CARD
This was also fairly simple to make. I also used acetate on the top layer to bring stability to the monogram detail.
CARD #7

CARD #8

CARD #9
Same procedure as the horizontal monogram #3 & #4 card above.
CARD #10
I had 2 strips left over from the vertical monogram design card above so I made one more set!

THE ENVELOPES:
Let’s not forget the envelopes! Sometimes we get so preoccupied with making the cards, we forget about the envelopes. If you think about it, it is the first thing people see when they receive a card! For the envelopes of these card sets, I just stamped the initial on the flap of the envelope and on the front right hand corner – very clean and simple.

THE BOX:
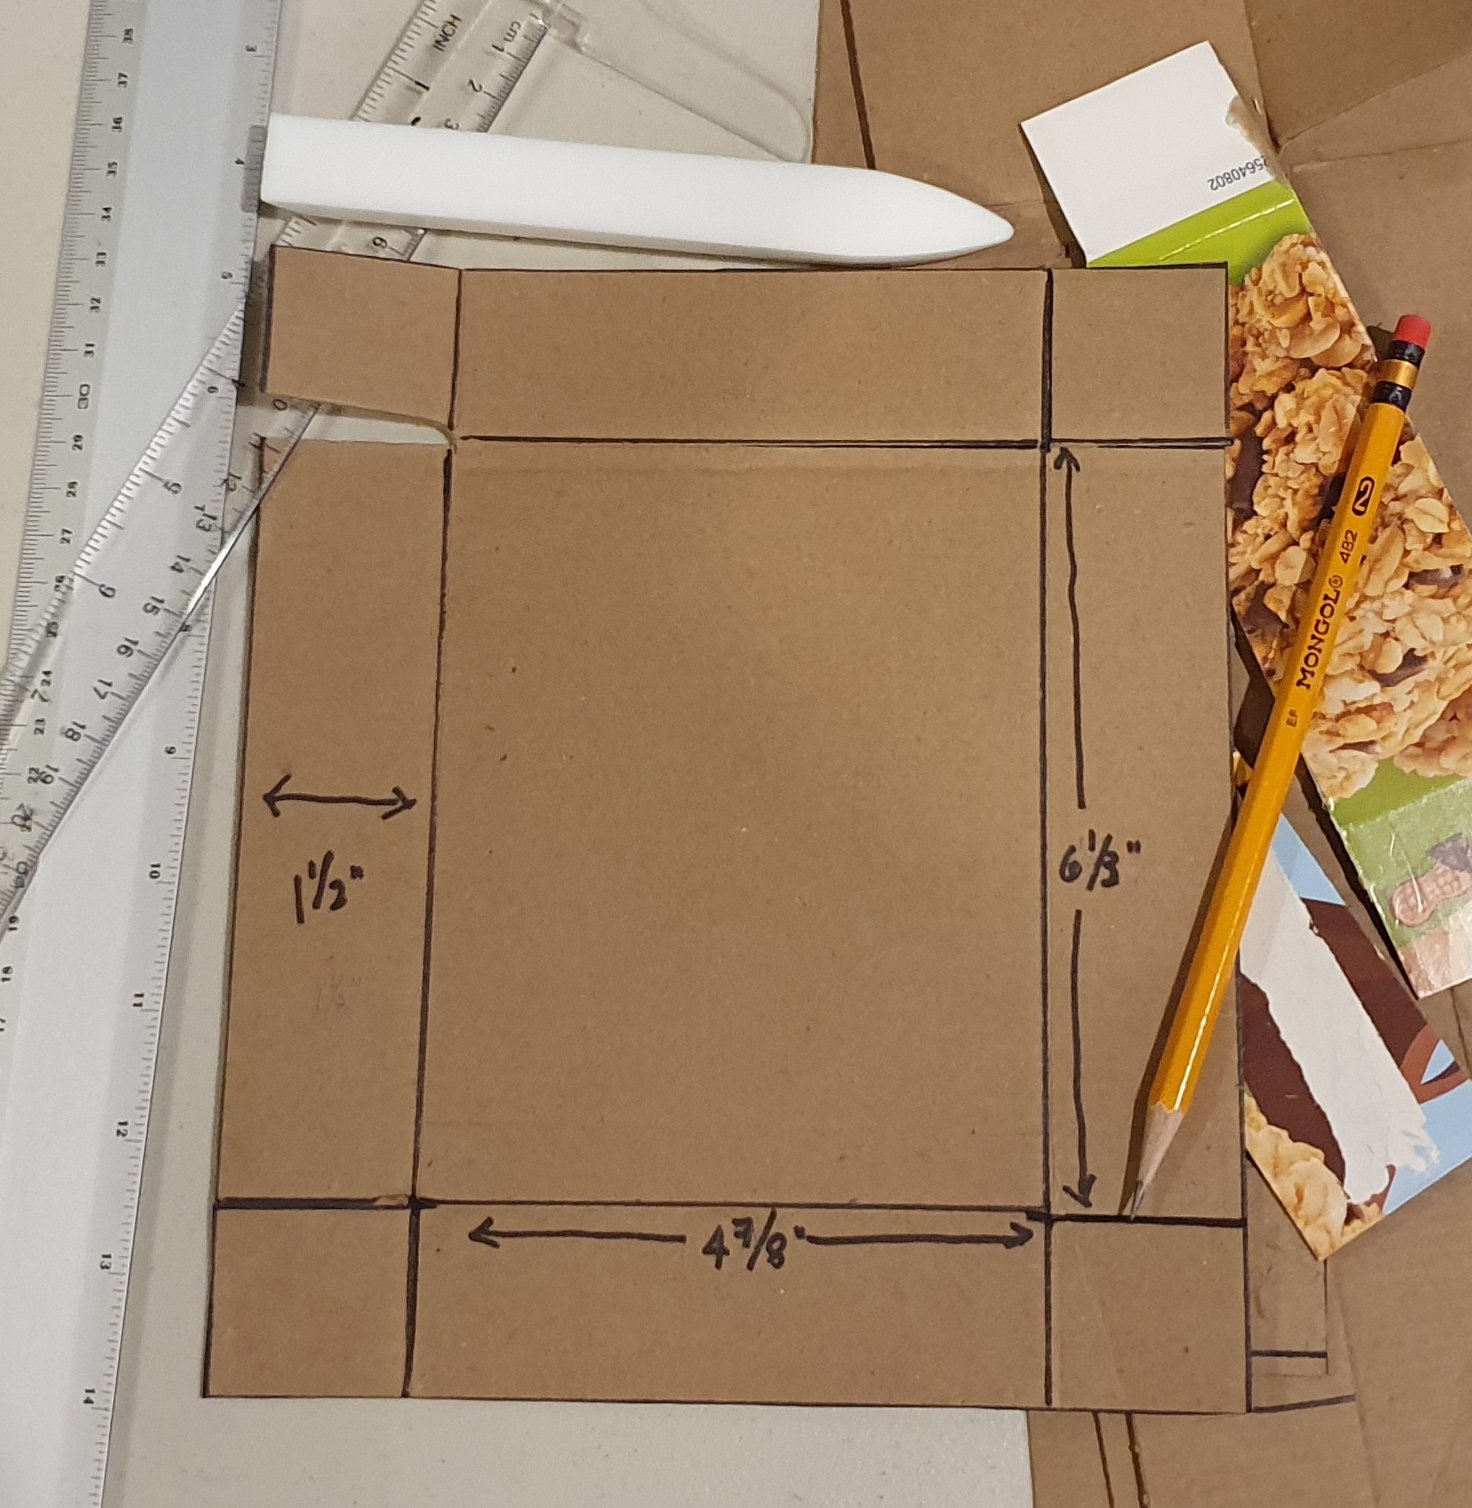
I’ve always been a fan of upcycling everyday objects that would otherwise get tossed out. I relish the challenge of making it reusable and at the same time look good. Because these are boutique style cards, I wanted the box to be sturdy so I used a box of Quaker Oats chewy bars to make the base of the box.

I measured my cards making sure I included the envelopes in the measurements (see photo below) and used a craft blade to cut it out. The measurements below are for regular A4 cards with envelopes with a little bit of “wiggle” room.
I had a couple of papers in my paper pad stash that fit the theme of my cards, so I decided to use them to cover the box. These papers are from DCWV Little Miss and Little Mister 12″x12″ paper pad.

I covered the box by putting it diagonally on the reverse side of a 12″x12″ pattern paper. I traced out the base of the box and then folded the paper along the traced lines. I then cut out the unnecessary bits of paper, and left tabs to wrap around the box. See photo below.

I then glued the pattern paper to the box, taking care to trim off here and there to give it a clean look.
THE ACETATE COVER:
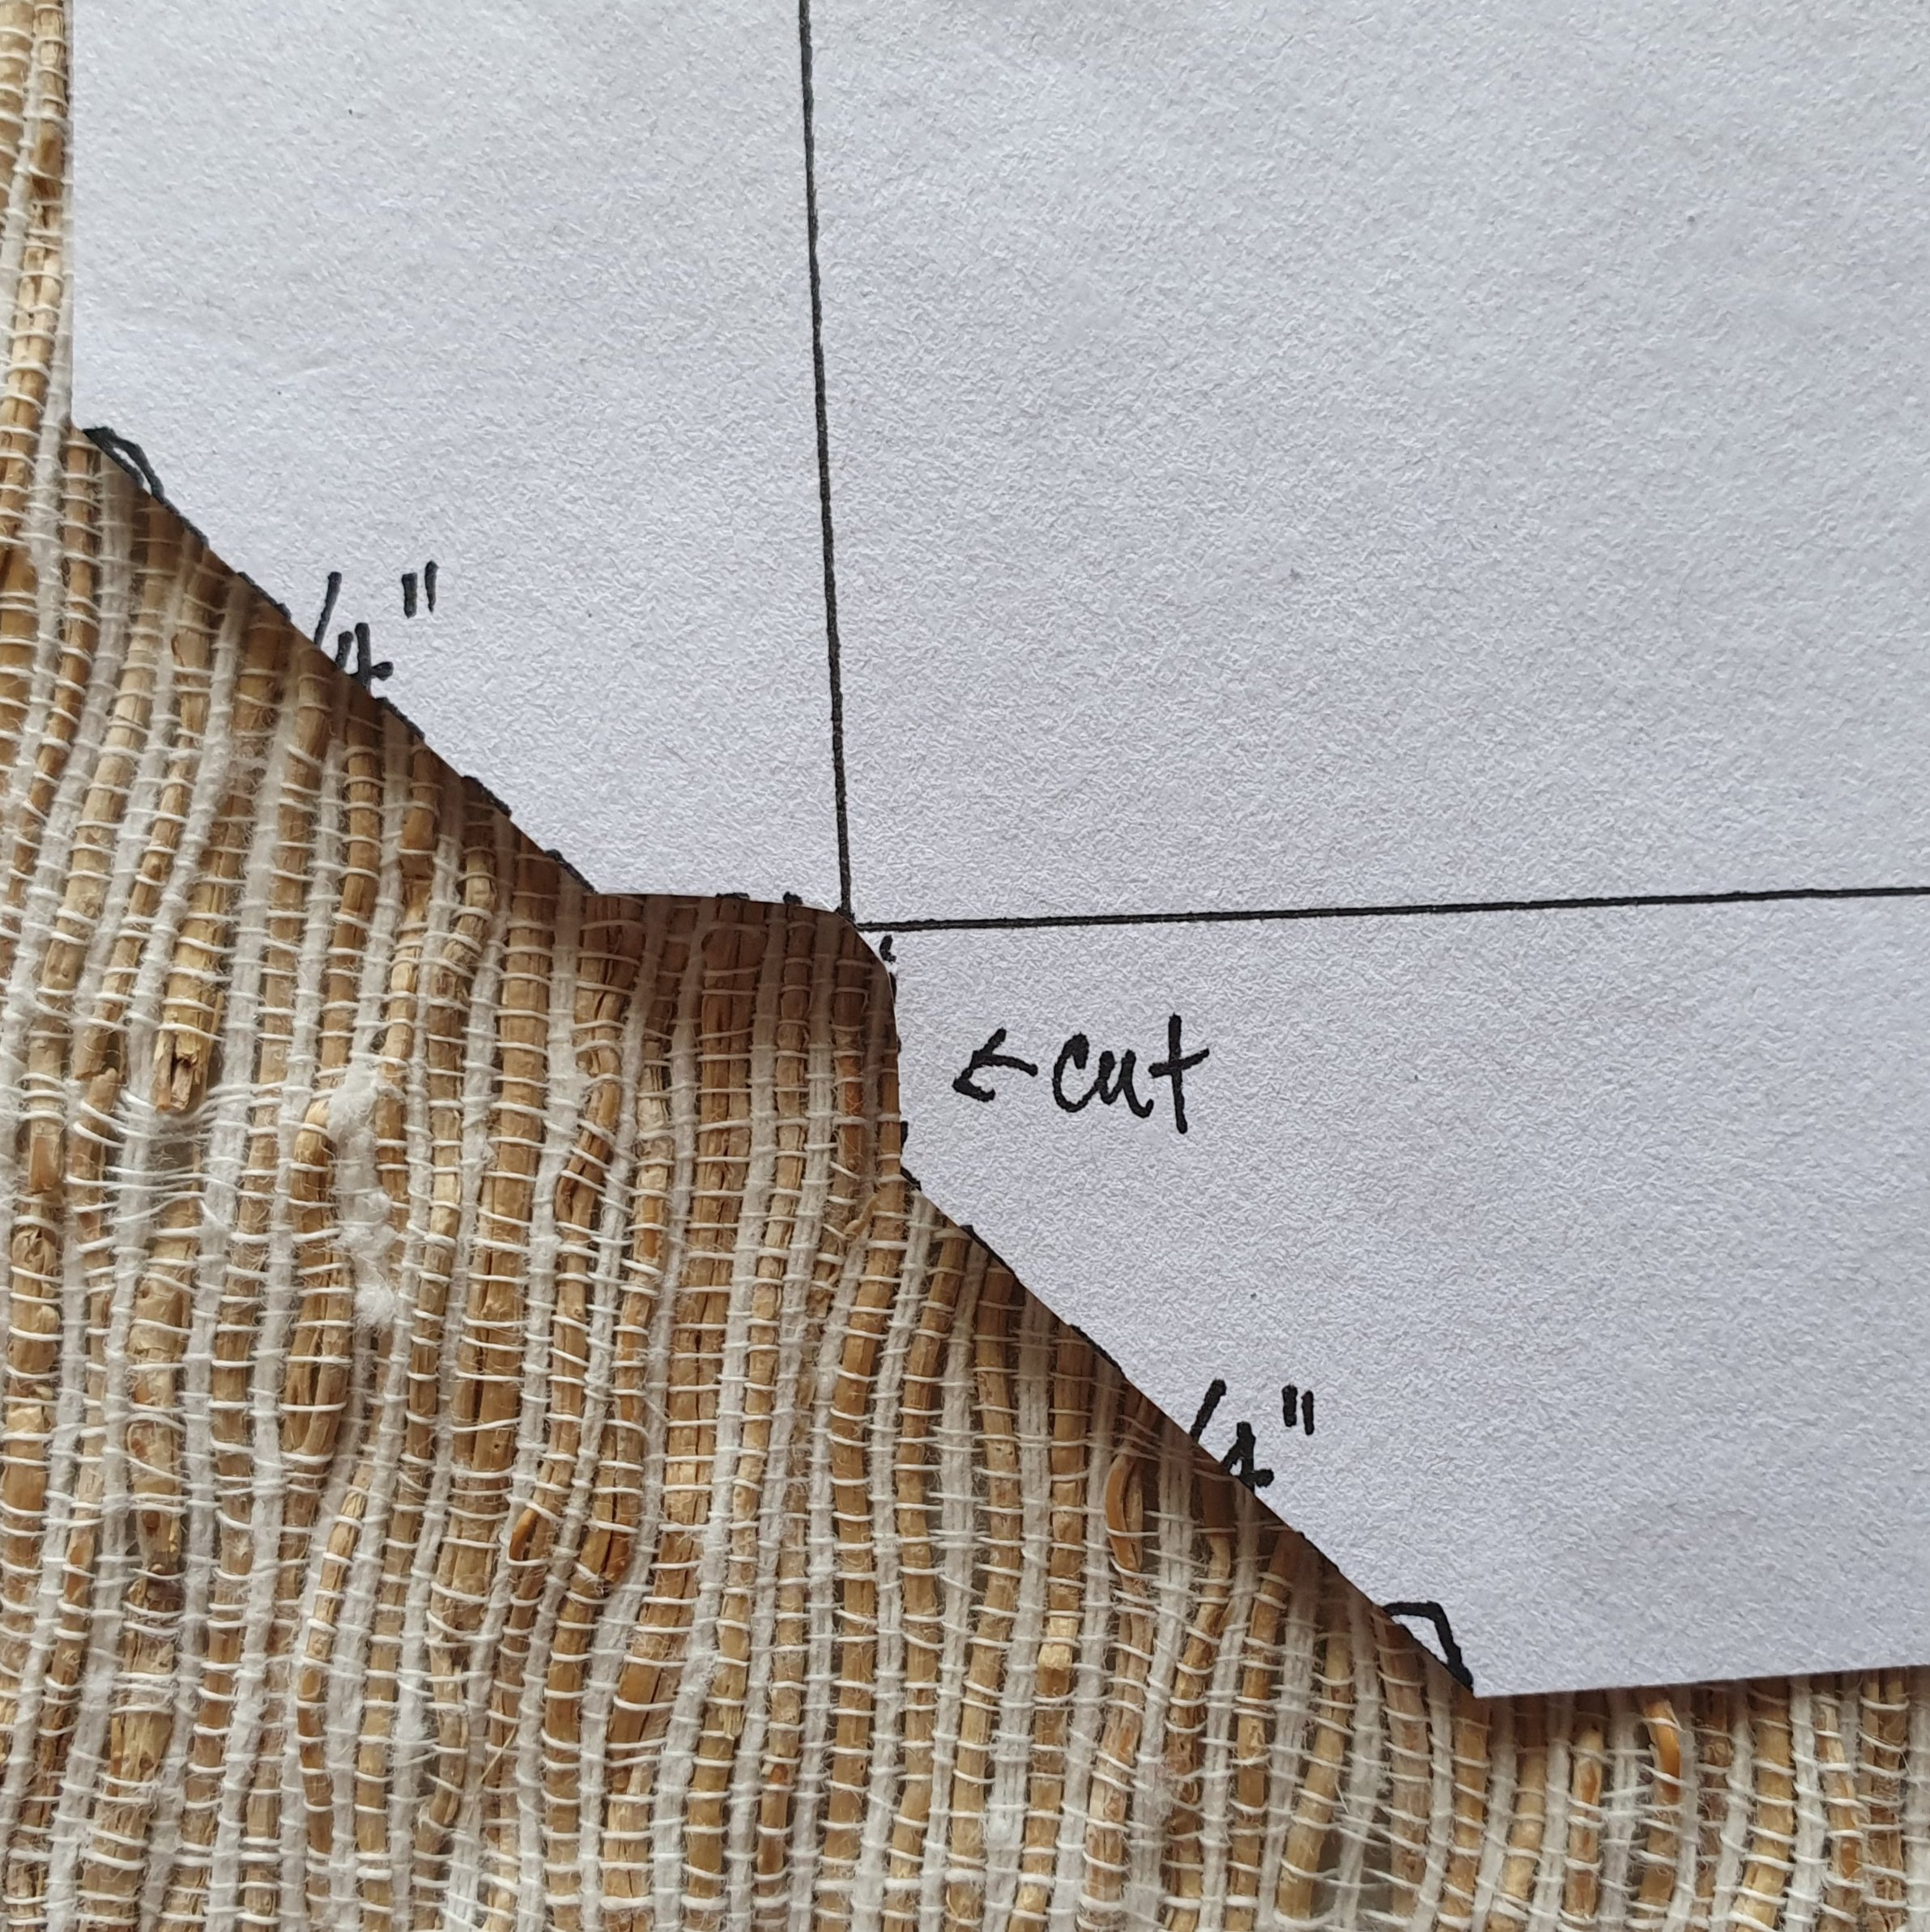
I made an acetate cover by measuring out the top of the box. For this, you will need an 8 1/2″ x 7 1/4″ rectangular piece of thick acetate. Then score 1 1/4″ all around. After scoring, you will need to mark 3/4″ starting from the score line measuring inwards. (I used a piece of typing paper for better clarity)

After marking the 3/4″ measurements all around, I then cut the corners at a diagonal. If you have an envelope punch board, you can then line up the score lines on your punch board then punch.
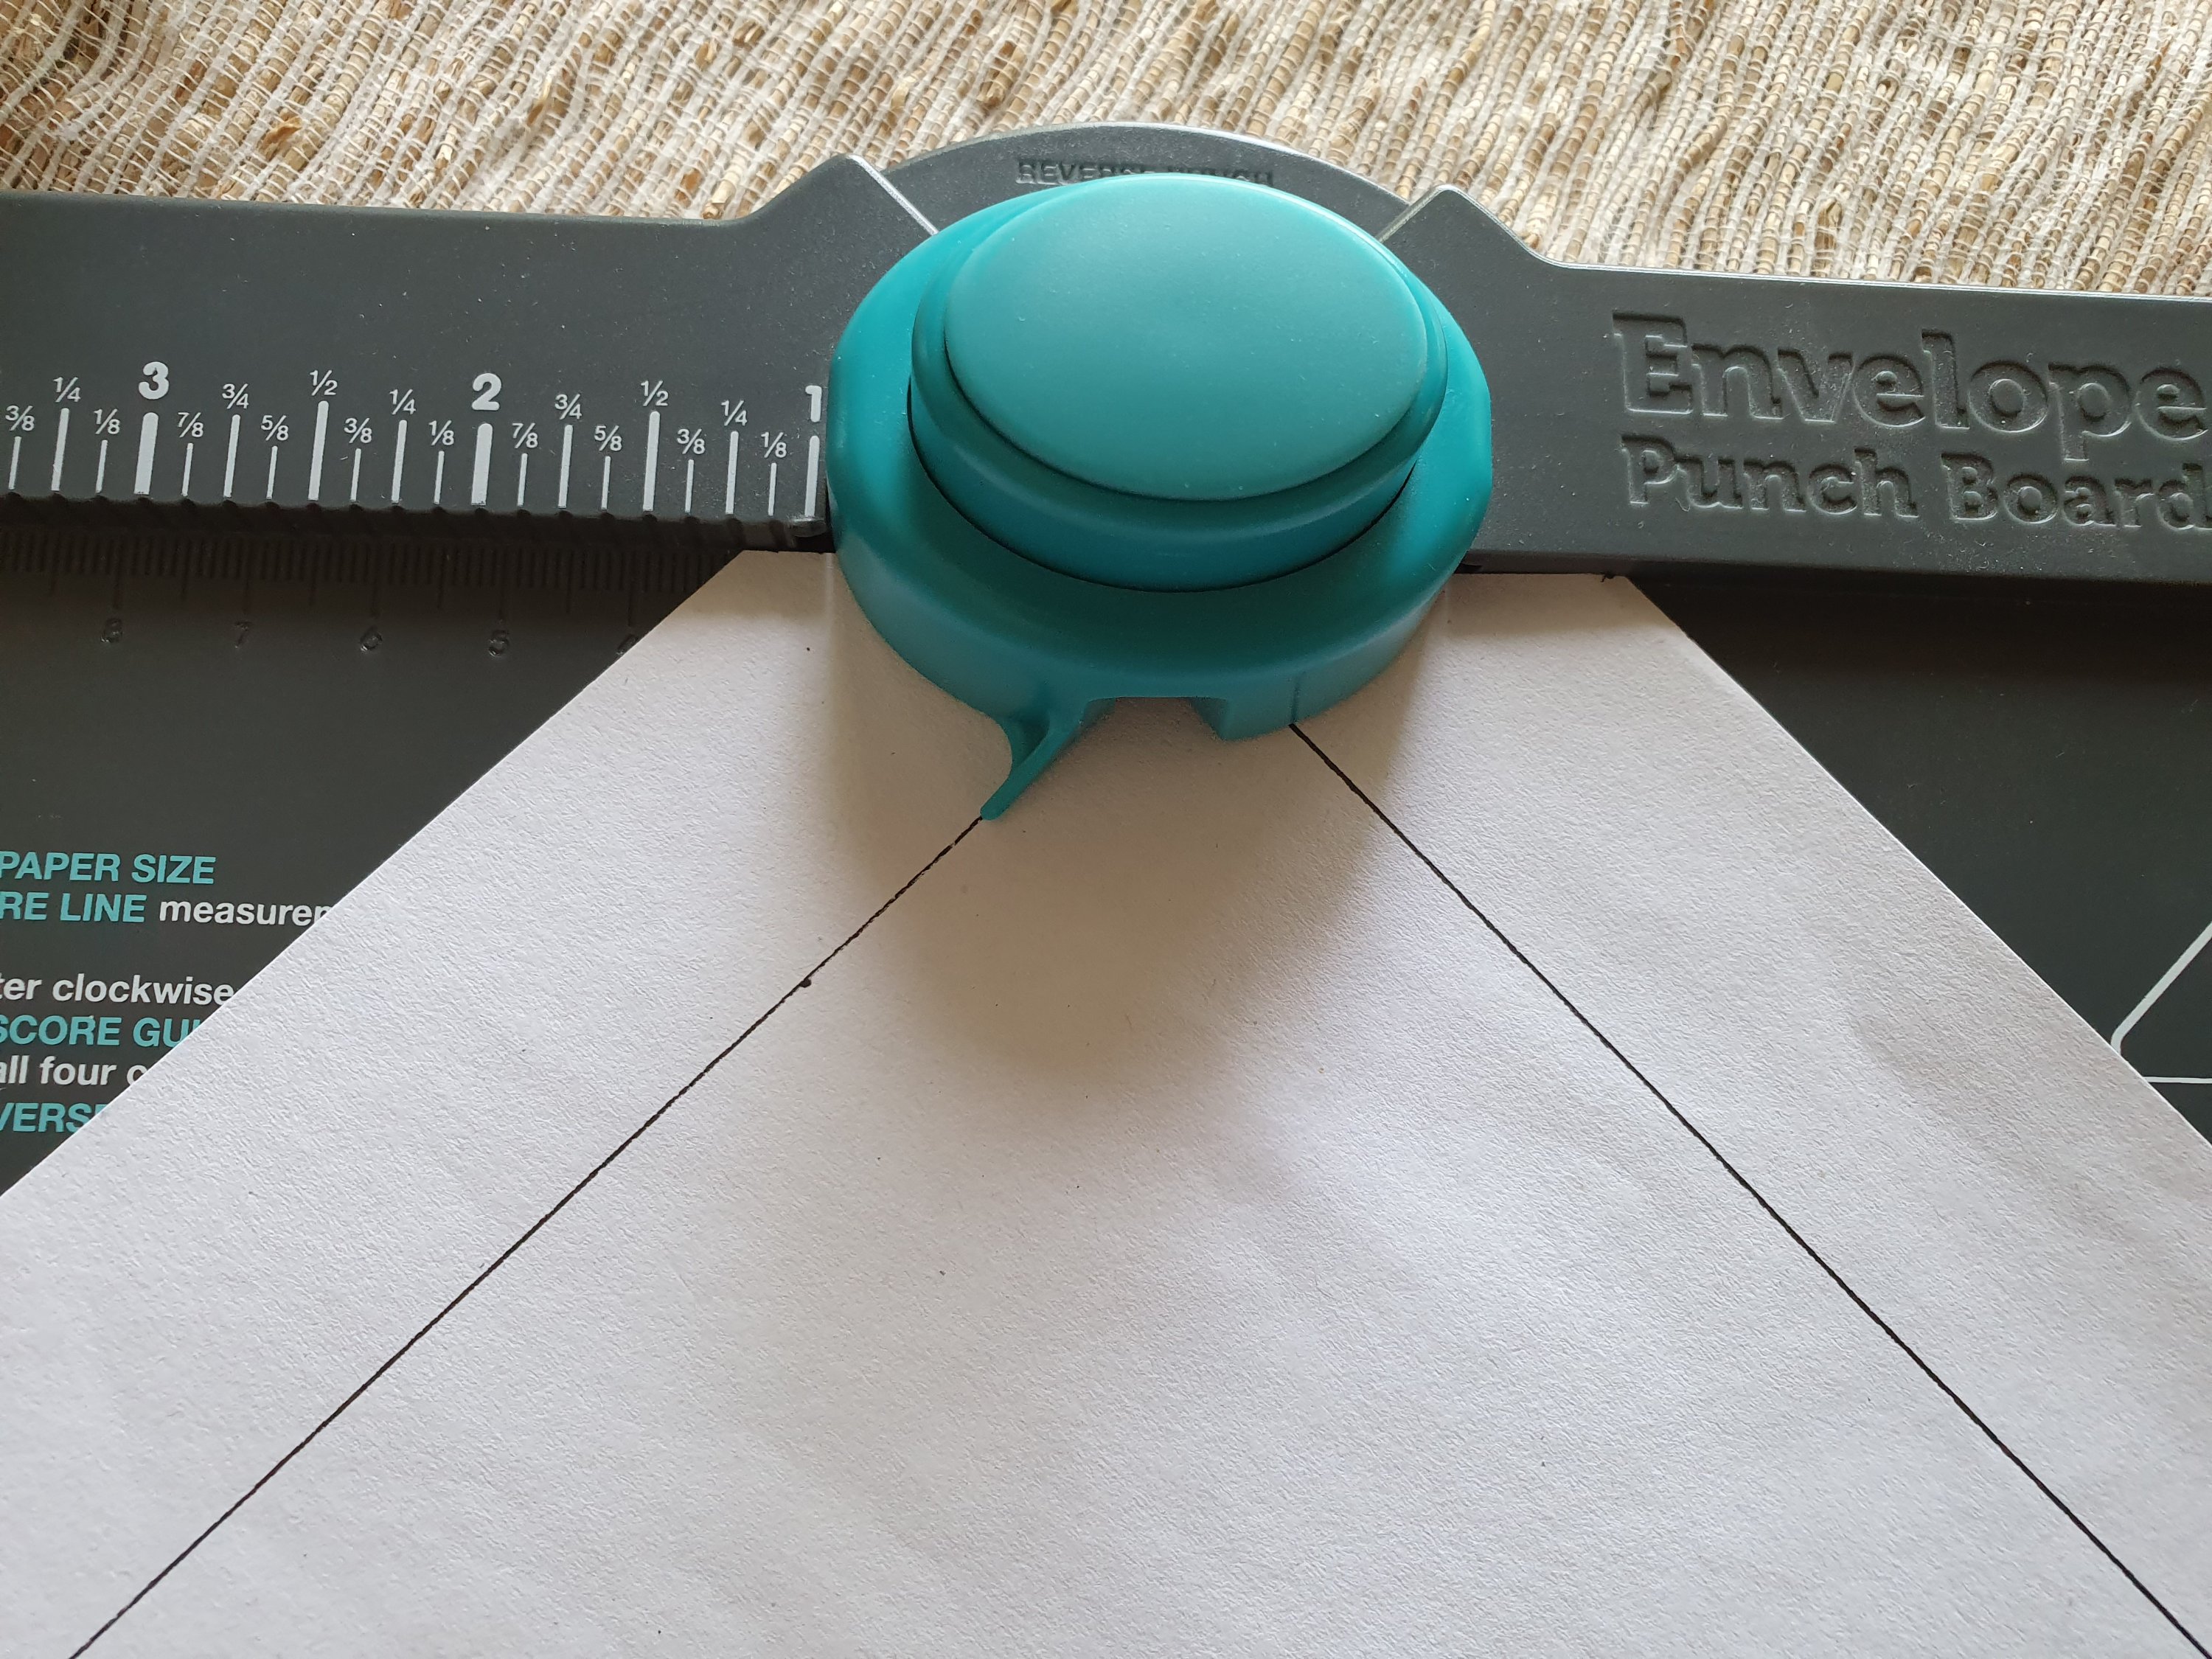

Do this on all four sides. Then fold the acetate on the score lines to make the cover. Don’t worry, if you don’t have an envelope punch board, you can easily hand cut it as shown below.

Here is what the acetate cover looks like when it’s done. This fits on the inside of the box.

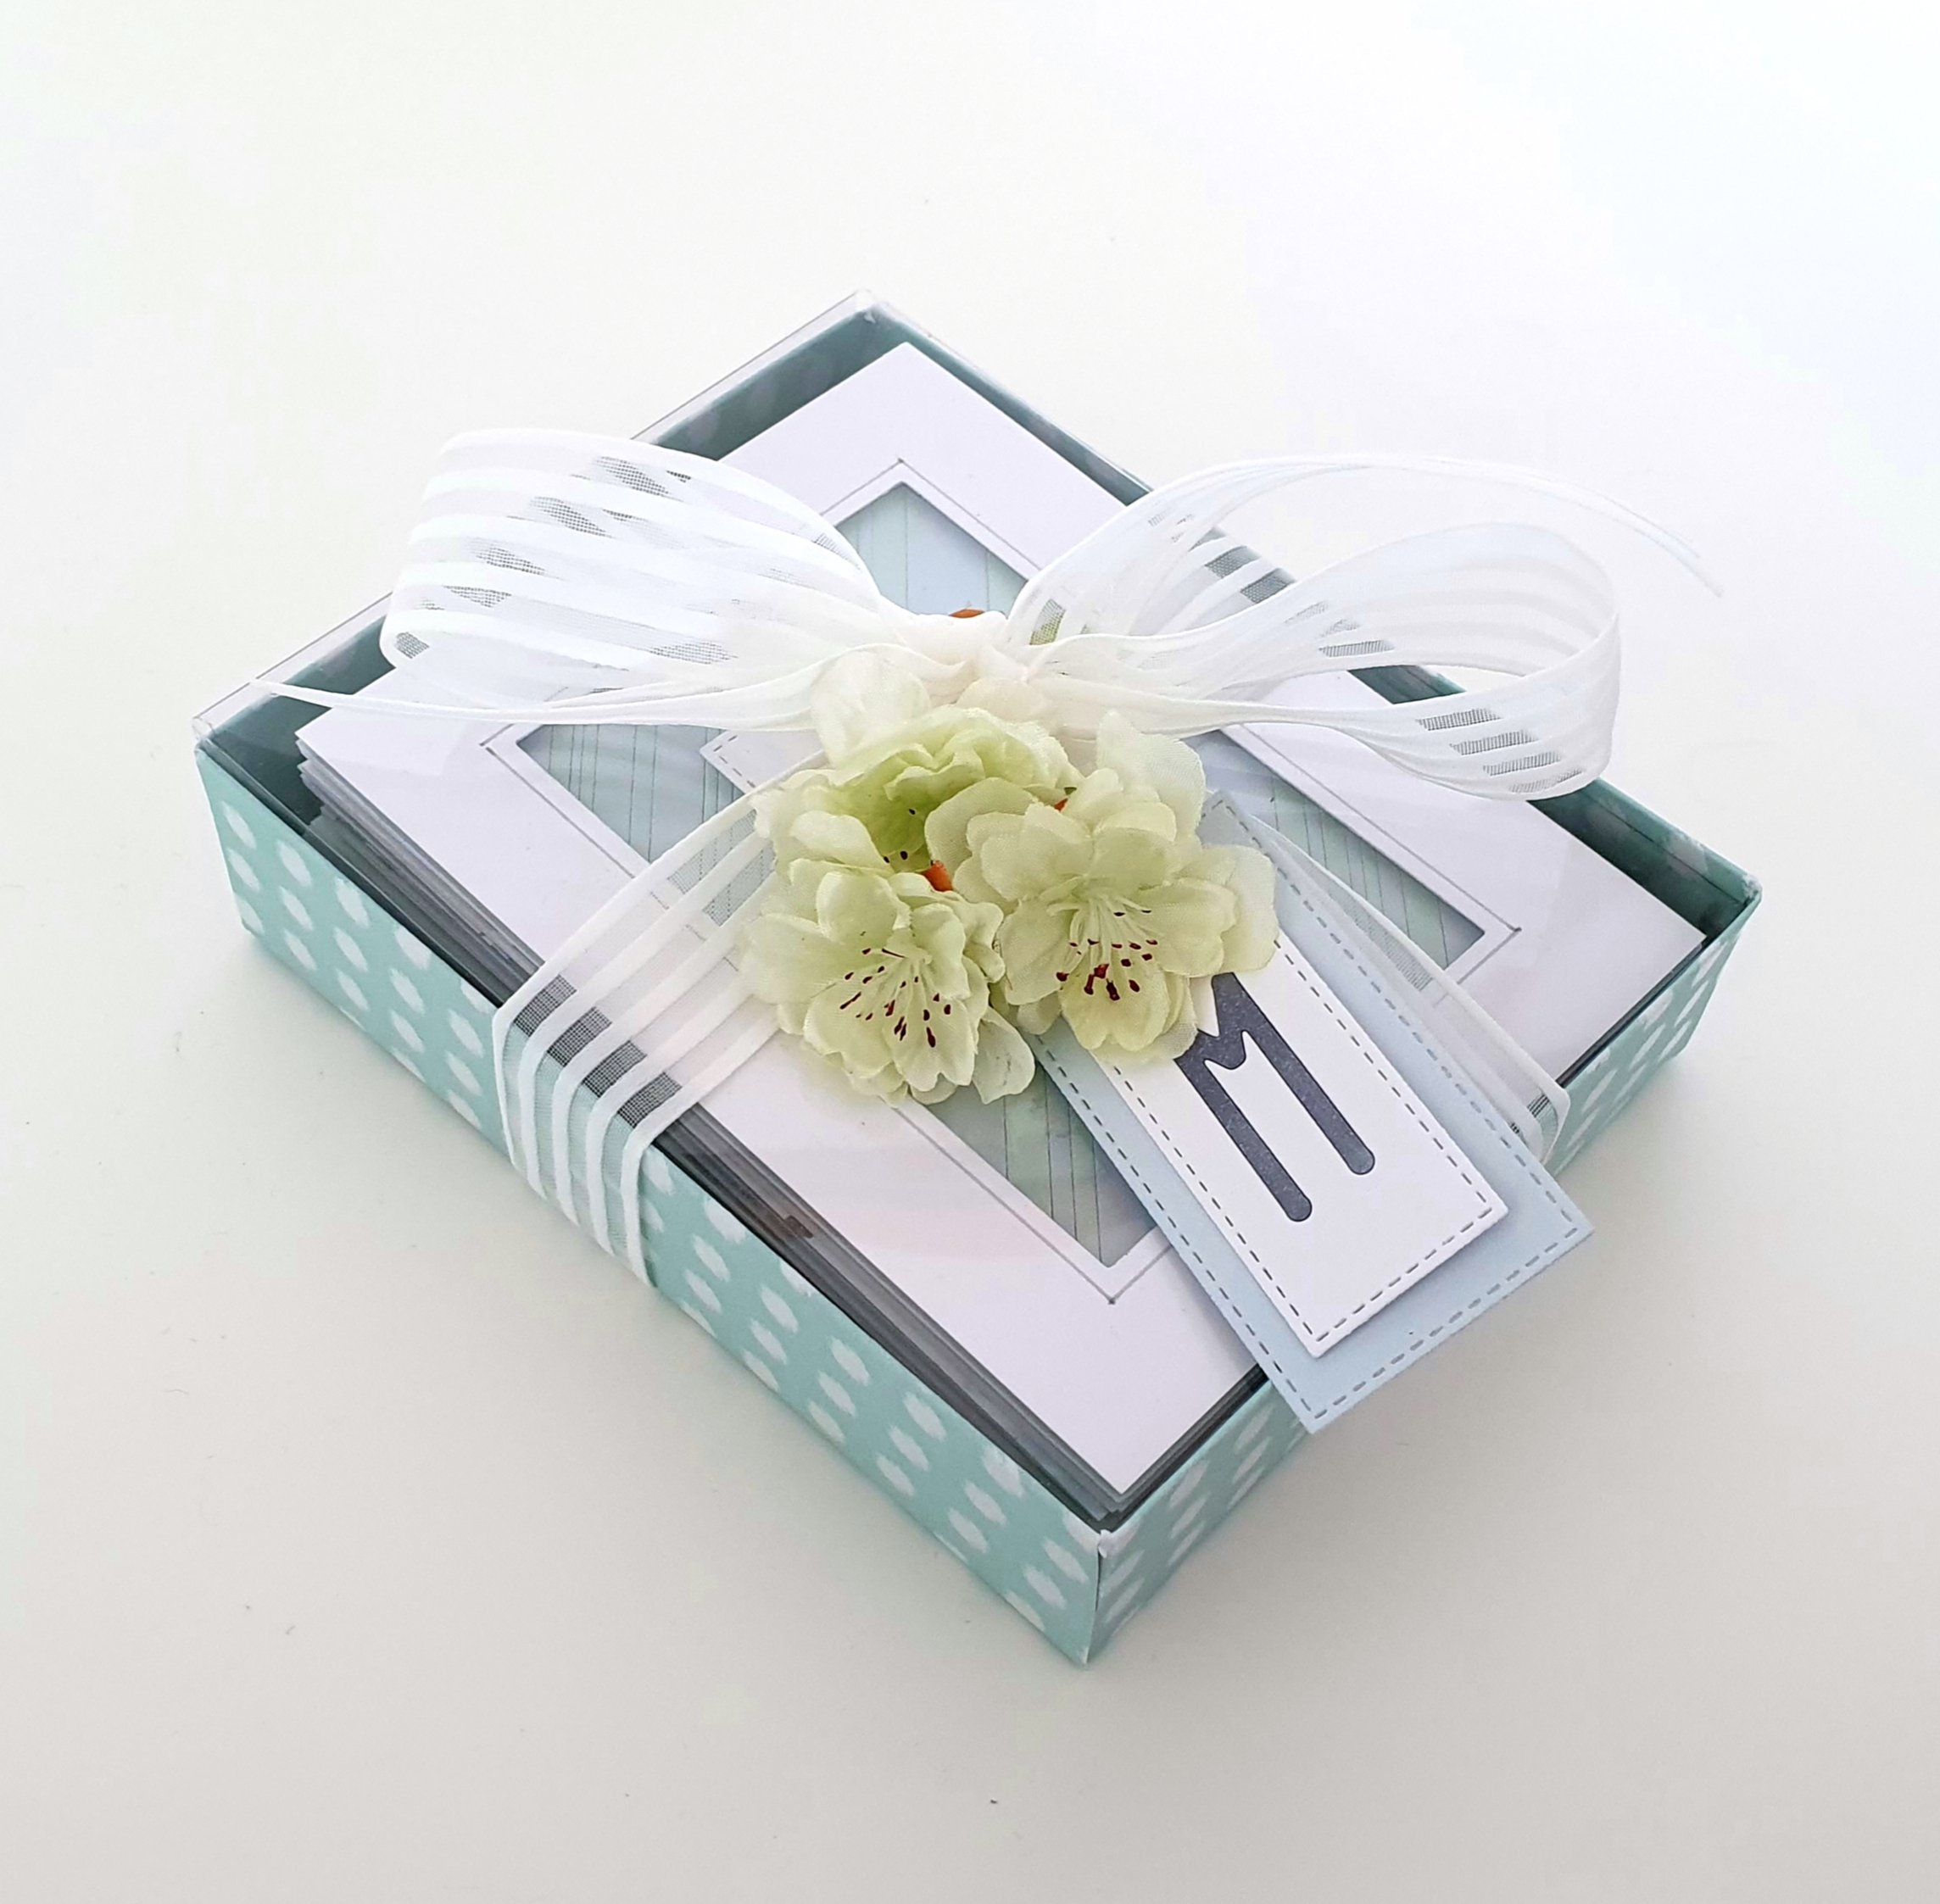
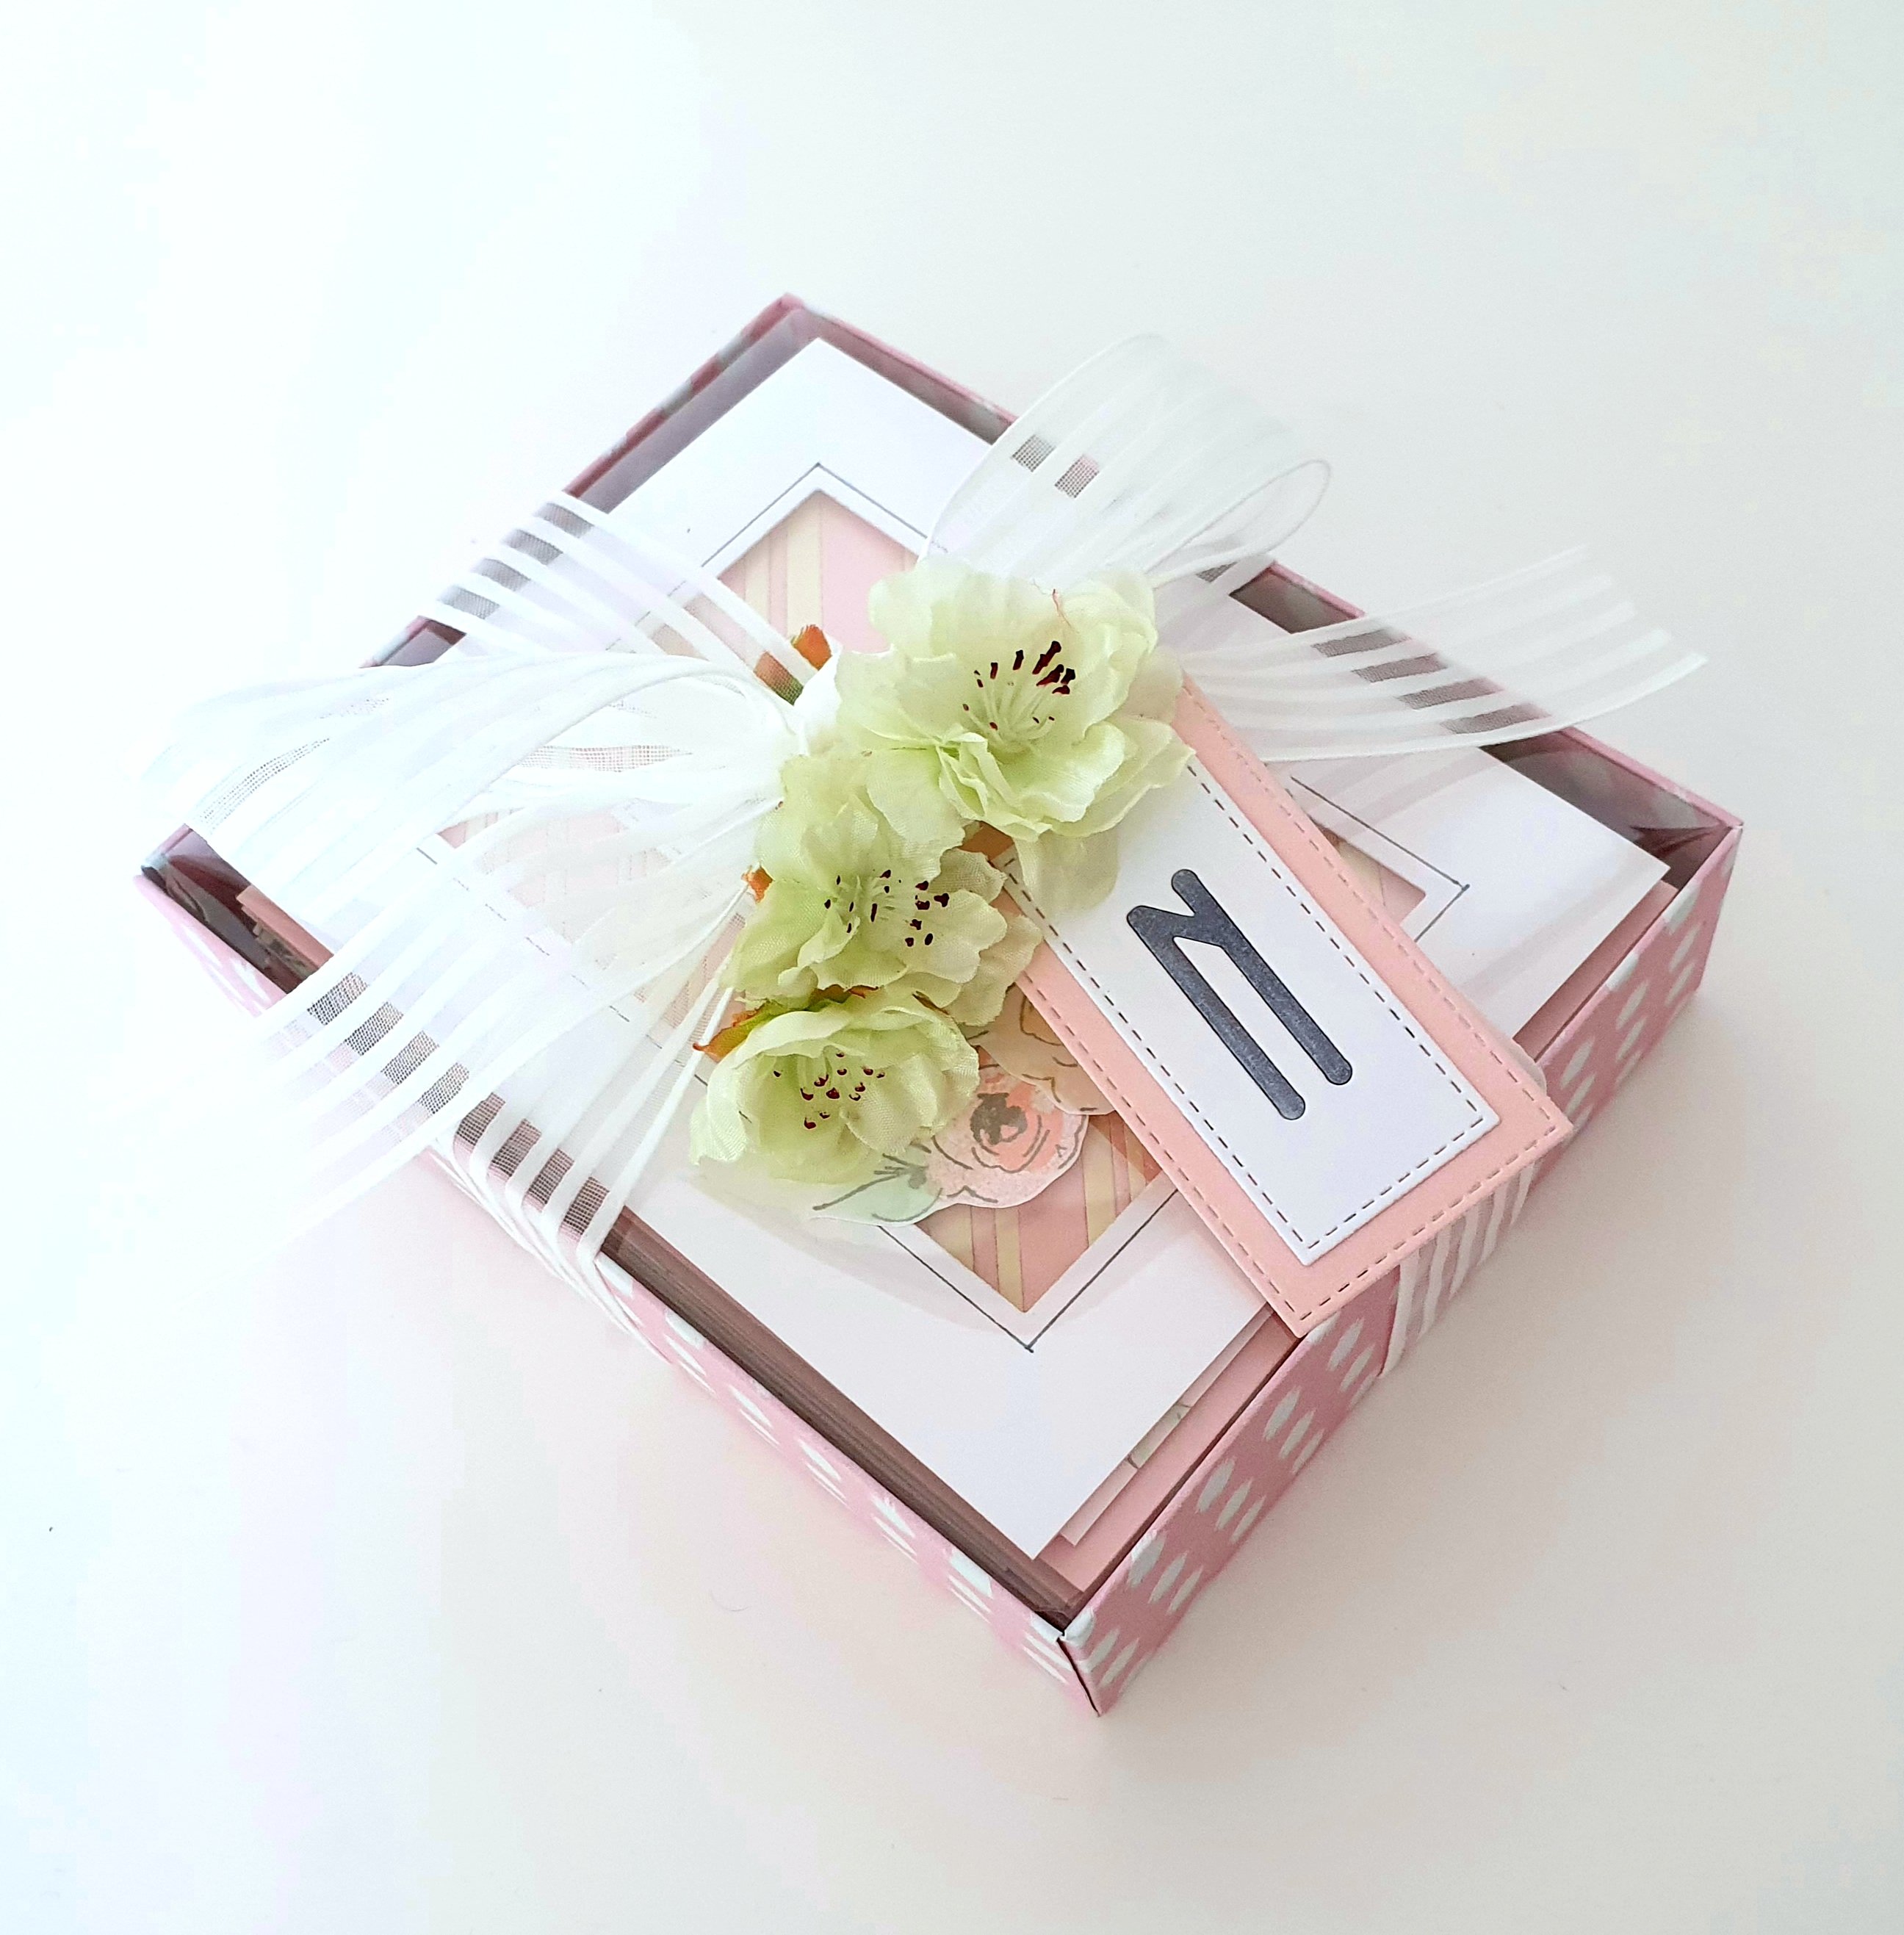
I also made small tags with inlaid initials for each box by cutting two sizes of stitched rectangles. I inlaid a monogram letter in the smaller of the two. I chose a simple but premium fabric ribbon to give it a high end finished look. I then embellished it with a small sprig of artificial cherry blossoms.
Here is the completed set all packaged up and ready for gifting.

I hope you learned something new from my tutorial.
I would like to take this opportunity to thank the lovely ladies of Altenew Academy, Erum and Virginia who always offered me encouragement every step of the way.
And a big shout out to Nenette of My Little Attic for saving me when I had a crafting emergency! Thank you!
I am very grateful to all of you visiting my blog, I truly appreciate the support.
‘Til next time!
❤️
Anna

https://linkdeli.com/widget.js?1559654439292
Note: I am affiliated with some online stores including Altenew, Concord & 9th and Hero Arts. If you use any of the links above, I get a small commission from these wonderful shops at no extra cost to you. Thank you for your support!

Beautiful sets and fantastic instructions !
LikeLike
Thank you so much! 💕
LikeLike
Your cards are fantastic. Even I am doing the AECP program. Geeting products in India is such a challenge at the moment.
LikeLike
Thank you so much! I wish you all the best on your AECP journey. Feel free to reach out to me if you need anything help 😊
LikeLike