

When I started cardmaking, my card designs were very basic and one-dimensional. I had very limited supplies – just pattern paper, paper trimmer, plain cardstock and a few ephemera pieces picked up from a local bookstore. My very first clear stamp was from Altenew. It was the Spring Daisy stamp set which I bought from a local Altenew distributor turned friend and mentor @mylittleattic. Then about two and a half years ago, I purchased my very first layering 3D die – the Altenew Peony 3D Die! I created a card with it and entered that project in the Altenew Inspiration contest and won. Incidentally, I had also just started my blog at that time.
The reason I am going down memory lane here is because this project is to be my last requirement as a Level 3 participant in the AECP program. I am so happy I took the certification program as it has enhanced my skill level sevenfold! If I pass this, I am onto the finals and then my certification as an Altenew Educator!
The Layering Dies 3D & More class given by Therese Calvird is a fantastic way to be inspired on using 3D dies and to create 3D effects even if you don’t own a single layering die. In this blog tutorial, I will show how you don’t really need expensive cardstock or even a variety of cardstocks and inks to create beautiful layering floral images for your projects. I will be using the Craft-a-Flower Layering Lily die set.
I revisited the very first card I made with the Peony layering die set and decided to CASE my own technique. In that project I used magazine pages as the design elements for my images. If you are interested in reading all about it, you can check that project linked here.
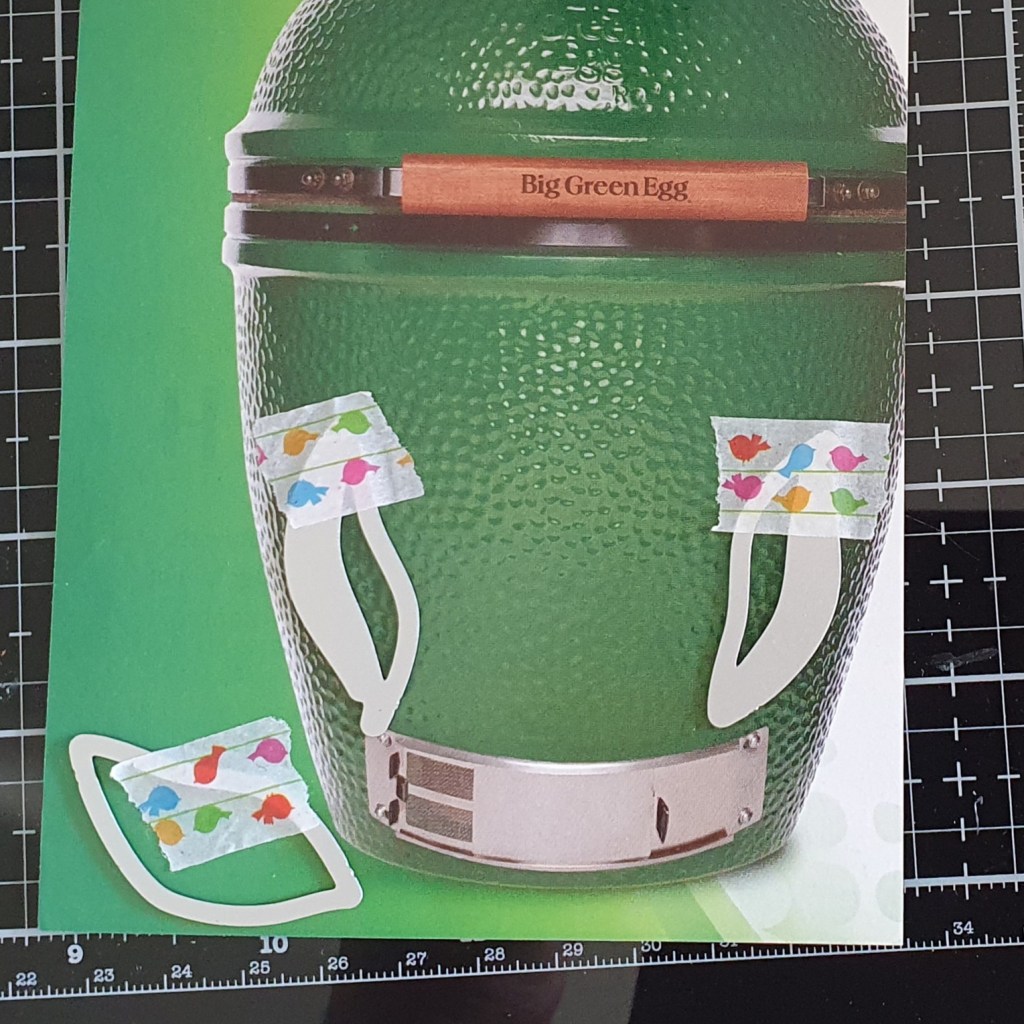
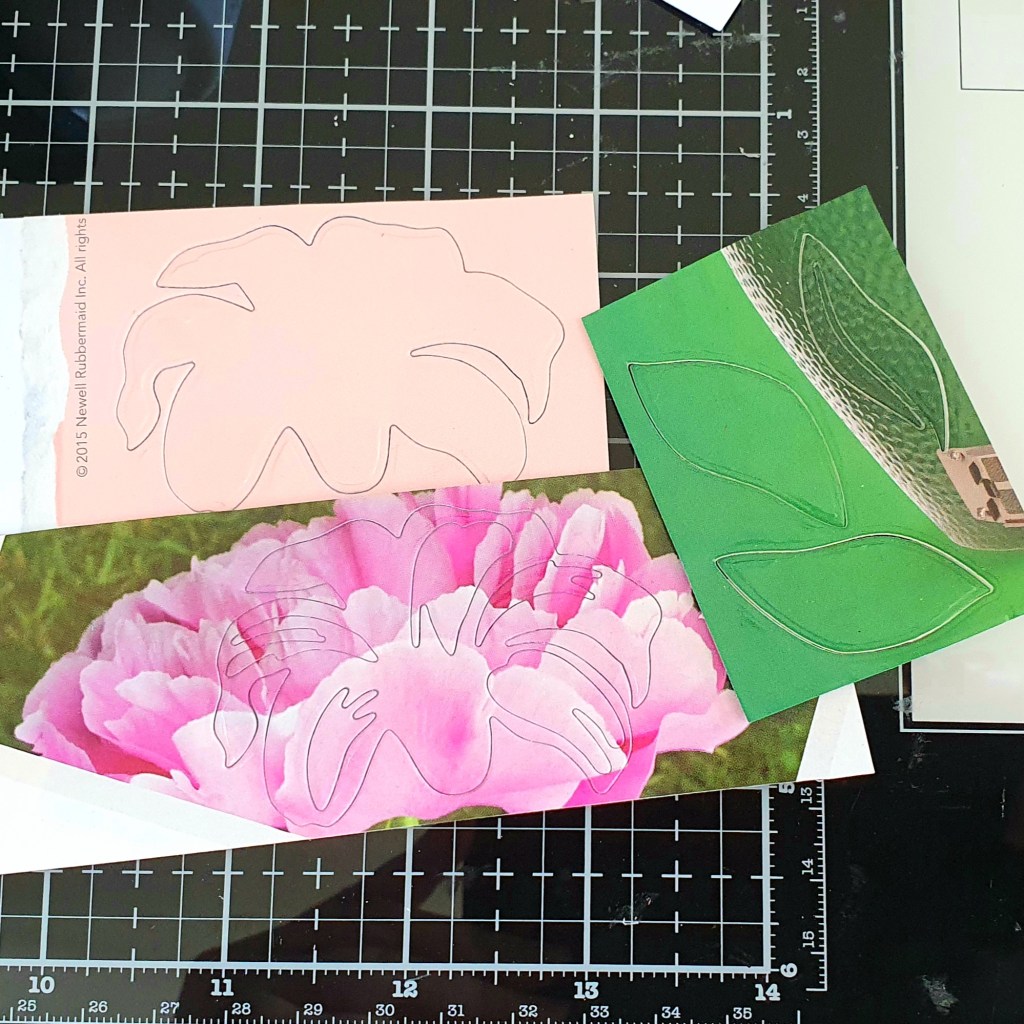
Looking through magazines can be quite daunting and maybe a bit difficult to find color elements that you could use. I found the best magazines are the ones that are are filled with photos rather than text. As I flip thru them, I don’t look at the photos as a whole, rather as individual colors and textures. For example, here is an ad for a “charcoal smoker” from an old Martha Stewart Living magazine. I thought the colors of the smoker and the “textures” were perfect for leaves.

The pages of magazines are a bit flimsy and are not really suited to die-cutting. So before I die-cut them, I cut off the parts of the pages I will use and glue them onto scrap cardstock. The best glue to use for this is not liquid glue or a tape runner, but glue stick. The one our kids use for school. Using this type of glue will prevent warping or buckling.
After I adhered all the magazine pieces onto cardstock, I placed the dies in the areas of the photos that I wanted for my elements, in this case, the leaves.
As for the layering Lily, I used the background of another ad in the magazine that had a solid color of light pink.

I try to keep the little die cut pieces together in their little “nest” because later on it will make it a lot easier to ink up the edges to give it more depth and dimension. I secured them temporarily at the back with washi tape.
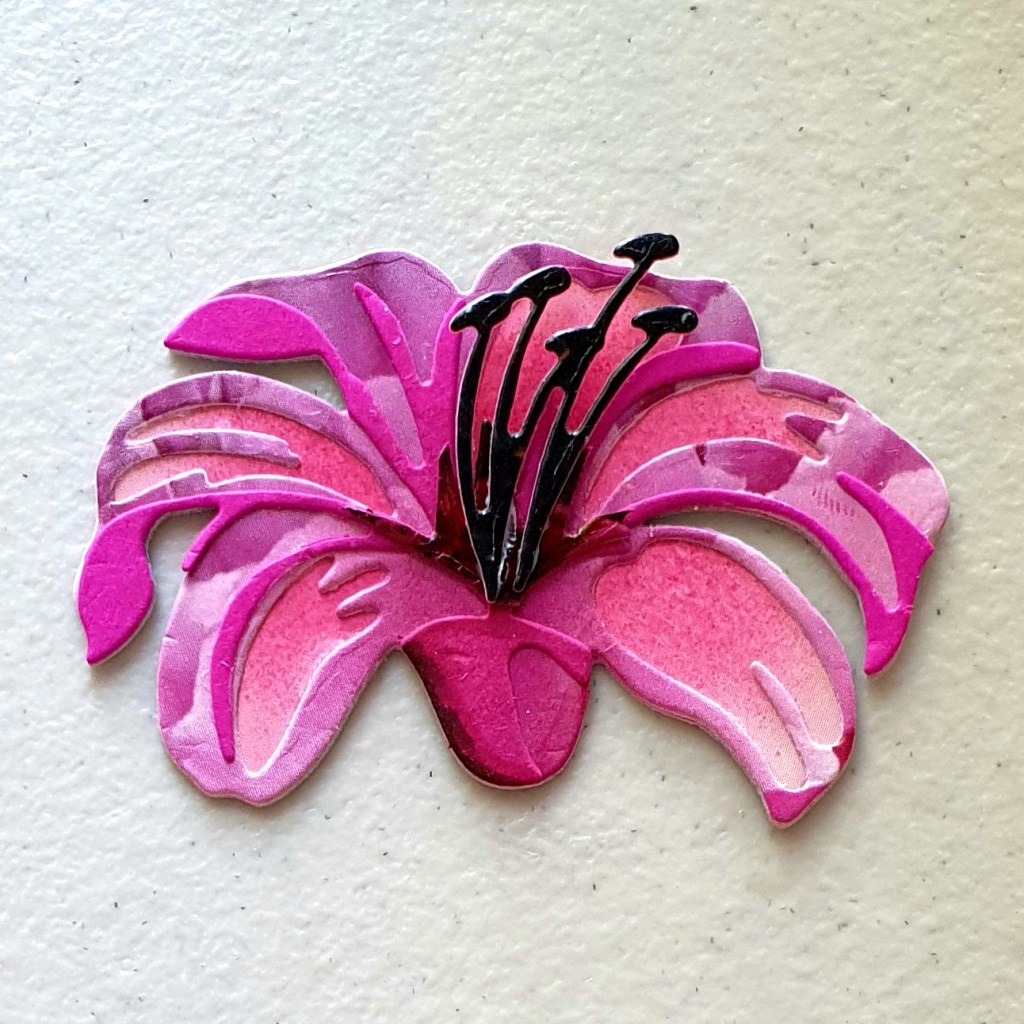
Next, I inked up the die cuts with some inks in the areas where I felt needed some depth. For the lily base layer, I used Raffleberry crisp dye ink to which matched perfectly with the magazine flower image I used for the second layer. I really love how the flower image in the magazine page added so much “texture” to my die cuts.

For the rest of the layers, I found sections of images in the magazine for all the other layers. I used coordinating markers to ink up the areas that needed more depth. Which I did for the leaves as well.
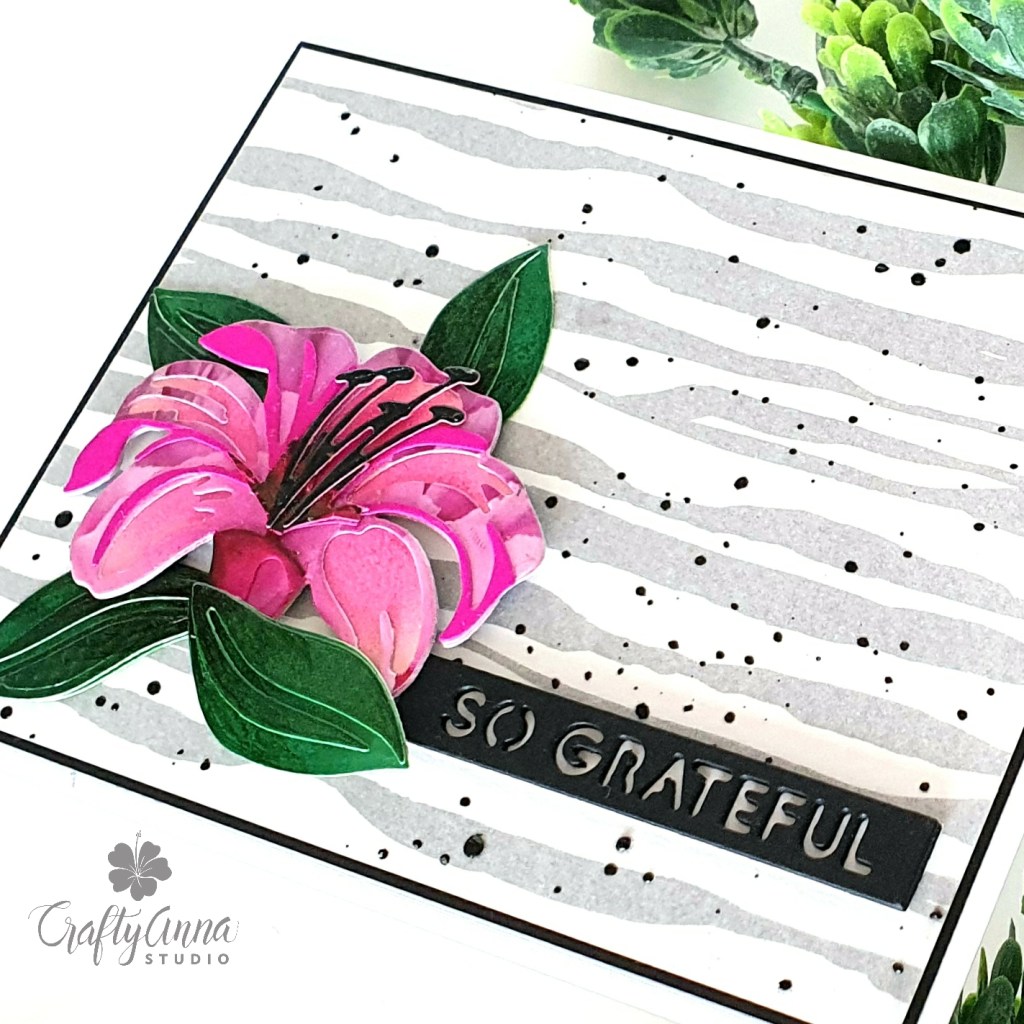
I kept the background very neutral as I wanted the emphasis to be on the layering lily and the leaves. I took Grand Stream washi and taped it onto a 4.25″X5.5″ piece of cardstock. I then cut it down to 4″X5.25″. I splattered it with Jet black ink spray then matted it with black cardstock then mounted to a white cardbase.
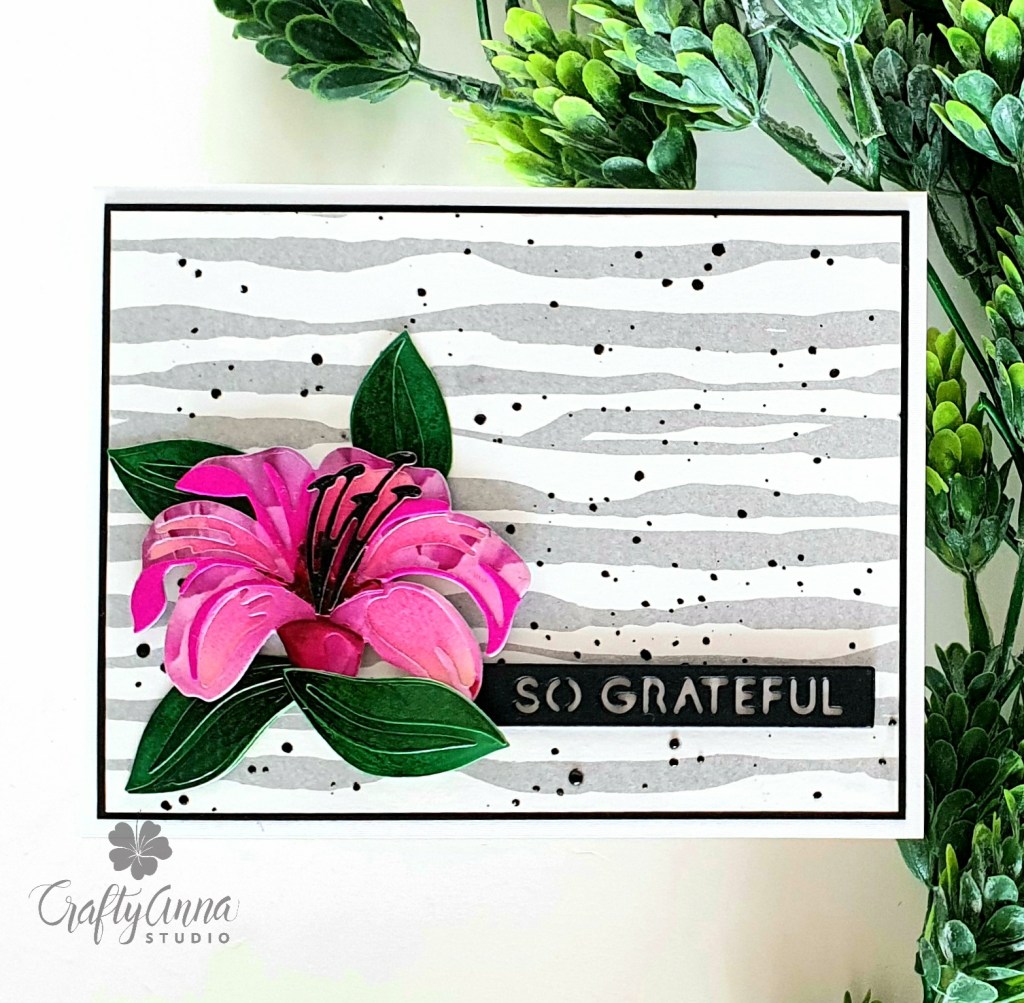
I adhered the layering lily on the lower left hand side on the card panel using foam tape, doubling up the foam tape in some areas for additional dimension. I added “So Grateful” sentiment from the beautiful Essential Sentiments Strips Die set cut from Jet Black cardstock. Here is another photo of my finished card.

I have encountered many challenges in my life throughout my one and a half year AECP journey. The death of my brother and best friend last October 2019 really shook me up and I thought for a moment that I might just quit. But then I realized that it was in cardmaking where I found my center, my peace – when everything around me felt like it was falling apart.
I am so grateful to Erum and Virginia for their constant support in my journey towards my AECP certification! I am excited and maybe a little nervous for the next and final step!
‘Til next time!
❤️
Anna
Thank you for visiting my blog. I truly appreciate it! You can also find me on Instagram, YouTube, Pinterest and Facebook.
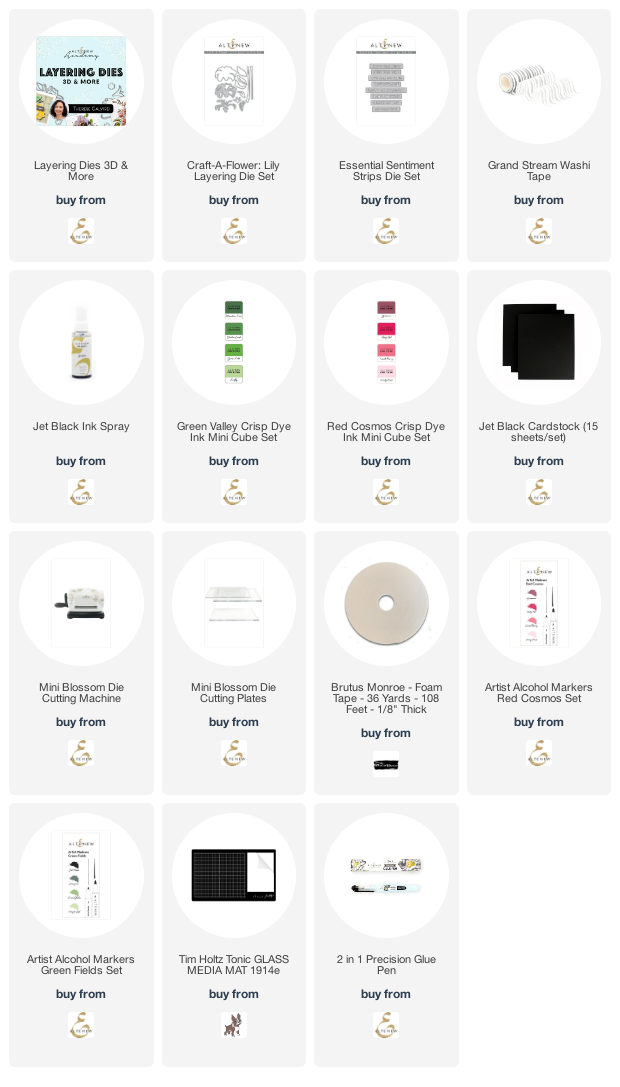
Suggested materials:
Note: I am affiliated with some online stores including Altenew, Concord & 9th, Hero Arts, Brutus Monroe and Trinity Stamps. If you use any of the links above, I get a small commission from these wonderful shops at no extra cost to you. Thank you for your support!

What a beauty!! You are such a clever cardmaker! I cant wait for you to become an Educator and teach the world your tricks! People would learn SO much from you!
Thank you for submitting your gorgeous work to the AECP assignment gallery. I will Virginia know that your courses are done, she will get in touch soon!
LikeLiked by 1 person
I can’t thank you enough for all the support you have shown me! I look forward to the next part of my AECP journey!
LikeLike
Beautiful!
LikeLiked by 1 person
Thank you Maria!
LikeLiked by 1 person
Oh this is a great technique. Thanks for sharing!
LikeLiked by 1 person
Thank you Nancee! 💕
LikeLiked by 1 person
Quelle magnifique idée. Merci.
Bonne Année 2021.
Bises.
MaryannG
LikeLike
Your card is lovely. I can relate to new beginnings and magazine pages. Now I’ve been making cards for over 30 years!
I love the Altenew style and wonderful layers! Enjoy your journey with your love for this craft!
LikeLike
Thank you so much Joan! 💕
LikeLike